
Sub/Amp Install - 2003 Silverado Ext. Cab
 December 28th, 2010, 10:15 AM
#1
CF Junior Member
Thread Starter

So I undertook a new project in the last two days, and thought I would post a reference guide for anyone looking to do this. I couldn't seem to find a solid thread on this, so I thought I would make one.
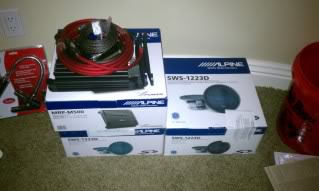
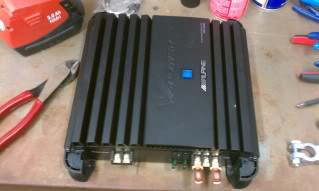
I purchased 2 Alpine SWS-1223D subwoofers and an Alpine MRP-M500 amplifier, along with a SubThump Sealed Under-Seat Box. Also, I got a Rockford Fosgate RDK4I installation kit, and of course other misc parts. (In simpler terms, 2-12" subs and a 500watt amp w/ 4AWG power wires.)

And so the installation begins...
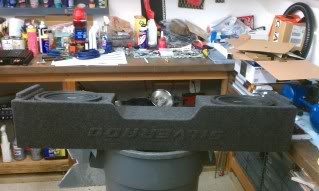
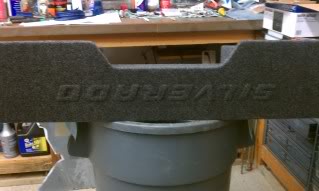
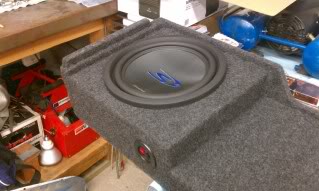
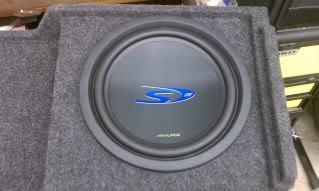
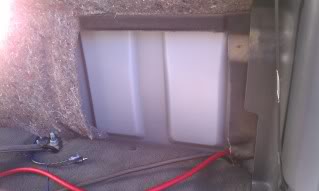
The first step was to install the subwoofers into my box. I have a box made by SubThump specifically for underneath my back seats, and the test fit was perfect. I highly recommend this box to anyone looking to do this to their truck. (They also make boxes for newer models such as the GMT900) The box came with the holes pre-cut. Each sub dropped in nicely and 8 SPAX screws hold each in place perfectly. (SPAX are high quality specialty screws, perfect for MDF wood, used to make these boxes) These specific subs are 2ohm, with dual voice coils. For information on how to wire the subs up, go to www.crutchfield.com and look at the "learn" center. Here are a few pictures of the box and the subs mounted in the box:
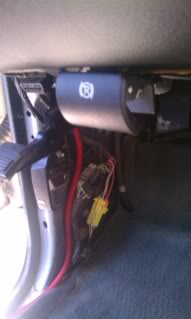
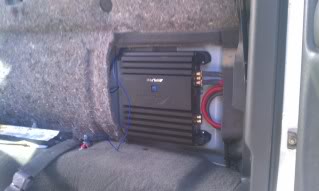
The next step is tear-down of the truck, starting with the back seat. The back seat can be taken out by removing 2 nuts on each bracket, and 1 nut in the middle of the seat. Once removed, you have a direct view at the back of the cab. On each side, there are hard, black, rubberish covers that enable the vents on the back of the cab to flow air. This is the most logical place to mount an amp because this way the air will flow right over the amp, providing adequate cooling. Here is a picture of the space where the amp is to be mounted. Here, I have already cut off the black cover:

An overall...
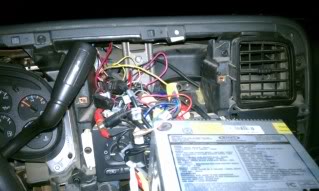
Also in the tear-down process, I removed the panels on the floor of each side of the truck (technical term anyone?). The power wire will go down the driver side, and the speaker wire/remote wire down the passenger side. Also to be removed is the dash panel covering the cluster and radio. the radio needs to be pulled out so that you can access the wires in the back of the unit. Here is the radio pulled out of the dash:
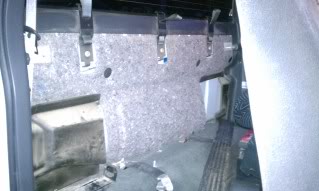
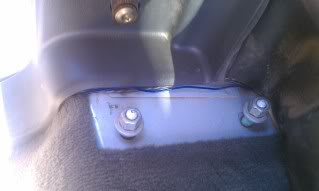
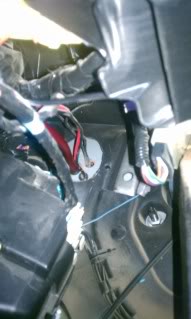
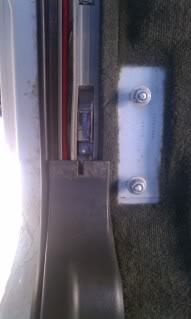
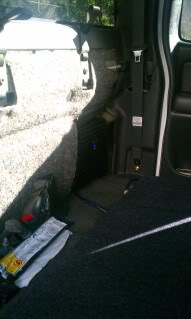
Now that everything is removed, the wiring process begins. I started with the speaker and remote cables. I started from the radio, going towards where the amp will be. It is a tight squeeze with your hands, but with patience, the wires will go nicely behind the dash, down to the right side of the glovebox (nearest the door). From there the wires go underneath the floor panel all the way back to where the jack and lug wrench are. I then mounted the wires on the back wall of the cab using zip ties and some sticky mounts. Here is a picture of the wires next to the mounting bolts for the seat:
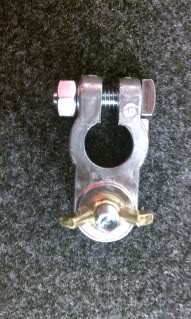
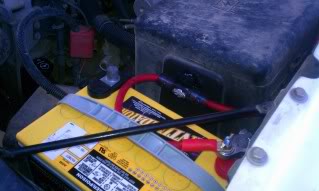
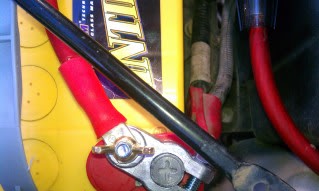
Now goes the power wire on the drivers side. Routed the same way, although instead of going to the headunit, it goes through the firewall and onto the battery. I started from the battery and went back to the amp. I had just previously installed a new battery (Deka Intimidator) with both side and top mounting options. So I installed the power wire on the top since the truck uses the side by default. I bought a little terminal with a wingnut shown here:
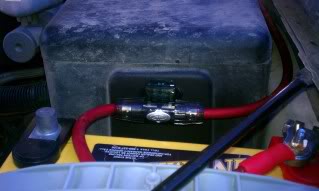
I mounted the inline fuse (that was already on the power wire since it was a kit) onto the plastic fuse box next to the battery. As you can see, it is nice and neat:
I purchased 2 Alpine SWS-1223D subwoofers and an Alpine MRP-M500 amplifier, along with a SubThump Sealed Under-Seat Box. Also, I got a Rockford Fosgate RDK4I installation kit, and of course other misc parts. (In simpler terms, 2-12" subs and a 500watt amp w/ 4AWG power wires.)
And so the installation begins...
The first step was to install the subwoofers into my box. I have a box made by SubThump specifically for underneath my back seats, and the test fit was perfect. I highly recommend this box to anyone looking to do this to their truck. (They also make boxes for newer models such as the GMT900) The box came with the holes pre-cut. Each sub dropped in nicely and 8 SPAX screws hold each in place perfectly. (SPAX are high quality specialty screws, perfect for MDF wood, used to make these boxes) These specific subs are 2ohm, with dual voice coils. For information on how to wire the subs up, go to www.crutchfield.com and look at the "learn" center. Here are a few pictures of the box and the subs mounted in the box:
The next step is tear-down of the truck, starting with the back seat. The back seat can be taken out by removing 2 nuts on each bracket, and 1 nut in the middle of the seat. Once removed, you have a direct view at the back of the cab. On each side, there are hard, black, rubberish covers that enable the vents on the back of the cab to flow air. This is the most logical place to mount an amp because this way the air will flow right over the amp, providing adequate cooling. Here is a picture of the space where the amp is to be mounted. Here, I have already cut off the black cover:
An overall...
Also in the tear-down process, I removed the panels on the floor of each side of the truck (technical term anyone?). The power wire will go down the driver side, and the speaker wire/remote wire down the passenger side. Also to be removed is the dash panel covering the cluster and radio. the radio needs to be pulled out so that you can access the wires in the back of the unit. Here is the radio pulled out of the dash:
Now that everything is removed, the wiring process begins. I started with the speaker and remote cables. I started from the radio, going towards where the amp will be. It is a tight squeeze with your hands, but with patience, the wires will go nicely behind the dash, down to the right side of the glovebox (nearest the door). From there the wires go underneath the floor panel all the way back to where the jack and lug wrench are. I then mounted the wires on the back wall of the cab using zip ties and some sticky mounts. Here is a picture of the wires next to the mounting bolts for the seat:
Now goes the power wire on the drivers side. Routed the same way, although instead of going to the headunit, it goes through the firewall and onto the battery. I started from the battery and went back to the amp. I had just previously installed a new battery (Deka Intimidator) with both side and top mounting options. So I installed the power wire on the top since the truck uses the side by default. I bought a little terminal with a wingnut shown here:
I mounted the inline fuse (that was already on the power wire since it was a kit) onto the plastic fuse box next to the battery. As you can see, it is nice and neat:
 December 28th, 2010, 10:15 AM
#2
CF Junior Member
Thread Starter
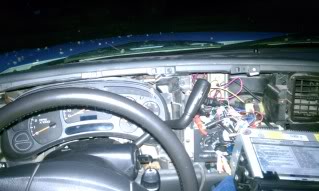
Next I routed the wire through the firewall, to the left of the steering collumn. There already were two holes cut for my FM transmitter in the cab and my lights on the front bumper. I drilled a third hole and put a grommet in. Here is the wire going through the firewall:
I then routed the wire right down to the left of the parking brake lever, and zip tied it nice and neat under the dash:
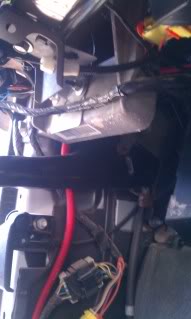
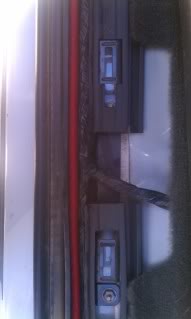
I then routed the wire down the side of the truck, all the way back to the amp. Here are some pictures of the wire in the channel beneath the floor panel:

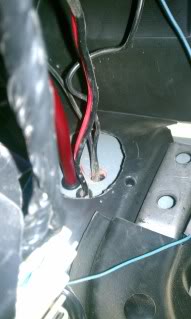
I drilled another hole through the floor behind where the rear seats would be, and routed the negative wire down below the truck, and secured it to the frame. Remember when doing this to scrape off some paint where the ground wire attaches to the frame, and also, of course, put a rubber grommet in the hole.
I then put the dash back together, and re-installed all the removed panels.
Next up is the installation of the amp. Four, self-drilling, stainless screws hold this baby to the cab...

As you can see, the excess wire was coiled up neatly on the side of the amp. Now I ran into one problem when attaching the power wires to the amp. The installation kit I purchased was 4AWG, made for big 1000W amps. I wanted the bigger wire, but with bigger wire comes bigger ring terminals... So a little grinding fixed that...
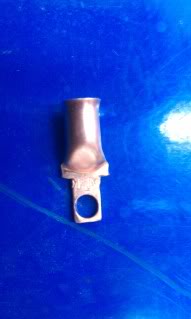
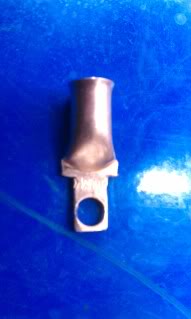
The terminals on the amp: (I removed the amp to test the fit of the terminals)
Now the amp is done, on to the installation of the subs. I wired the subs to the amp and mounted the wire on the back of the box. (There is a little room) The box was then put into the cab, after a little vacuuming and clean-up of course...
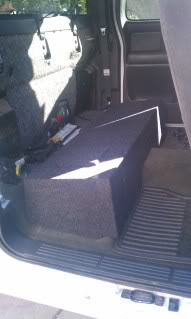
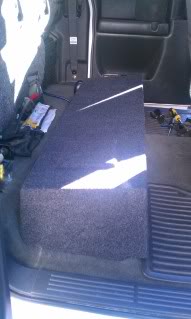
After the box is installed, I put the seat back in, and tightened up the five mounting nuts. There is plenty of room between the seat and the amp.
Well there you have it, my sub/amp install. Hope I provided some insight and/or guidance to you all! Thanks for reading!
I then routed the wire right down to the left of the parking brake lever, and zip tied it nice and neat under the dash:
I then routed the wire down the side of the truck, all the way back to the amp. Here are some pictures of the wire in the channel beneath the floor panel:
I drilled another hole through the floor behind where the rear seats would be, and routed the negative wire down below the truck, and secured it to the frame. Remember when doing this to scrape off some paint where the ground wire attaches to the frame, and also, of course, put a rubber grommet in the hole.
I then put the dash back together, and re-installed all the removed panels.
Next up is the installation of the amp. Four, self-drilling, stainless screws hold this baby to the cab...
As you can see, the excess wire was coiled up neatly on the side of the amp. Now I ran into one problem when attaching the power wires to the amp. The installation kit I purchased was 4AWG, made for big 1000W amps. I wanted the bigger wire, but with bigger wire comes bigger ring terminals... So a little grinding fixed that...
The terminals on the amp: (I removed the amp to test the fit of the terminals)
Now the amp is done, on to the installation of the subs. I wired the subs to the amp and mounted the wire on the back of the box. (There is a little room) The box was then put into the cab, after a little vacuuming and clean-up of course...
After the box is installed, I put the seat back in, and tightened up the five mounting nuts. There is plenty of room between the seat and the amp.
Well there you have it, my sub/amp install. Hope I provided some insight and/or guidance to you all! Thanks for reading!
 April 5th, 2011, 12:17 PM
#4
CF Junior Member
Thread Starter
Here is the box, sorry for the late response:
99-06 GM Extended Cab Ultra Deep Dual 10/12 Downfire Box
99-06 GM Extended Cab Ultra Deep Dual 10/12 Downfire Box

Thread
Thread Starter
Forum
Replies
Last Post
fitz5739
Silverado & Fullsize Pick-ups
0
May 2nd, 2012 4:34 PM
thehighclass
Silverado & Fullsize Pick-ups
2
January 17th, 2011 9:50 AM
mikewaterskis
Silverado & Fullsize Pick-ups
22
October 10th, 2007 8:47 PM
tech12volt
Silverado & Fullsize Pick-ups
0
January 31st, 2007 1:45 AM