
Auxilliary Battery Install Project....
 April 26th, 2009, 7:21 PM
#1
CF Active Member
Thread Starter

Join Date: Jan 2007
Location: Northern galactic plane of Andromeda
Posts: 171
Likes: 0
Received 1 Like
on
1 Post
My mission:
Install an isolated deep cycle battery for my amateur radio gear, so I could run the gear for several hours and not have to worry about starting the vehicle afterwards.
My equipment selection:
An Optima Yellow Top deep cycle battery
A Hellroaring Technologies BIC-95150B Battery Isolator
I chose the Hellroaring product because I believe it's the best solid state isolator available. It doesn't have the forward voltage drop like that of a simple diode isolator so the charge voltage is as it should be. In use, the charge current to the aux battery is limited so it apprears simply as another load on the vehicles charging system. You shouldn't get any check engine lights, or premature alternator failure. There's also an small green LED which displays current battery status by the way it illuminates.
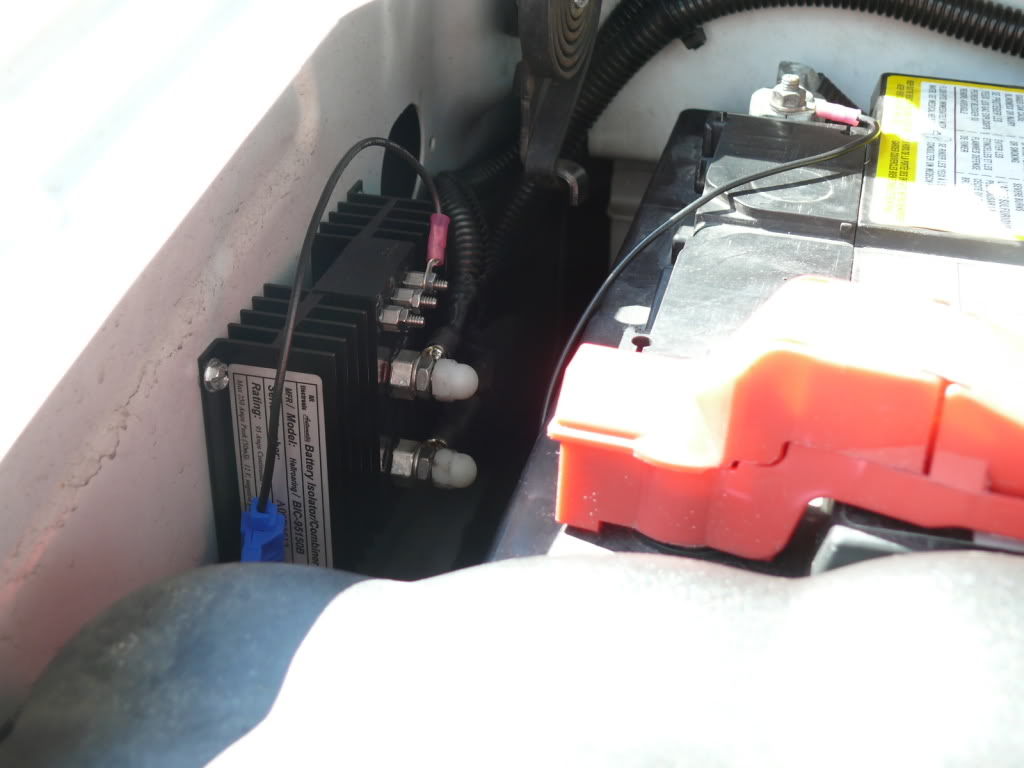
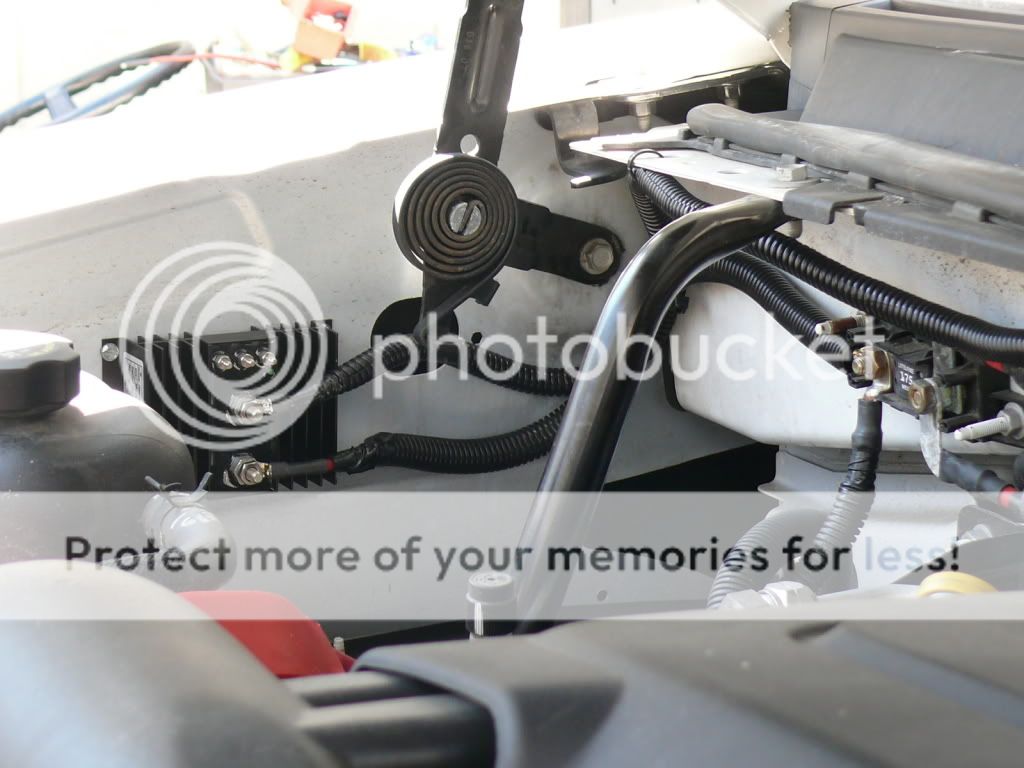
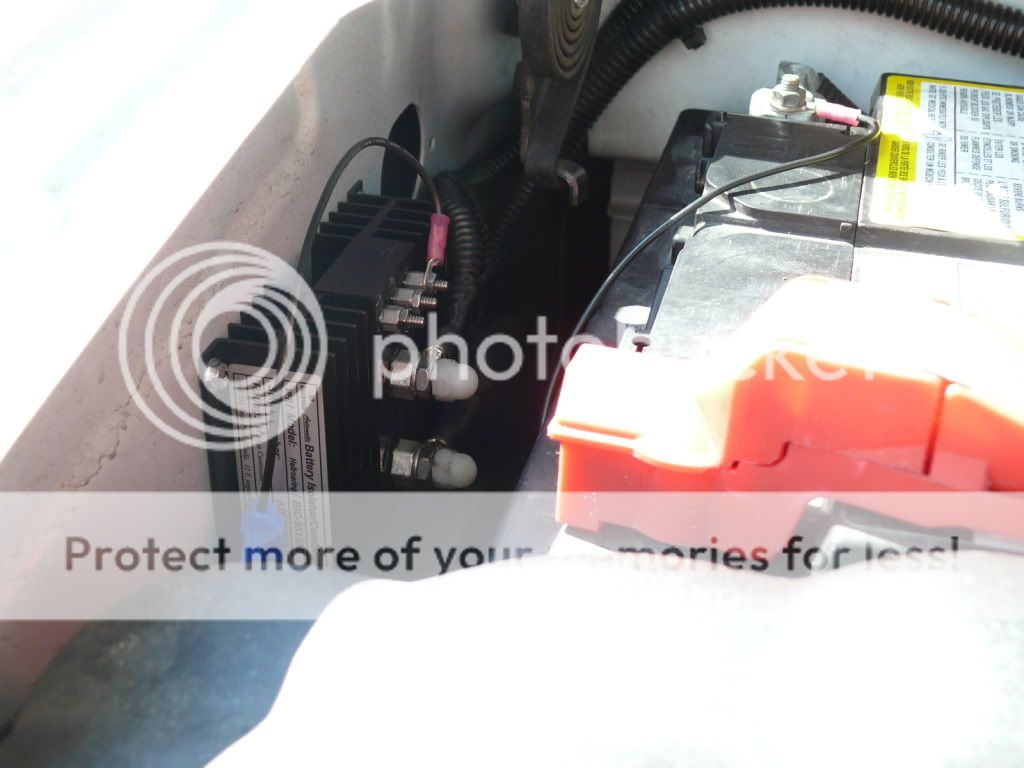
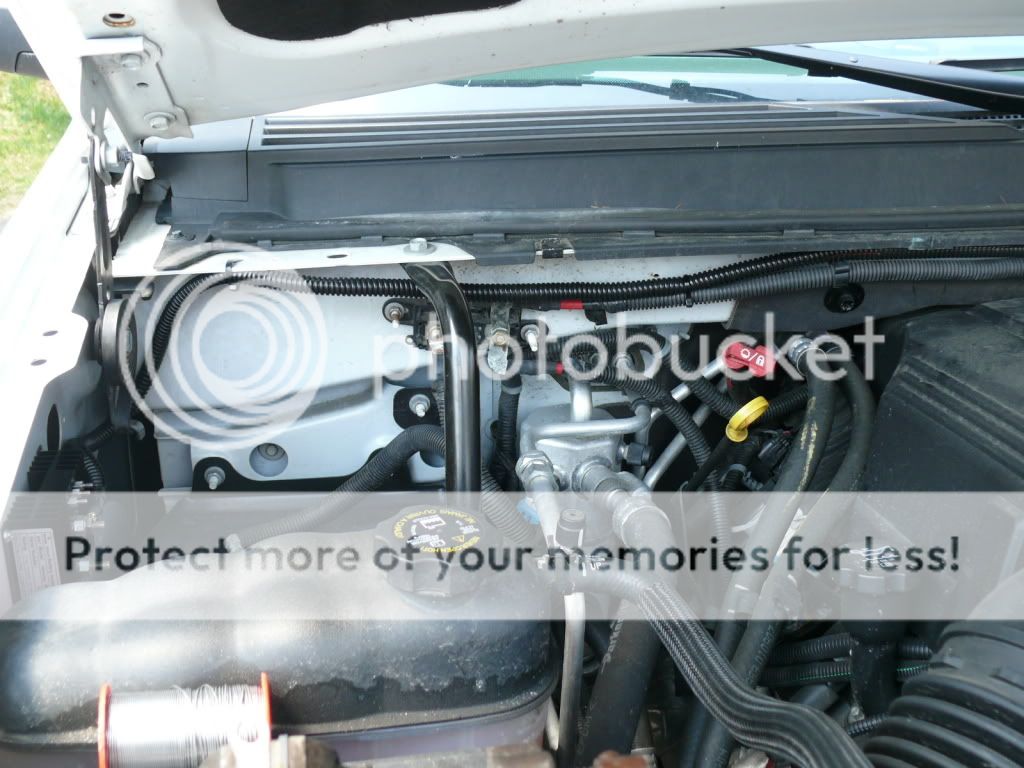
As shown below, the Hellroaring isolator was located on the fender wall just alongside of the main battery.
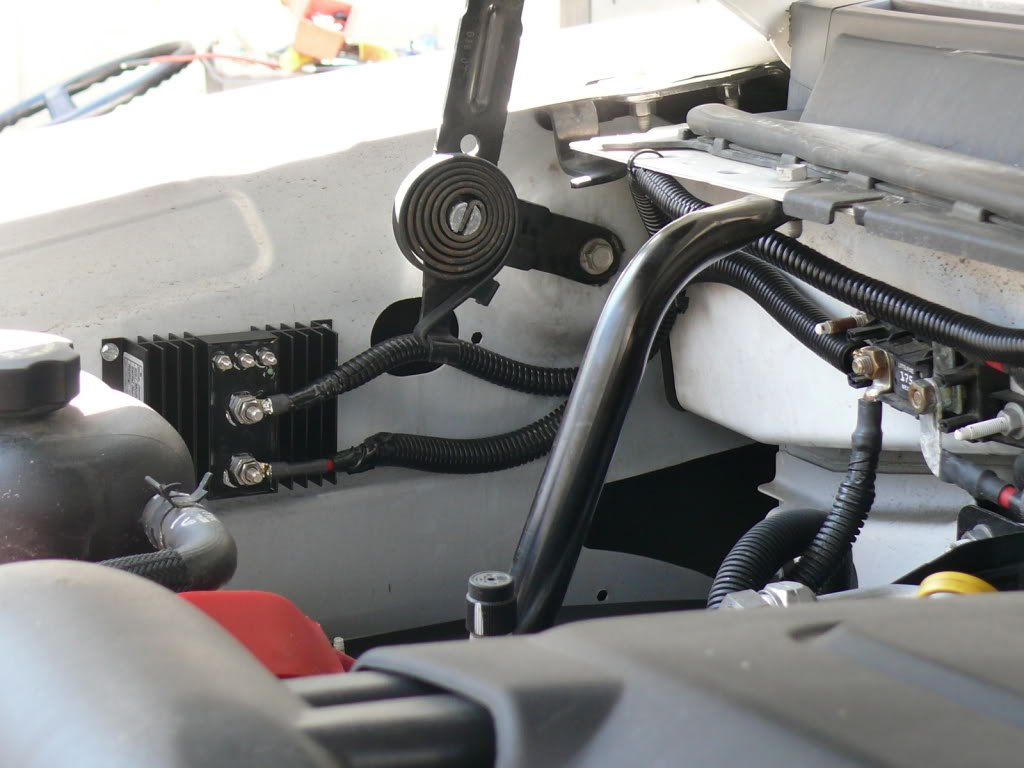
There's plenty of space between the two.
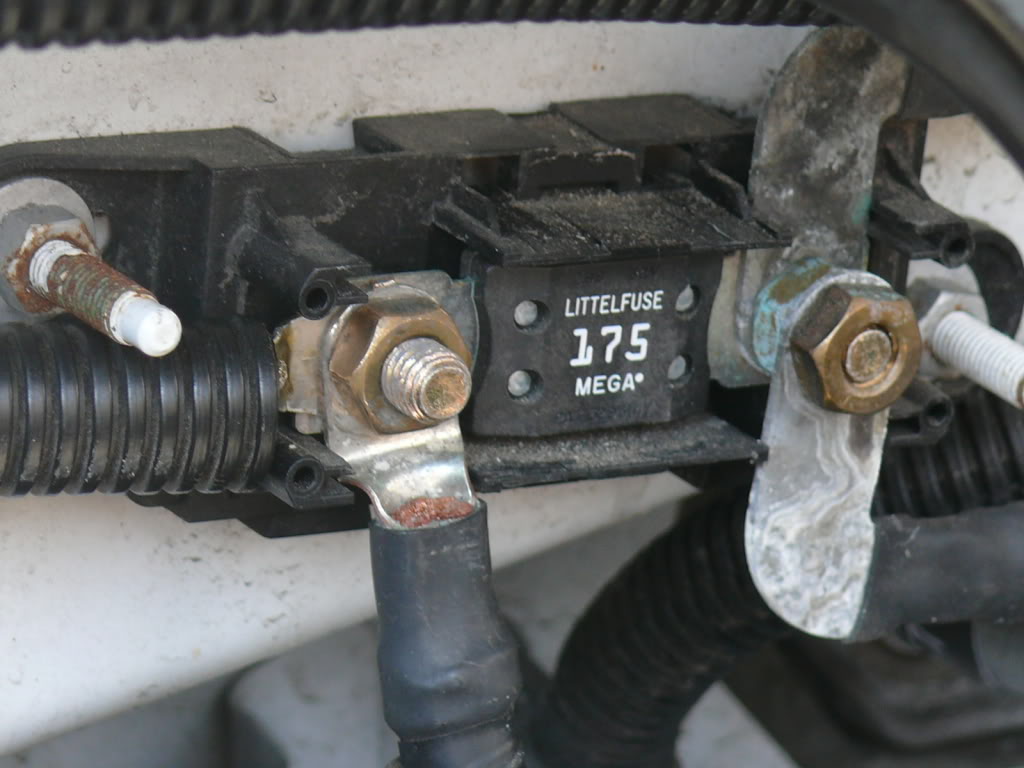
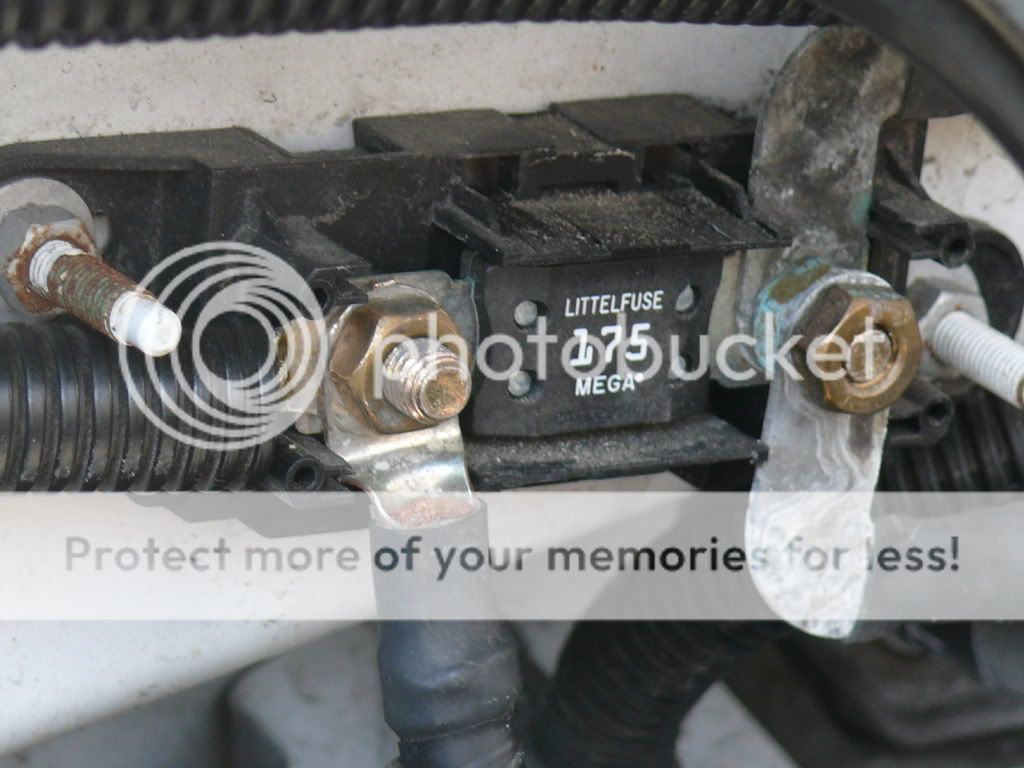
Wiring was straight forward. I picked off the alternator voltage just prior to the main fuse as shown. I came off the stud at 9 o'clock which requires the fuse cover to be trimmed slightly. There's actually faint cut lines on the inside of the cover to guide you. I used aircraft shears (aka. tin snips) to trim trim the plastic.
I used 8AWG wire from the isolator to the auxilliary battery as directed to further current limit the charging of the Yellow Top. I used zip ties to piggy-back onto the vehicle's stock wiring. All wires were covered by corrugated plastic tubing. Blame it on an uncharacteristic hot sun for a late Massachusetts April, but I zip tied the wire to the hole used by a bolt for the corner gusset brace which was removed in order to get the battery out.
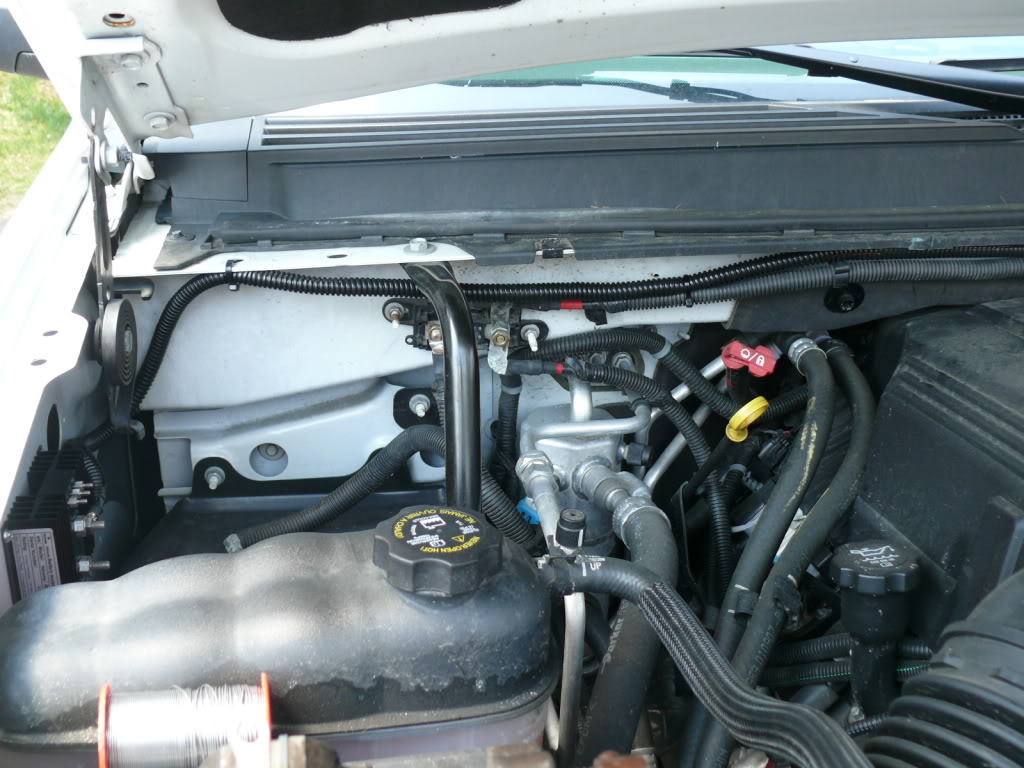
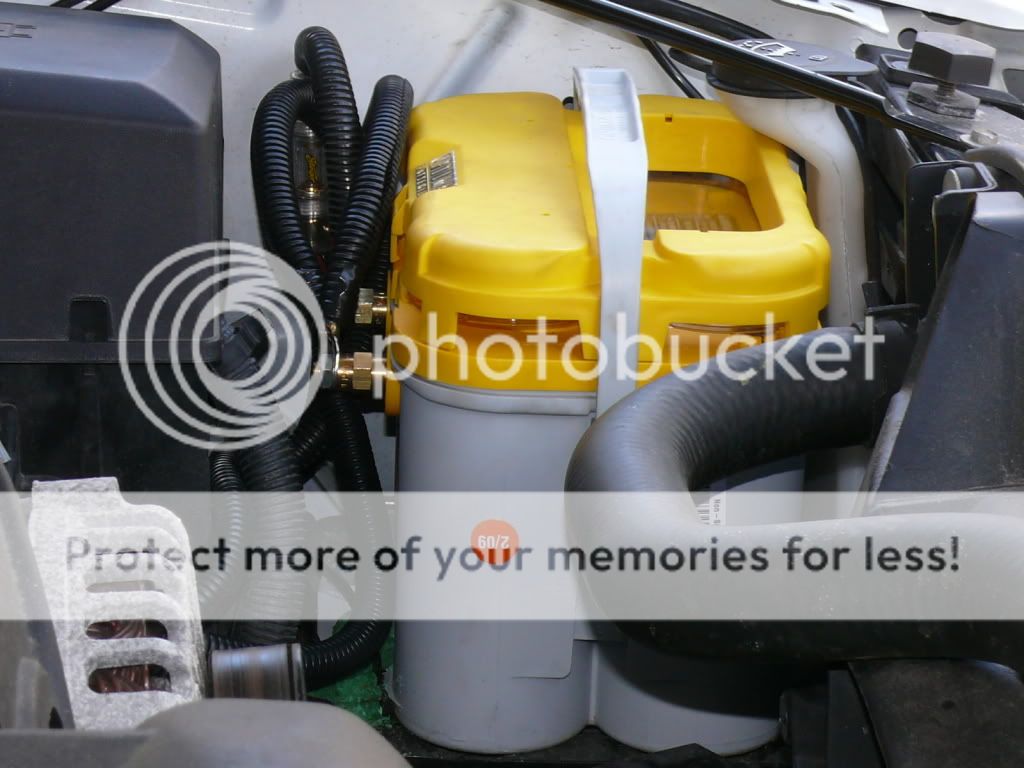
Here's the business end of the project. I chose an Optima Yellow Top deep cycle battery. The advantages over a traditional flooded cell are worth the significant price difference. The battery is supplied with a specially formed hold down bracket. It matches perfectly with a threaded hole in the tray. You'll need a M8x1.25 by 1.5" long bolt to clamp the battery down. Do not leave it just sitting on the tray! If you look carefully and the bottom left of the battery, you'll see something green. That's a block of rodent poison zip tied to the battery tray. I live out in the boonies where mice and the like abound. I found some acorns in the engine compartment during an oil change, so I took action before any wire chewing was done. No signs of them since, but the bait is regularly eaten.
The installation took me about 5 hours including a lunch break and the many "admiring the work" breaks. All work can be done with standard weekend warrior tools. What's hidden from view are one mondo fuse and a 60 amp breaker. Basically, each side for the isolator is protected, with an additional 60 amp fuse leading to the vehicle cabin in case of a catastrophic short. The main battery must be pulled prior to starting work, so the vehicle is basically dead. Care must be taken during initial power-up as you reconnect to the battery terminals. Just follow the instructions and you'll be fine. Total cost of the project was around $425.00.
Install an isolated deep cycle battery for my amateur radio gear, so I could run the gear for several hours and not have to worry about starting the vehicle afterwards.
My equipment selection:
An Optima Yellow Top deep cycle battery
A Hellroaring Technologies BIC-95150B Battery Isolator
I chose the Hellroaring product because I believe it's the best solid state isolator available. It doesn't have the forward voltage drop like that of a simple diode isolator so the charge voltage is as it should be. In use, the charge current to the aux battery is limited so it apprears simply as another load on the vehicles charging system. You shouldn't get any check engine lights, or premature alternator failure. There's also an small green LED which displays current battery status by the way it illuminates.
As shown below, the Hellroaring isolator was located on the fender wall just alongside of the main battery.
There's plenty of space between the two.
Wiring was straight forward. I picked off the alternator voltage just prior to the main fuse as shown. I came off the stud at 9 o'clock which requires the fuse cover to be trimmed slightly. There's actually faint cut lines on the inside of the cover to guide you. I used aircraft shears (aka. tin snips) to trim trim the plastic.
I used 8AWG wire from the isolator to the auxilliary battery as directed to further current limit the charging of the Yellow Top. I used zip ties to piggy-back onto the vehicle's stock wiring. All wires were covered by corrugated plastic tubing. Blame it on an uncharacteristic hot sun for a late Massachusetts April, but I zip tied the wire to the hole used by a bolt for the corner gusset brace which was removed in order to get the battery out.
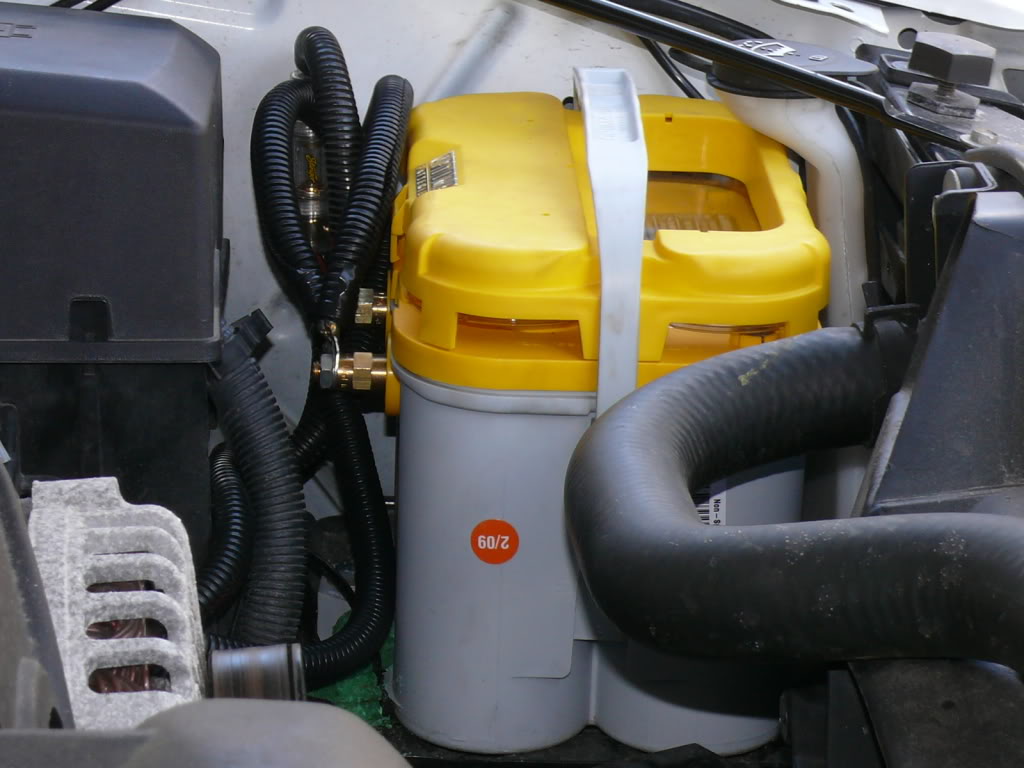
Here's the business end of the project. I chose an Optima Yellow Top deep cycle battery. The advantages over a traditional flooded cell are worth the significant price difference. The battery is supplied with a specially formed hold down bracket. It matches perfectly with a threaded hole in the tray. You'll need a M8x1.25 by 1.5" long bolt to clamp the battery down. Do not leave it just sitting on the tray! If you look carefully and the bottom left of the battery, you'll see something green. That's a block of rodent poison zip tied to the battery tray. I live out in the boonies where mice and the like abound. I found some acorns in the engine compartment during an oil change, so I took action before any wire chewing was done. No signs of them since, but the bait is regularly eaten.
The installation took me about 5 hours including a lunch break and the many "admiring the work" breaks. All work can be done with standard weekend warrior tools. What's hidden from view are one mondo fuse and a 60 amp breaker. Basically, each side for the isolator is protected, with an additional 60 amp fuse leading to the vehicle cabin in case of a catastrophic short. The main battery must be pulled prior to starting work, so the vehicle is basically dead. Care must be taken during initial power-up as you reconnect to the battery terminals. Just follow the instructions and you'll be fine. Total cost of the project was around $425.00.
Last edited by Hardin Thicke; April 26th, 2009 at 10:24 PM.

 April 27th, 2009, 2:53 PM
#4
Administrator
Didn't wait for the pics to load last nite (router was slow) but today noting the amount of corrosion, you must not be too far from the sea breezes.
April 27th, 2009, 3:48 PM
#5
CF Active Member
Thread Starter
Join Date: Jan 2007
Location: Northern galactic plane of Andromeda
Posts: 171
Likes: 0
Received 1 Like
on
1 Post
I'm 60 miles west of Boston in central MA, Shark. That's the effects of road salt. At 65mph, the spray gets into everything. A lot of folks up here are now experiencing brake line failure from the calcium chloride they're now using as a pre-treatment prior to a storm. All along the interstates up here, the pines are all burnt from the road spray fog which blankets the area during wet road conditions. I no longer drive the Tahoe every day on the 100 mile round trip to work, so it's getting a big break, but the damage is done, unfortunately. Look at that alternator!
May 27th, 2009, 5:22 PM
#7

And a bill of materials, if possible?
Thanks.
Thanks.
My mission:
Install an isolated deep cycle battery for my amateur radio gear, so I could run the gear for several hours and not have to worry about starting the vehicle afterwards.
My equipment selection:
An Optima Yellow Top deep cycle battery
A Hellroaring Technologies BIC-95150B Battery Isolator
I chose the Hellroaring product because I believe it's the best solid state isolator available. It doesn't have the forward voltage drop like that of a simple diode isolator so the charge voltage is as it should be. In use, the charge current to the aux battery is limited so it apprears simply as another load on the vehicles charging system. You shouldn't get any check engine lights, or premature alternator failure. There's also an small green LED which displays current battery status by the way it illuminates.
As shown below, the Hellroaring isolator was located on the fender wall just alongside of the main battery.
There's plenty of space between the two.
Wiring was straight forward. I picked off the alternator voltage just prior to the main fuse as shown. I came off the stud at 9 o'clock which requires the fuse cover to be trimmed slightly. There's actually faint cut lines on the inside of the cover to guide you. I used aircraft shears (aka. tin snips) to trim trim the plastic.
I used 8AWG wire from the isolator to the auxilliary battery as directed to further current limit the charging of the Yellow Top. I used zip ties to piggy-back onto the vehicle's stock wiring. All wires were covered by corrugated plastic tubing. Blame it on an uncharacteristic hot sun for a late Massachusetts April, but I zip tied the wire to the hole used by a bolt for the corner gusset brace which was removed in order to get the battery out.
Here's the business end of the project. I chose an Optima Yellow Top deep cycle battery. The advantages over a traditional flooded cell are worth the significant price difference. The battery is supplied with a specially formed hold down bracket. It matches perfectly with a threaded hole in the tray. You'll need a M8x1.25 by 1.5" long bolt to clamp the battery down. Do not leave it just sitting on the tray! If you look carefully and the bottom left of the battery, you'll see something green. That's a block of rodent poison zip tied to the battery tray. I live out in the boonies where mice and the like abound. I found some acorns in the engine compartment during an oil change, so I took action before any wire chewing was done. No signs of them since, but the bait is regularly eaten.
The installation took me about 5 hours including a lunch break and the many "admiring the work" breaks. All work can be done with standard weekend warrior tools. What's hidden from view are one mondo fuse and a 60 amp breaker. Basically, each side for the isolator is protected, with an additional 60 amp fuse leading to the vehicle cabin in case of a catastrophic short. The main battery must be pulled prior to starting work, so the vehicle is basically dead. Care must be taken during initial power-up as you reconnect to the battery terminals. Just follow the instructions and you'll be fine. Total cost of the project was around $425.00.
Trending Topics
May 27th, 2009, 5:54 PM
#8
CF Active Member
Thread Starter
Join Date: Jan 2007
Location: Northern galactic plane of Andromeda
Posts: 171
Likes: 0
Received 1 Like
on
1 Post
This project was very simple. The big engine bay of the Tahoe is extremely easy to work in. The schematic can be found right on the Hellroaring Technologies page. I used the "basic" configuration.
Bill of Materials:
1 Hellroaring BIC-95150 Battery Isolator (includes misc. hardware)
1 Optima Yellow Top Battery
20' of 8 gauge hook-up wire
10 BIG ring lugs
bunch of black zip ties
enough corrugated wire loom to get around the engine bay
It's been in one month, and it works beautiful.
Bill of Materials:
1 Hellroaring BIC-95150 Battery Isolator (includes misc. hardware)
1 Optima Yellow Top Battery
20' of 8 gauge hook-up wire
10 BIG ring lugs
bunch of black zip ties
enough corrugated wire loom to get around the engine bay
It's been in one month, and it works beautiful.
May 27th, 2009, 8:57 PM
#9
Administrator
Hardin,
your setup feeds only your radio gear right?
but there is no reason why the same setup couldn't be used to tie right back into the fuse box under the hood to provide extra/extended power to the vehicle accessories i.e. radio, DVD ect...
and your setup keeps the truck battery separate from the aux battery, so if the main battery went you could swap out the batteries and be on your way...
May 28th, 2009, 6:10 AM
#10
CF Active Member
Thread Starter
Join Date: Jan 2007
Location: Northern galactic plane of Andromeda
Posts: 171
Likes: 0
Received 1 Like
on
1 Post
By connecting the auxilliary battery back to the fuse panel, I believe you'd parallel the batteries in some wierd configuration. Why not install another battery in the tray, and connect the positives together, and the negative to the frame? With my current configuration I can jump the starting battery with the aux. battery if every needed, and without disconnecting it from the isolator.