Chevrolet Silverado 1999-2006: How to Repair the Instrument Cluster
The first-generation Cheverolet Silverado 1500 has an unfortunate tendency for their instrumental clusters to fail. Most drivers decide to replace their clusters without realizing there is an alternative, less expensive fix.
By Neftali Medina - June 3, 2015
Contributors: briansmobile1
This article applies to the Chevrolet Silverado 1500 (1999-2006).
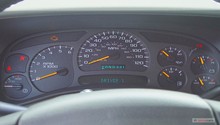
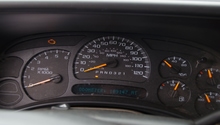
The first-generation Chevorlet Silverado 1500 uses a less than impressive design for their instrumental cluster. So much so that it results in erratic speedometers, stalled RPM meters and non-existent gear selectors. The fault lies in the weak soldering points created from factory. Over time, these solder points experience different levels of temperature and vibrations, all of which lead to some worn or damaged connections. However, once these solder points are refreshed, the cluster can return back to its normal functions. Use these following instructions to repair a damaged instrumental cluster on a first generation Chevy Silverado 1500.
Materials Needed
Solder tool
Flux
Screwdriver
9/32 drill socket
Drill
Step 1 – Remove the gauge cluster trim
The upper-part of the dashboard is held in place via clips.
Push the tilt lever for the steering wheel down.
Push the wheel down.
With the key still turned to on, pull the gear selector down to one – use the emergency brake to keep the truck in place.
Grab the dashboard panel and pull it towards you. Un-clip it and pull it out of the way.
Move the gear selector back to park.
Remove the key.
Figure 1. Pull back the dashboard trim.
Step 2 – Remove the instrumental cluster
This part is easy, more so if you have a drill handy. Use a 9/32" bit to remove the four screws situated around the instrumental cluster. Be sure to carefully pick up and place each screw aside.
Figure 2. Remove the instrumental cluster screws.
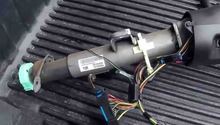
Once the screws are off, grab the gauge cluster by hand pull it towards you. However, do not pull too hard as you still need to disconnect the instrumental cluster plug from behind the unit.
Figure 3. Remove the instrumental cluster.
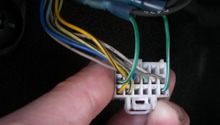
Figure 4. Unplug the instrumental cluster connector.
Step 3 – Prepare the instrumental cluster board
The board is the chip set that powers all the gauges, lights and meters. First you have to gain access to it.
Use your finger to separate the clips that hold the cluster together.
Pull the backside cover of the cluster off.
Figure 5. Removing backside cover.
Place the board in a flat surface.
Begin to heat up the solder torch.
Inspect the solder points for the plug connector on the board.
Pro Tip
A good connection should not have any burn marks or cracks. When you visually inspect the solder you may be able to make out the damage areas, but it should still be noted that many cracks may not be so easily seen.
Figure 6. Inspect these specific solder points.
Step 4 – Solder the points on the instrumental panel
First, you will need to remove the protectant clear finish on the contact points. You can do so by using a solder pen to heat up the existing flux on each pin (refer to Figure 7). While removing the clear finish, the old solder will begin to set to the bottom of each pin. Hit each solder point on the top and bottom of the chipset.
Figure 7. Set the older solder on each pin.
Lay the new solder on top of each pin.
Try not to burn the board.
Figure 8. Lay the new solder.Step 5 – Test the cluster
If the speedometer was off center, now is a good time to set it in its original position. Install the cover back on to the cluster and plug it into the dashboard harness.
Turn the key to 'on' and inspect the panel.
Figure 9. Test the cluster.
Everything should be back to working order.
Install the mounting screws.
Mount the dashboard trim.
Featured Video: Chevy Silverado Instrument Cluster Fix
GMGaugeRepair, brainsmobile1, Silveradoss
Is the instrumental panel in your Silverado going nuts? Read this article to understand what may be causing the problem.
This article applies to the Chevrolet Silverado ...
Why is My Instrument Cluster Broken?
A correctly operating instrument cluster is essential to keeping you informed of your truck's condition.
This article applies to the Chevrolet Silverado GMT800 and GMT900 ...
Recalls and Technical Service Bulletins
Find out if your Chevy Silverado is involved in a recall and what steps you'll need to take next if it is.
This article applies to the Chevrolet Silverado (1999-2006).
If ...
How to Replace Heater Core
Spark-Answers, PerformanceTrucks
Has your heater core stopped working? Click here to learn how to replace it.
This article applies to the Chevrolet Silverado 1500 (1999-2006).
The heater ...
Why is Cruise Control Not Working?
Cruise control comes in handy on those long highway trips. Fixing it may be pretty simple.
This article applies to the Chevrolet Silverado 1500 (1999-present).
The cruise control ...
Recalls and Technical Service Bulletins
We have the information you'll need should your Chevy Silverado become involved in a recall or a Technical Service Bulletin is issued for your model year.
This article ...