Chevrolet Silverado 1999-2006: How to Replace 4WD Tranfer Case Shift Motor
As with any moving truck component, the transfer case shift motor in your Silverado will wear over time. And once the shift motor fails, your truck might get stuck in two or four wheel drive. Continue reading to repair this problem as soon as possible.
This article applies to the Chevrolet Silverado GMT800 (1999-2006).
The transfer case shift motor in your Chevy Silverado bolts to the transfer case. This shift motor contains an electrically powered armature that moves a gear selector through a driver controlled switch. However, when the component fails, the motor ceases to operate and the drive modes cannot be changed. Although this failure can also result from a different mechanical or electrical fault, the shift motor is often the cause. Follow the steps below to properly replace the damaged shift motor in your Silverado.
Materials Needed
- Hydraulic jack and jack stands
- Flat head screwdriver
- Pry bar
- Torque wrench
- Ratchet and extension
- Metric and SAE socket set
Step 1 – Lift the front end
- Loosen and remove the 8mm bolt securing the negative lead (black) to the battery terminal.
- Place the floor jack underneath the center of the crossmember. Before raising the front end, place a block of wood between the jack and the crossmember to avoid damage.
- Then, place the jack stands underneath the front frame rails to add support to the front end.
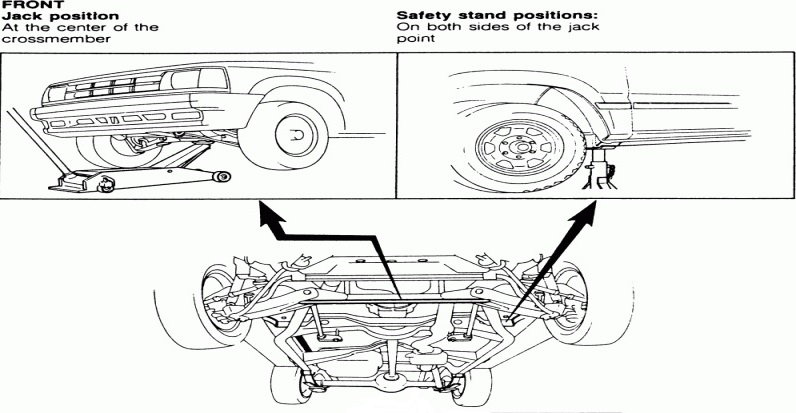
(Related Article: How to Jack Up Your Truck - ChevroletForum.com)
Step 2 – Remove the propeller shaft
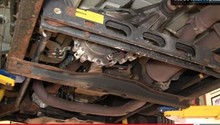
One end of the rear propeller shaft (prop shaft) slides into the transfer case, and the other end of the propeller shaft is bolted to the rear differential through a U-joint assembly.
- Remove four bolts from the rear U-joint assembly of the prop shaft.
- Use a pry bar to apply leverage, and separate the prop shaft from the rear differential.
- Slide the prop shaft to the side and keep it supported.
- Slide the front end of the prop shaft out from the transfer case. It will require some strength to remove.
- Be careful not to remove the caps on the ends of the U-joint assemblies as they contain small bearings.
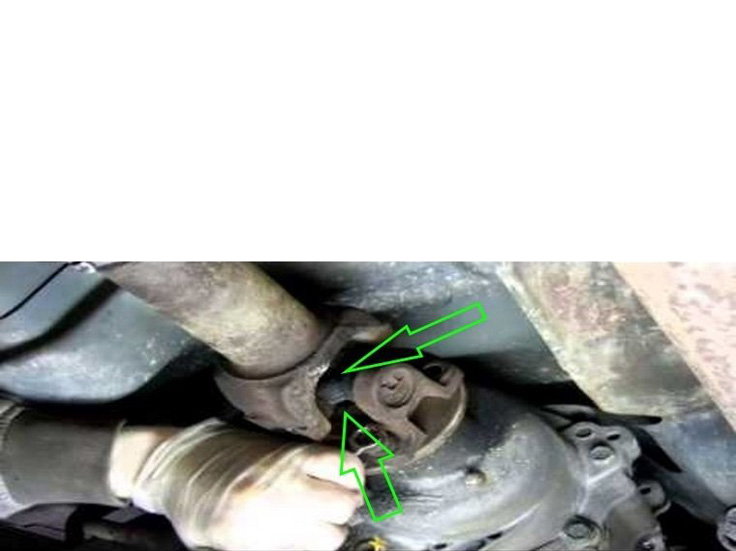
Figure 2. Separate the rear prop shaft U-joint assembly. 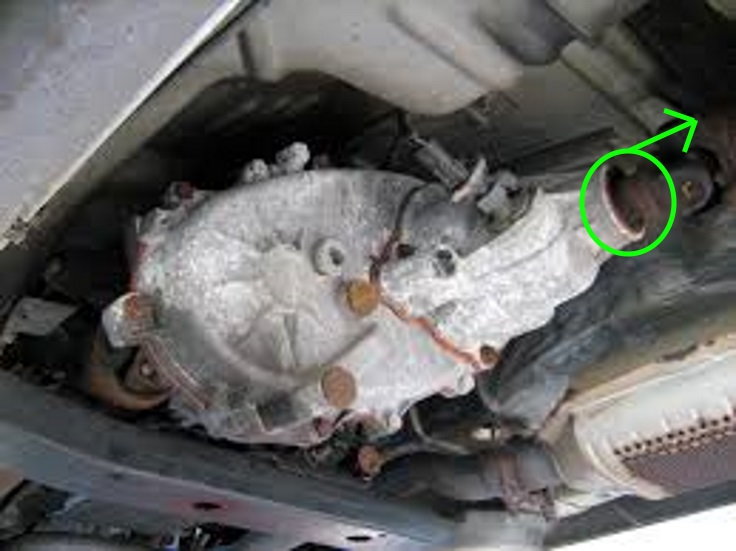
Figure 3. Slide the prop shaft out of the transfer case.
Pro Tip
The entire transfer case does not have to be removed. The figures above are meant to clarify exact locations of the connectors and bolts.
Step 3 – Release the transfer case shift motor connectors
- There's an L-shaped metal shield underneath the transfer case. Remove four 15mm bolts from the shield and detach it from the crossmember.
- The shift motor is located to the left of the prop shaft connection.
- First, remove the black connector on top of the shift motor. Simply pull the tab of the connector up and pull it out.
- Then, use a flat head screwdriver to separate a circular routing clip on top of the transfer case. The clip holds a second connector in place.
- Detach the second connector in the same way.

Figure 4. Pull tab of the connector to release it. 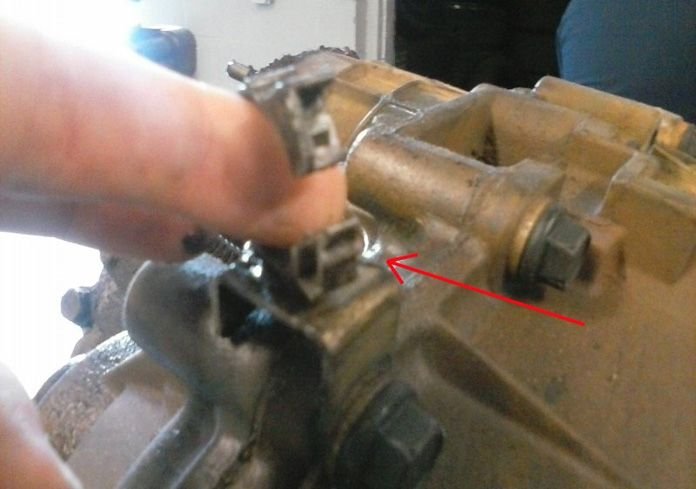
Figure 5. Separated routing clip of the second wire harness (red arrow).
Step 4 – Remove the transfer case shift motor
- Remove three 15mm bolts from the shift motor, and pull it off of the transfer case.
- Save the gasket between the shift motor and transfer case as it will be reused. Take care not to damage it.
Pro Tip
On the inner shift motor is a detent plate that properly fits into the transfer case. Make sure to attach the new detent plate in the exact same position when installing the new transfer case shift motor.
Step 5 – Install the new transfer case shift motor
- First, properly align the gasket and hold it in place.
- Insert the bolts into the new shift motor before installation. The bolts will act as alignment pins for the gasket.
- Gently place the shift motor on the transfer case and hand-tighten the three bolts. The shift motor may need to be turned and angled to provide a secure seal.
- Then, fully tighten the bolts to 30 ft/lbs of torque.
Pro Tip
Make sure all components of the new transfer case shift motor matches the old one. The harness should be the same length, and the connectors should be located in the same spots.
Step 6 – Reassemble the rear driveshaft
- Slide the front end of the prop shaft into the transfer case.
- Then, attach the rear end of the prop shaft to the rear differential.
- Hand-tighten the four bolts of the U-joint assembly.
- Fully tighten them to 20 ft/lbs of torque.
- Bolt the transfer case shield to the crossmember.
- Lastly, lower your truck and reconnect the battery.
Featured Video: How to Install/Replace 4WD Transfer Case Shift Motor
Related Discussion
- '99 Silverado 4WD Issue - ChevroletForum.com