Chevrolet Silverado 1999-2006: How to Replace Clunking Steering Shaft
Steering should be like a bowl of pudding: smooth and noiseless. Continue reading to make sure the steering in your Chevy Silverado stays like a bowl of pudding.
This article applies to the Chevrolet Silverado GMT800 (1999-2006).
The Chevrolet Silverado is a great truck, there's no question about it. But in GM's infinite wisdom, they overlooked the matter of the so-called "intermediate shaft" in the steering assembly, and that oversight has led to an unfortunate clunking noise. The intermediate steering shaft has also led to a number of technical bulletins, but that's another story.
A lot of shops and shade-tree mechanics alike will tell you that packing your OEM steering shaft with grease will solve this issue. From what we can tell, they're right that it might temporarily "fix" the problem, but it won't solve the problem completely as the clunking noise will usually come back. Instead we're going to install a re-engineered intermediate steering shaft that's a little beefier with some better joints.


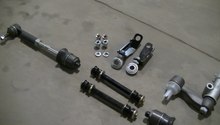
Materials Needed
- New intermediate shaft with upgraded design (Dorman part #425-176)
- 15mm socket and ratchet
- 15mm box-end wrench
- Torque wrench
- Grease
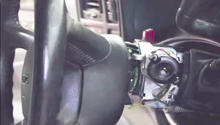
Step 1 – Detach top end of the steering shaft
What could be more fun than lying on your truck's driver side foot well, trying to get a bolt out of the steering shaft? Well, a lot of things, but we'll have to do it anyway. Use your box wrench to remove the 15mm nut from the top end of the steering shaft bracket; you can see the connection behind the pedals. Then pop out the bolt and pull the steering shaft down to detach it from the steering column.

Pro Tip
Once the bolt and bracket are out, the steering wheel will be able to spin freely, but don't let it. Make sure to keep it still in top dead center position or you could risk damaging some of the electronic components inside. Brace it with something if you need to.
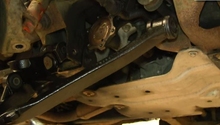
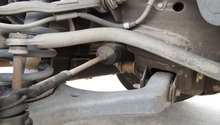
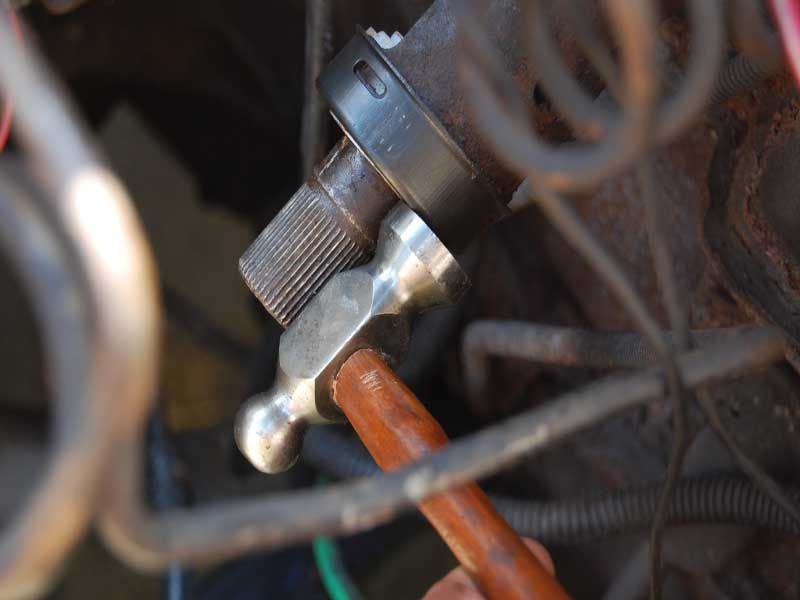
Step 2 – Detach bottom end of the steering shaft
In the engine compartment, to the bottom left of the power brake booster is the bottom end of the intermediate steering shaft, which is connected to the lower steering shaft. Use your 15mm box wrench to hold the bolt head still as you remove the 15mm nut using the ratchet and socket. Once the nut is off, push the bolt out of the hole and separate the two shafts. You might have to get crafty with some kinetic persuasion, also known as whacking things with a hammer, but make sure not to get your fingers.
Step 3 – Remove the old intermediate steering shaft
Move back into the foot well and pull the clunky old intermediate shaft out through the firewall. Then, compare it to the new one and make sure it will fit.

Step 4 – Install the new intermediate steering shaft
Knowing what you now know about this process, you should be in good shape to put the pieces back together and bolt in the new steering shaft back up.
- Simply slip the bottom end of the steering shaft through the firewall.
- Apply some grease to the end, and connect it to the lower steering shaft.
- Then bolt them together.
- For the upper end of the steering shaft, simply pull it up and connect it to the steering column. Then re-install the bracket and tighten the bolt to 35 ft-lbs.
Enjoy your clunk-free steering!
Pro Tip
If you're having trouble getting the bolt all the way through the bracket on the top end of the steering shaft, flip the ignition (but don't start the car), then gently move the steering left and right to wiggle the bolt through.
Featured Video: How to Replace Clunking Steering Shaft
Related Discussions and Video
- Clunking Noise in Steering Column on 2003 Silverado - ChevroletForum.com
- Knocking in Steering Column - ChevroletForum.com
- Steering Wheel Clunk Fix Chevrolet Silverado 2500 HD 2003 - YouTube.com