Chevrolet Silverado 1999-2006: How to Replace Fuel Filter
A clogged fuel filter will cause hesitation and occasional fuel starvation. Let's change it out.
This article applies to the Chevrolet Silverado GMT800 (1996-2006).
In a fuel injected fuel system, the fuel filter is extremely important. It is critical in keeping contaminants and particles from clogging injectors or other parts of the fuel system. The fuel filter is recommended to be replaced every 30,000 miles or 30 months. Here is how to replace the fuel filter to keep your fuel system nice and clean.
Note that 2005 and later models are equipped with a non-replaceable fuel filter, which is built into the fuel sender assembly.

Materials Needed
- Flare nut wrenches
- Rags
- Drip pan or suitable catch container
Warning
Fuel is extremely flammable, so take extreme caution when working with the fuel system. It is also a good idea to have a fire extinguisher present when working on the fuel system.
Step 1 – Relieve the pressure from the fuel system
The fuel system is under constant pressure. When disconnecting the fuel lines, the pressure must first be relieved.
- Remove the fuel filter cap. This relieves pressure built up in the fuel tank.
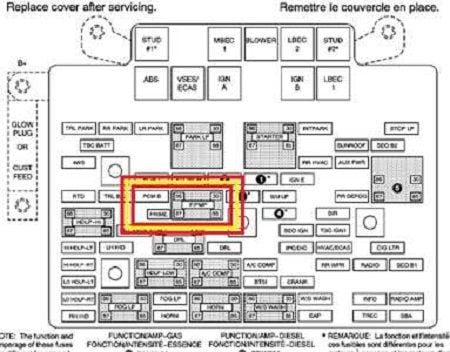
- Remove the fuel pump relay from the relay box in the engine compartment. A guide identifying the relay is under the lid of the relay box.
- Turn the ignition key to "START" and crank the engine over. It should start for a moment, but then stall.
- Turn the ignition key to "OFF."
- Disconnect the negative (black) cable from the battery.
- When you are done, have replaced the relay, and finished what you are working on, the check engine light might come on when you start the engine due to the engine being started without the fuel pump relay. It might clear itself after driving for a bit, or you might have to clear it yourself.
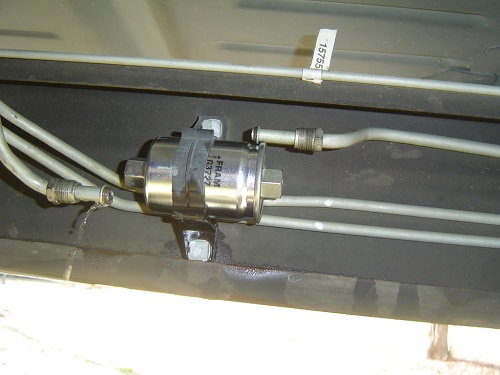
Step 2 – Locate the fuel filter and clean
The fuel filter is located on the right frame rail near the fuel tank. Once located, clean the surrounding area of the fuel filter, inlet and outlet line fittings. You will want to make sure that when you disconnect the lines, no dirt or debris gets into them. Also, make sure to clean off any dirt or debris that has accumulated on the fittings and around the lines before disconnecting them.

Step 3 – Loosen the fuel filter's fittings
At each end of the filter are screw-in fittings. It will require two wrenches to loosen and then tighten the fittings. When loosening the fittings, make sure to have a catch pan or rags to catch any fuel that will leak out when the lines get disconnected.
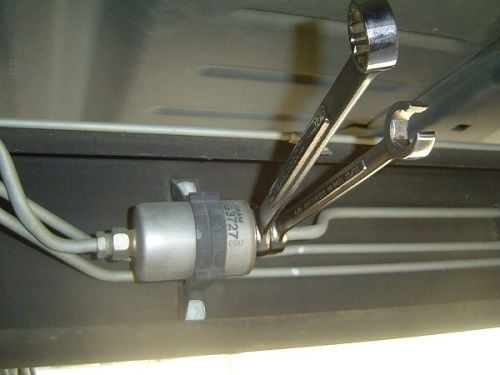
Pro Tip
Flare nut wrenches will help to keep from rounding off the fitting of the fuel filter.
Step 4 – Detach fuel filter from mounting bracket
The fuel filter is attached to the vehicle by a bracket. To loosen the bracket and remove the fuel filter, loosen the nuts that hold it into the mounting bracket. These nuts are located on the backside of the frame rail.
Step 5 – Installation is the reverse of removal
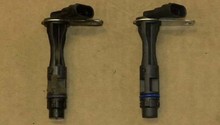
- Thread in the fittings into the new fuel filter.
- Secure the filter and lines to the chassis.
- Refit the fuel pump relay.
- Reconnect the battery.
Featured Video: How to Install/Replace Fuel Filter
Related Discussions
- 2004 Silverado with No Fuel Filter - ChevroletForum.com
- Fuel Filter, Motor Knock - ChevroletForum.com
- '05 Fuel Filter Questions - ChevroletForum.com
- Fuel Filter O-Rings - ChevroletForum.com