Chevrolet Silverado 1999-2006: Why Do My Vents Blow Only Hot or Cold Air?
The Chevy Silverado climate control system uses several different components that come together to either cool down or heat up the cabin. When one or more of these components fails, the heat or cold air capabilities go along with it. Read this article to find out three common causes for temperature lost on your Silverado 1500.
This article applies to the Chevrolet Silverado 1500 (1999-2006).
It's 90-plus degrees outside and you sit in your car only to be doused with a blast of heat from what is supposed to be ice-cold air conditioning. Or perhaps the windchill is just below freezing and you make it inside your car only to discover icicles forming on the vents. A proper climate control system should prevent these types of events from happening, as they allow your truck's blend door to adjust and allow a mixture of hot and cold air to pass through. There are three common reasons why the climate control fails to work. Use the information listed below to help diagnose and repair why your vents only blow hot or cold air.

Materials Needed
- Metric socket set
- Refrigerant
- Coolant
- Screwdriver
- Trim pry tool
Step 1 – Check the blend doors
The blend doors may be stuck.
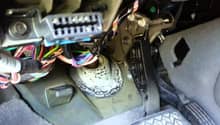
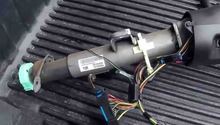
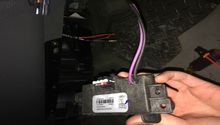
Modern trucks make use of blend doors, which are plastic flaps found inside of the vents that act as a gateway for hot or cold air to pass through. These doors are controlled by electrical actuators, which respond to the buttons pressed on the dashboard. When the actuator fails, the blend door will remain stuck in its position. This causes whatever the climate setting was set to, to be the only available temperature option in the car.
- Disconnect the negative battery terminal from the truck.
- Remove the vent cover.
- Locate the driver-side and passenger-side blend door actuators.
- Loosen the mounting screws for each actuator and disconnect the sensors.
- Install the new actuators.
- Reconnect the battery and test the new actuator
The actuator should return to the center once the battery is connected. Press the buttons on the climate control interface and make sure everything works. If so, re-install the new vent cover.

If the blend doors aren't the issue, proceed to Step 2.
Step 2 – Check the air conditioning system
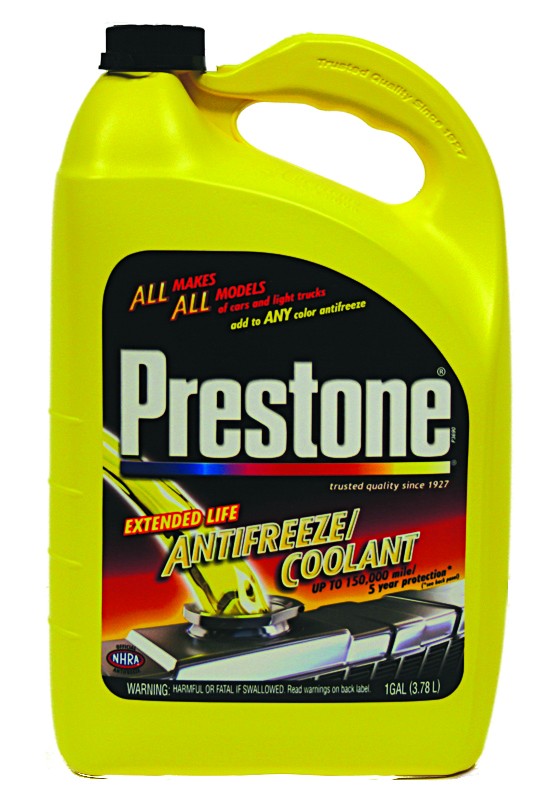
There may be no refrigerant in the system.
When there is a lack of cold air coming from the vents, most will agree that there is a leak in the system. Refrigerant, commonly referred to as freon, is a chemical that, when fluctuating through high and low pressures, becomes cold. The air conditioning system uses several components that all work together to help make this happen; however, when a leak occurs or a component fails, the production of cold air stops as well. Use a pressure gauge with a specialized air conditioning fitting to check the low pressure hose on the truck and make sure it maintains 100 psi with the engine off, and 35 psi with it on.
- First start the car and turn all the knobs to cold and max A/C.
- Locate the low pressure hose, which will have a cap marked with an "L."
- Take the refrigerant refill hose and attach it.
- Check the reading on the meter.
- Refill the freon until the pressure is at its correct limit.
Pro Tip
Although a recharge will bring back cold air, it should be noted that the need for a recharge indicates a leak in the system. The truck will continue to need recharges until the leaking component is repaired.

Step 3 – Do a back flush
There may be air trapped in the system.
Hot coolant is responsible for passing through the heater core, creating hot air which can than pass through the vents and into the cabin. On some occasions air can become trapped in the system, stopping the coolant from doing its job. In these cases, a coolant back flush is required to remove the air from the heating system.
- Locate the hoses that enter the heater core.
- Disconnect them to release any trapped air.
- Reconnect the lines.
- Top off the coolant.
Pro Tip
This procedure refers to a quick release of air from the system. For a complete coolant flush the radiator will need to be drained and refilled.
Related Discussion and Sites
- A/C Heater Control Problems - ChevroletForums.com
- 2005 Silverado A/C problem - GMTruckclub.com
- Heater Blowing Cold Air - SilveradoSierra.com