Chevrolet Silverado 2007-2013: How to Bleed Brakes
In Ye Olden Days, it was thought that bleeding humans helped them heal. Not true for humans, but sometimes true for hydraulic braking systems.
This article applies to the Chevrolet Silverado GMT900 (2007-2013).
Bleeding brakes is a war against the most devilish villain in a hydraulic system: air. Though you and I need air in order to breathe, speak, and sing pop songs in the shower when no one can hear, air totally bedevils hydraulics. The reason for this boils down to the inherent density, and thus compress-ability, of the two substances.
Earth's atmosphere, mostly Nitrogen and Oxygen, has a density of about 1.1 kilograms per cubic meter (kg/m^3) at 25 degrees C. Ethelyne Glycol, of which many brake fluids are made—not all, but we're choosing it for ease—is around a thousand times higher at 1097 kg/m^3. For this reason, squishing air is much, much easier than squishing brake fluid.
When you press your brake pedal, it compresses a piston, which squishes some brake fluid down a pipe. At the end of that pipe are your brake calipers, which are pushed by the increased pressure of the brake fluid onto your braking surface. If there is an air bubble in the system, it will compress instead of your brake calipers, causing reduced (or maybe even eliminated) braking performance.
Getting the air out is a routine process known as "bleeding," but it's not as straightforward as it used to be thanks to an invention called ABS (or "anti-lock braking system"), which your truck most likely has. For the purposes of this How-to, we're going to ignore ABS unless we've properly bled the brakes and they're still soft.
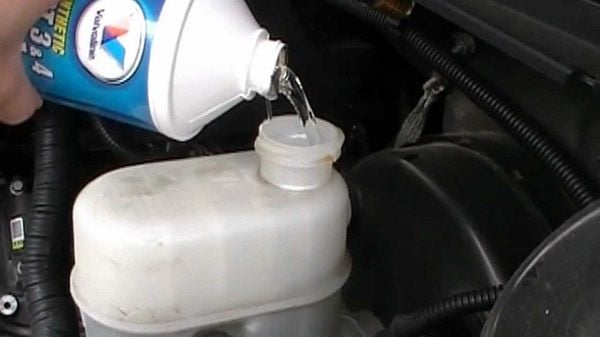
If you open your hood to look at the brake fluid reservoir and it looks like it's full of bus station coffee, it's time to replace. Brake fluid should be a hazy clear or other nice color. Not black or brown.

Materials Needed
- Clear vinyl tubing: 3' long (or so), 1/4" internal diameter
- Turkey baster
- Catch can of some sort (clear old juice bottle, water bottle, etc.)
- 10mm box wrench
- A helper with a strong set of legs (one leg will do, actually) and a decent amount of patience
- Safe jacking equipment
- 2 liters of brake fluid
Note that there are a lot of tools and methods designed to get the brake bleeding process down to only one person. We are going to ignore those methods and do things old school. Cause we're old fools, who are so cool.
Step 1 – Remove old fluid from the brake reservoir
You can skip this step if your brake fluid looks good and you're just bleeding the brakes, because you've replaced the pads and/or rotors. Use your turkey baster to suck the old brake fluid out, and put it in your catch can for safe disposal later. Don't use the turkey baster from the kitchen. Don't put the turkey baster you use back in the kitchen. This should be obvious, but, you know, just saying.
You can leave the brake fluid reservoir open for now. Top it off with the new fluid.
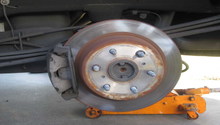
Step 2 – Remove the wheels
You might be able to reach the bleeding nut with the wheels still on, but it'll be a big pain. Better to just take the wheels off and get 'em out of the way. Safely jack up the truck, put it on stands, and remove the wheels.
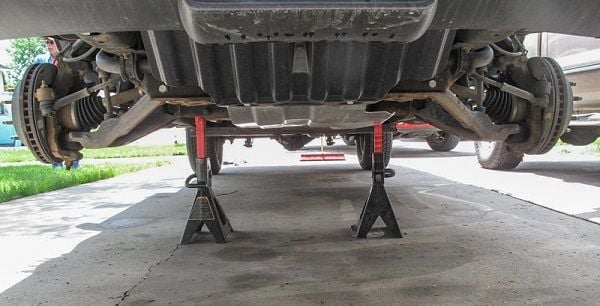
(Related Article: How to Jack Up Your Truck - ChevroletForum.com)
Step 3 – Get assistance from your helper
You will need to begin with the wheel farthest from the master cylinder. During this phase it's important that your helper pay attention and is able to hear you. Windows need to be down, radio off, iPads and iPhones stowed away somewhere else. You're going to be shouting commands like a coxswain on a rowing crew, and if your helper's attention wanders, they could introduce air to the system rather than removing it. This process has caused more than one heated marital argument over the years.
Conversely, if you have to say "please" more than seems necessary, just remember: 1. the goal is to fix your truck, not your relationships, and 2. no one wants to be out here all dang night.
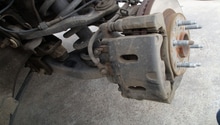
Step 4 – Bleed the brake line
Put your 10mm wrench on the screw. Place one end of your hose on the bleeder screw, and the other in your catch can. Give the screw a turn until you feel it open, then yell "push and hold!" Your helper will push the brake pedal to the floor and hold it there, then shout "holding!" This is your signal to re-tighten the bleeder screw. Once that's done, you yell "release!" That's your helper's cue to release the pressure on the brake pedal, completing a cycle of brake bleeding. It'll take between one and one million cycles to complete this process. Some other words may be shouted here if you get upwards of a dozen cycles or so.
During this process, pause every couple of cycles to go look at the fluid reservoir. If it runs dry, you'll be pumping air into the lines. We don't want that, so make sure it stays filled to its fill line.
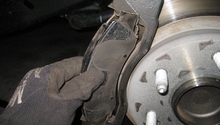
On each bleeding cycle, you should see goop come out of the end of the bleeding screw and into your hose. If you chose a clear hose, you can judge the color of said goop. Is it black or brown? If so, it's a good thing you're replacing it. You can keep cycling through the process until it goes the color it's supposed to be, at which time you'll know you've "flushed" that line. You might also see air bubbles. If so, that's a good sign because it means you correctly diagnosed air in the lines. If not, you might have another problem (e.g. bad master cylinder or brake booster).
Sooner or later, the bubbles should cease to appear. Then, you know you're done with this line and can move on to the next until all four are bled.
If this process doesn't work, meaning you never stop seeing bubbles or your pedal never gets firm, you could have any number of issues including failed master brake cylinder, brake booster, or other component.
From here, you will want to repeat the same process in the following order: right-rear wheel, left-rear wheel, right-front wheel, left-front wheel. This ensures that you work any old brake fluid out of the system, while working progressively closer to the master cylinder. Expect to use up to two liters of brake fluid in flushing the whole system.
With all four calipers bled, ensure that the brake fluid reservoir is filled to the area between the "Min" and "Max" lines (do not go over or under this!), and that the brake pedal is firm. Then, refit all four wheels, lower the truck down, and go for a low speed test drive, ensuring that the brakes are functioning as intended.
Featured Video: How to Bleed Brakes
Related Discussions
- Soft Brake Pedal While Truck is Running - ChevroletForum.com
- Soft Brake Pedal - ChevroletForum.com
- 2008 Silverado Brake Issue - ChevroletForum.com