Chevrolet Silverado 2007-2013: How to Replace Wheel Bearings
Replacing the wheel bearings is a bit of a tedious process, but definitely important for the well being of your truck.
This article applies to the Chevrolet Silverado 1500 (2007-2013).
Unless you've replaced a wheel hub bearing yourself, chances are you've never actually seen one. The wheel hub bearing is buried deep inside the wheel assembly of your Silverado, and it plays a big role in safety, but primarily handling and road-worthiness. Bearings allow other parts spin or rotate freely, so enduring large amounts of friction and heat is part of their job. But even parts designed for this kind of job eventually wear out. Keep in mind that in the Silverado, the bearing is sealed in the spindle assembly, and the whole part may be replaced. Once the lubricant wears out due to mileage or abuse, they can start grinding and vibrating.

Materials Needed
- Floor jack and jack stands
- New bearing hub assembly
- 15mm, 18mm, 19mm socket and ratchet wrench
- Breaker bar
- T30 Torx driver
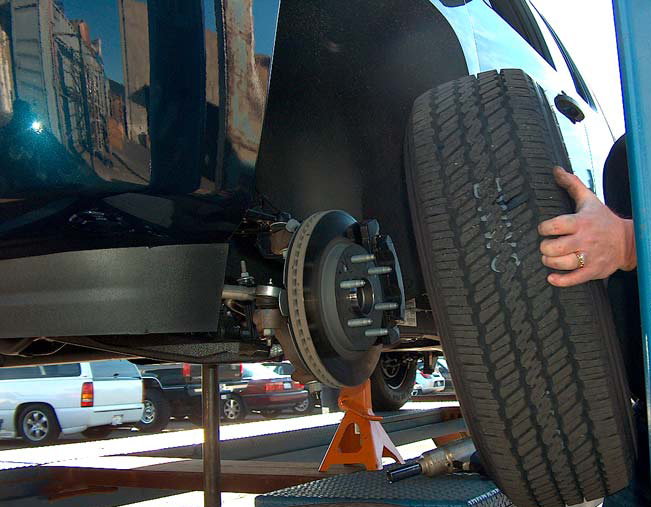
Step 1 – Jack up truck
Start by using the lug nut wrench to partially loosen the lug nuts, then find the appropriate jacking spot for your truck, and jack it up using the floor jack. Once the truck is up in the air, secure it with jack stands, fully remove the lug nuts and remove the wheel.
(Related Article: How to Jack Up Your Silverado - Chevroletforum.com)
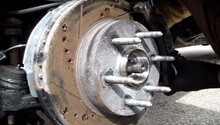
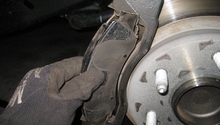
Step 2 – Remove brake assembly
In order to remove the spindle where the bearing is housed, you must first remove the brake assembly. Start by using the 19mm socket and ratchet wrench to remove the two bolts that hold that caliper in place. Then use the 18mm socket to remove the caliper bracket. Next, use the T30 Torx driver to remove the Torx screw that holds the rotor in place.

Figure 2. Remove main caliper bolts. 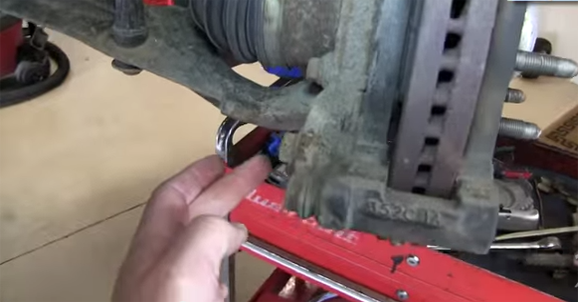
Figure 3. Undo caliper bracket bolts.
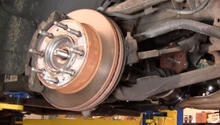
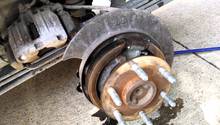
Step 3 – Remove hub
The hub is the piece to which the caliper was attached to and which has the main lugs where the wheel is mounted. The hub is held in place by three 15mm bolts; use the 15mm socket and ratchet to remove these. You will most likely need the breaker bar at this point as well. Once the three bolts are removed, unclip the ABS wiring sensor, and you can now pull off the hub assembly.

Figure 4. One of the three bolts located on the backside of the hub. 
Figure 5. Once the hub bolts have been removed, the hub can be pulled away.
Step 4 – Install new bearing hub
Once the old bearing hub assembly has been removed, it is a good time to clean up any old grease, dirt or gunk that has built up in the spindle area. After a good cleaning, you can install the new bearing hub assembly into the place where the old one was. From this point on, re-installation is in exact reverse order. Follow these steps:
- Install new hub.
- Replace three main hub bolts.
- Reconnect ABS sensor cable.
- Mount brake rotor and replace Torx screw.
- Mount caliper bracket.
- Install brake pads on brake caliper.
- Remount brake caliper.
- Mount wheel back on.
- Hand tighten lug nuts.
- Lower truck to the ground.
- Torque lug nuts to the right specs.
Featured Video: How to Replace Front Wheel Bearings Silverado '07-'13
Related Discussion and Site
- Common Bad Wheel Bearing Issues - Chevroletforum.com
- Repair Cost for Parts and Labor on Silverado - Repairpal.com