Chevrolet Silverado 2014-Present: Lowering Kit Reviews and How to Lower Your Truck
Many people prefer the ride and styling of their Chevy Silverado when it's been lowered a couple of inches. How low you want to go will determine the price and how difficult the installation will be.
This article applies to the Chevrolet Silverado 1500 (2014-present).
Lowering your Chevrolet Silverado 1500 can be done safely and can be dependable thanks to the companies that have taken the time to engineer kits for all ranges of drop. With proper installation, ride quality should not be adversely affected, and most brands offer replacement shocks designed just for your lowered truck. A lowering kit will also improve your truck's handling by creating a lower center of gravity.
Table of Contents
Lowering Kits Overview
Several manufacturers make lowering kits for the 2014+ Silverado. Other than BellTech, each manufacturer has other size options for lowering your truck depending on how much you want to spend or how much of a drop you want.
Mcgaughys |
Rough Country |
BellTech |
DJM Suspension | |
|---|---|---|---|---|
Price |
$678.27 | $199.95 | $66.90 | $639.20 |
Difficulty |
Hard | Hard | Moderate | Hard |
Size |
3/5", 4/6" and 4/7" adjustable drop | 2/4" drop | 2" to 3" rear drop | 2/4" drop |
Rating |
Recommended | Recommended | Recommended | Recommended |
Warranty |
Lifetime warranty on spindles, otherwise 1 year warranty | Lifetime replacement warranty on hard suspension components | Non-transferable lifetime warranty | Non-transferable lifetime warranty |
Best Quality: Mcgaughys
Best Value: Rough Country
Each company listed produces a lowering kit that has been tested and bought by many Silverado owners. Some (Belltech) are preferred more than others, but Belltech has been known to frequently run out of stock.
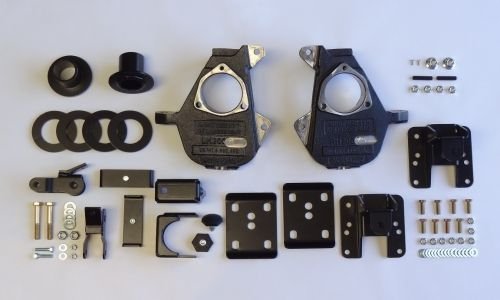
Mcgaughys
Price – $678.27
Difficulty – Hard
Size – 3/5", 4/6" and 4/7" adjustable drop
Rating – Recommended
Warranty – Lifetime warranty on spindles, otherwise 1 year warranty
Mcgaughys lowering kit includes 2" front drop spindles, front adjustable coil spring mounts, a rear flip kit, rear lift hangers, and rear shock extenders. They recommended you purchase the 2050 rear shocks. Recommended if you're looking for an adjustable kit with great warranty.
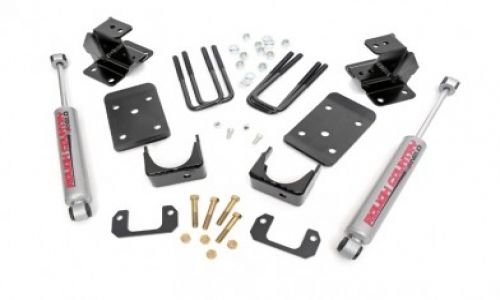
Rough Country
Price – $199.95
Difficulty – Hard
Size – 2/4" drop
Rating – Recommended
Warranty – Lifetime replacement warranty on hard suspension components
Rough Country brings an affordable lowering kit to the 2014+ Silverado market. Their kit utilizes lowering spacers for the front with grade 9 hardware. For the rear, a spring hanger bracket, axle saddles, u-bolt plates, and new u-bolts are used. This kit also includes N2.0 series rear shocks. Recommended if you're looking for an affordable kit.
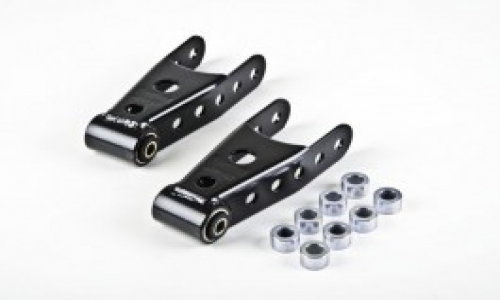
Belltech
Price – $66.90
Difficulty – Moderate
Size – 2-3" rear drop
Rating – Recommended
Warranty – Non-transferable lifetime warranty
Belltech offers a lowering kit for the rear of the 2014+ Silverado. They fabricate rear shackles that are adjustable. The shackles are made from heavy gauge die-stamped steel that have been powder coated to ensure a long service life. Recommended if you're looking for a rear lowering kit without spending too much money.
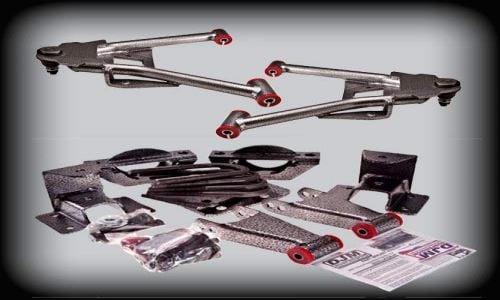
DJM Suspension
Price – $639.20
Difficulty – Hard
Size – 2/4" drop
Rating – Recommended
Warranty – Non-transferable lifetime warranty
DJM Suspension has engineered a lowering kit that includes new lower control arms. This keeps your truck's alignment at factory levels and helps eliminate wheel clearance issues. Their kit also relocates the factory leaf springs using DJM's exclusive pinion adjustable axle brackets. Recommended if you're looking for quality kit while keeping the factory alignment.
How to Install Lowering Kit
This lowering kit how-to is not specific to any company's product. It serves as a general procedure for installation. The lowering kit you decide to go with may include more or less components that may require fabrication and modification. Be sure to check the owner's manual provided with it.

Materials Needed
- Metric socket set
- Metric wrench set
- 8mm Allen wrench or socket
- Electric drill
- 11/32" drill bit
- 15/32" drill bit
- Vise grips
- Die grinder
- Floor jack and jack stands
- Torque wrench
- Safety glasses
- C-clamps
If fabrication is required, you may need some or all of these tools:
- Plasma cutter
- Die grinder
- Air chisel
- Cut-off wheel
Step 1 – Raise and support the front of the vehicle and remove the wheels
Raise the front of the vehicle with your floor jack, and position jack stands on each frame rail behind the wheel wells. Loosen the wheels before you raise the truck with a 21mm socket if you do not have an air or electric impact wrench.
(Related Article: How to Jack Up Your Truck - ChevroletForum.com)

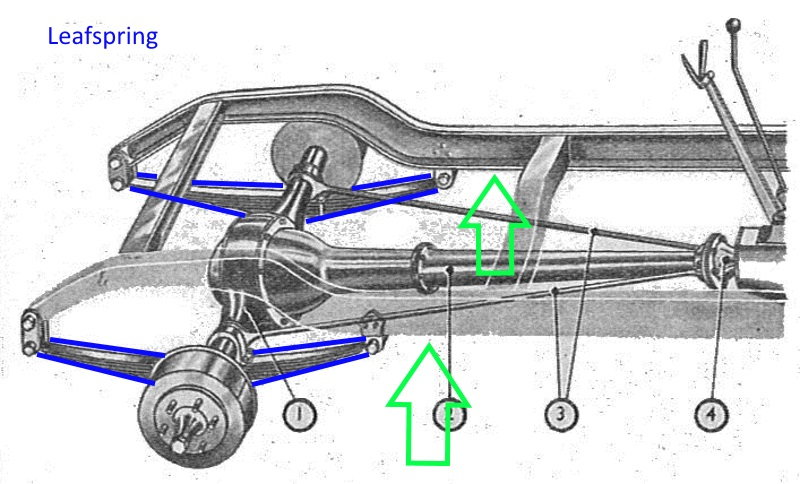
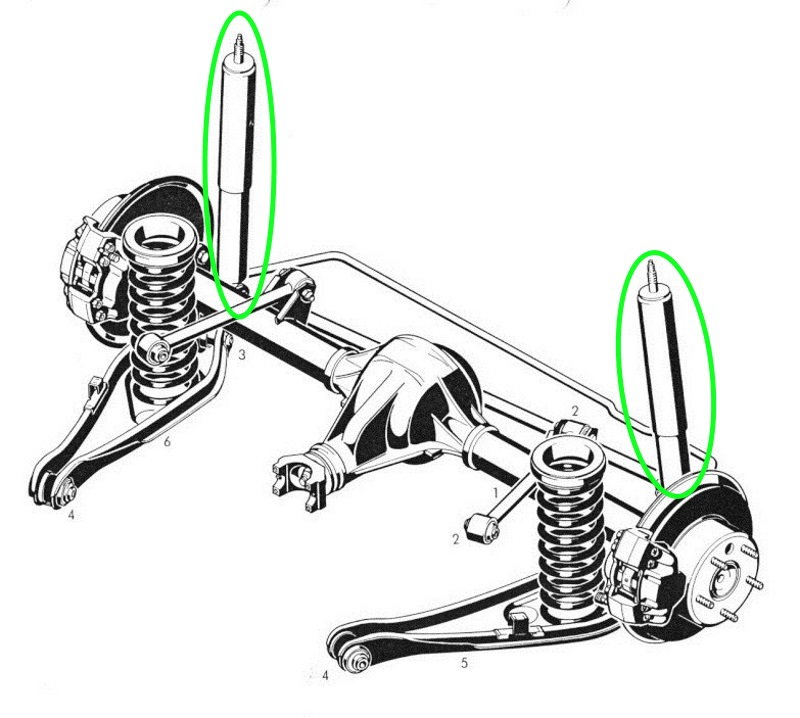
Figure 1. Place the jack stands in the positions indicated by the green arrows. 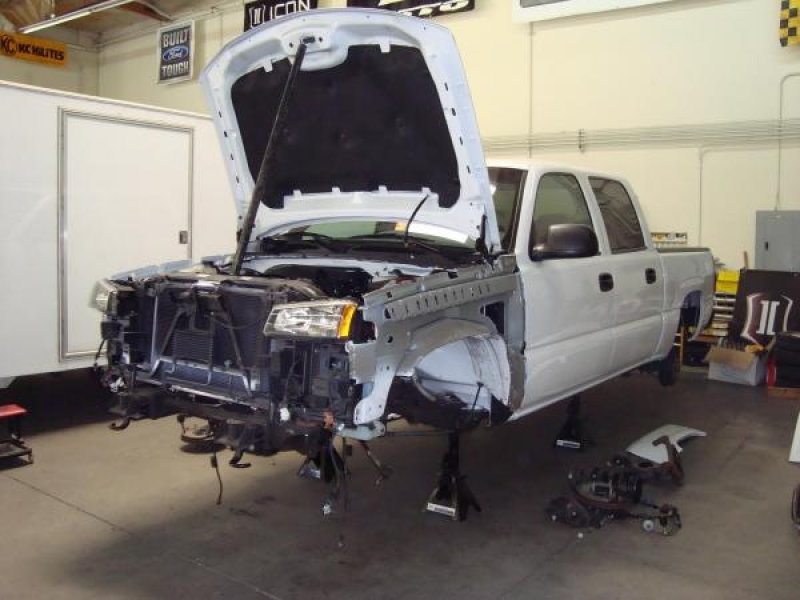
Figure 2. A properly-hoisted Silverado.
Step 2 – Remove the front struts
Check with your kit's instructions for the specifics on this step. Most kits provide only strut spacers depending on the size of the lowering kit and Steps 3-6 are not required.
- Loosen the three nuts on top of the strut with an 18mm wrench.
- Loosen the bottom two strut bolts using a 15mm socket or wrench.
Warning
Do nut loosen the middle retaining nut; it is under extreme pressure.

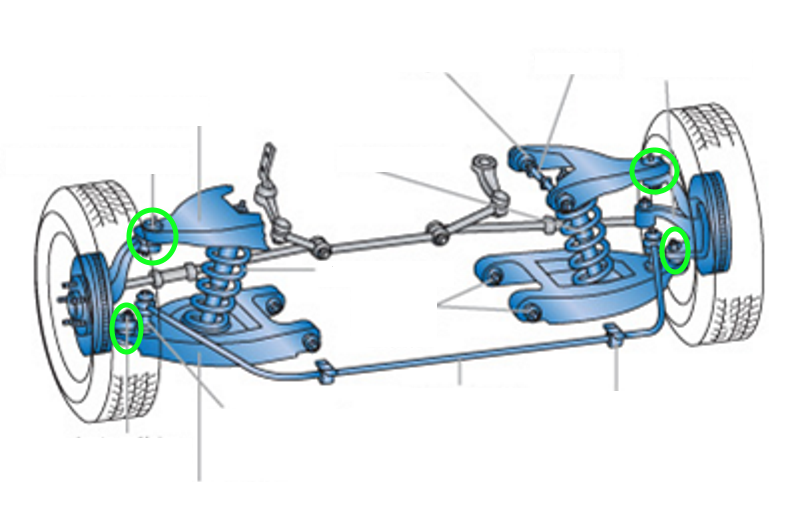
Figure 3. The green circles indicate the three nuts at the top of the strut and the two bolts at the bottom. 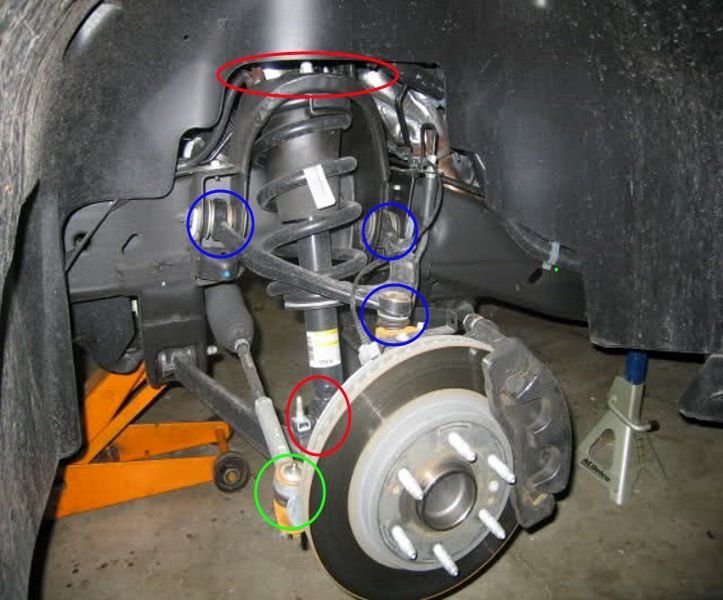
Figure 4. The front strut nuts and bolts (red circles) will be removed. The tie rod (green circle) will be removed in the next step. The upper control arm bolts/upper ball joint are circled in blue.
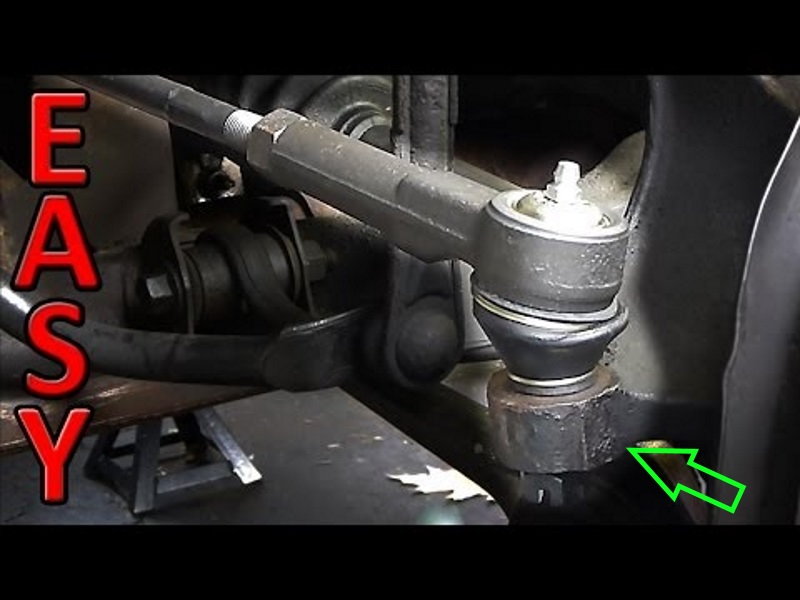
Step 3 – Remove the tie rods from the spindles
Use your hammer and hit the spindle near the tie rod end to unseat the taper.
Do not do this if your spindle is aluminum. Alternatively, you can use a pickle fork or a tie rod pulling tool. Be careful not to tear the tie rod boot.
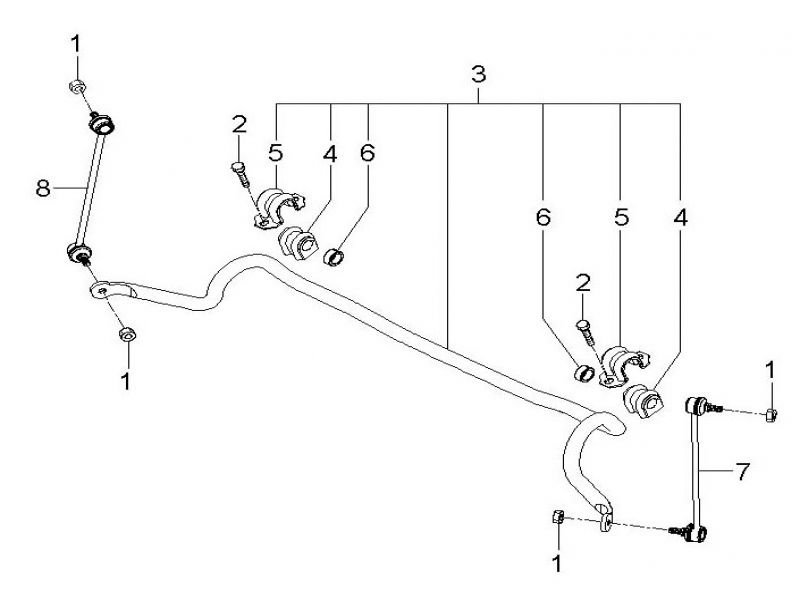
Step 4 – Remove the sway bar
Remove the nuts holding the sway bar to the end links. Then remove the four bolts holding the sway bar to the frame. They are held in place by caps.
Step 5 – Remove the lower ball joints
Loosen the nut holding the lower ball joint to the spindle. Remove the ball joint the same way you removed the tie rod end.
Remember not to strike your spindle if it's aluminum. Use a pickle fork, pry bar or ball joint removal tool. Refer to Figures 6 and 7 for lower ball joint removal.
Step 6 – Remove the lower control arms
Pivot bolts secure the lower control arms to the crossmember.
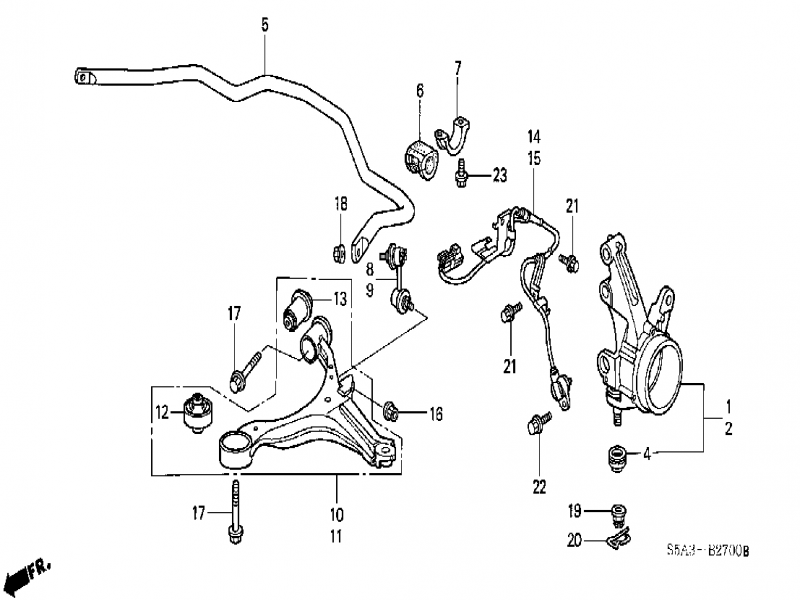
Step 7 – Install the new lower control arms and/or strut spacers
- If your kit included lower control arms, install them in the same location as the original. Use the appropriate grease and new hardware.
- Re-install the factory ball joints, sway bars, and tie rod ends.
- If your kit included front strut spacers, install those between the strut and the lower control arm. The rough country kit has you move the strut below the lower control arm then placing a spacer between the strut and lower control arm. Some kits may require modification before this is completed.
- Install the wheels and torque them between 100-140 ft lb. depending on wheel type.
- Lower the front of the truck and get ready to begin the rear installation.
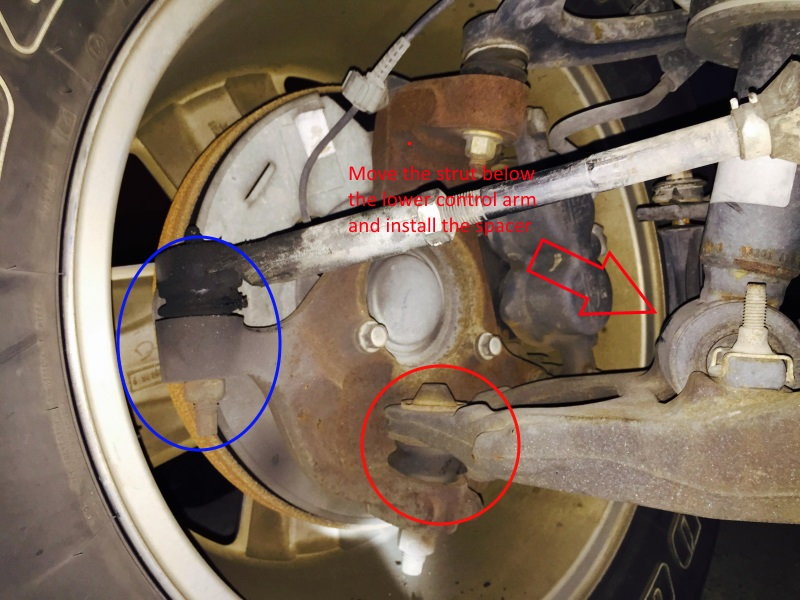
Figure 9. Re-install the tie rod (blue circle) and lower ball joint (red circle) with the new lower control arms if provided. 
Figure 10. A strut spacer installed.
Step 8 – Raise and support the rear of the truck and remove the rear wheels
- Lift the truck with your floor jack and install jack stands onto each frame rail.
- Position the jack stands forward of the leaf springs.
- The wheels can be removed with a 21mm deep socket.
Step 9 – Remove the bump stops
- Use your cut-off wheel to remove the bump stops. Cut along the base of the bump stop. Be careful not to cut the frame rail.
- They are located on the frame rails above the leaf springs and are cube or oval-shaped.
- Follow the specific instructions included in your kit for your new bump stop installation. Some kits require you to cut and re-drill holes to secure the new bump stop.
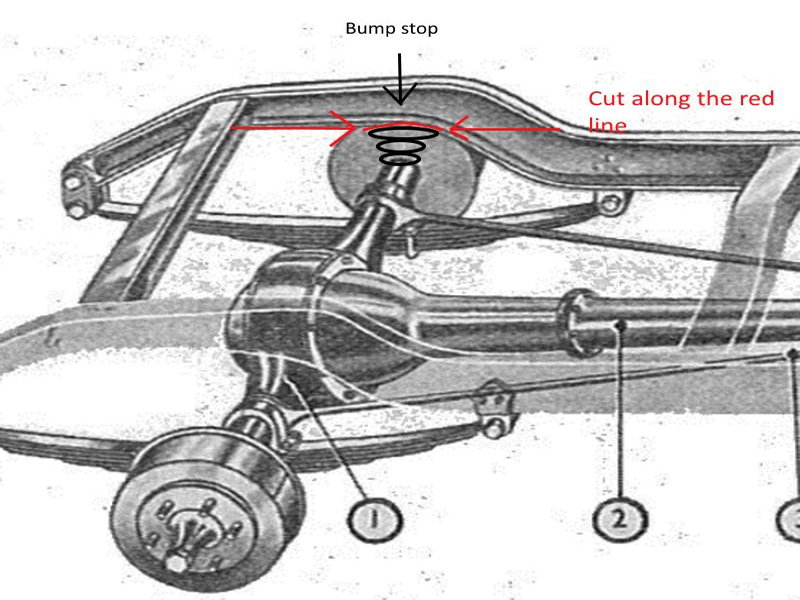
Figure 12. Cut the bump stops along the red line between the bump stop and frame rail. 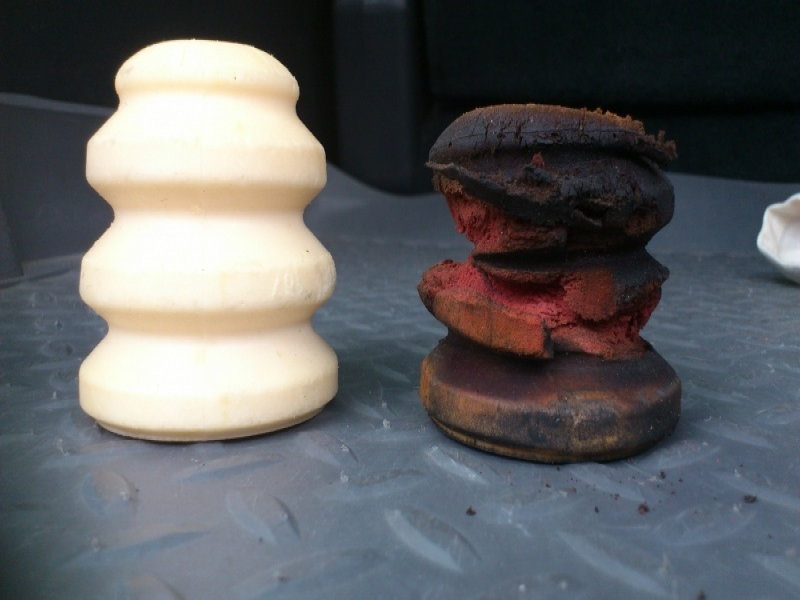
Figure 13. New and old bump stops. 
Figure 14. Inside the red circle is an orange bump stop.
Step 10 – Remove the rear shocks and support the rear axle
- The rear shocks are held in place by one bolt at the top and bottom of the shock.
- There is a brake line that runs across the top of the rear differential. Remove it from the bracket holding it to the differential.
- Position your floor jack under the rear differential and slightly support it. You will need to move the rear axle around later as you remove the leaf springs and shackles.

Step 11 – Remove the u-bolts and leaf springs
- Remove the u-bolts on both the driver and passenger side using a 21mm socket.
- Before proceeding, you must remove your tow hitch before you remove the leaf springs if your Silverado is equipped with one.
- Begin removing the passenger side leaf spring by loosening two bolts and two nuts holding the leaf spring to the truck. You will need a 24mm and 21mm socket as well as a 12mm and 10mm wrench.
- Your kit may require you to unbolt the leaf springs and reverse the center bolt. You will need to hold the leaf spring together using c-clamps while the leaf spring is unbolted. Install the the c-clamp on the middle leaf spring.
- Now move to the driver’s side. Remove the rear bolt in the frame mount, then the front bolt on the shackle. Do not remove the shackle completely. You will need to move the axle over to the passenger side to make room for the removal of the leaf spring.

Figure 17. A leaf spring. You can see how the u-bolts at the center of the leaf spring hold it down onto the rear axle. The shackles are connected at the ends of the leaf spring and mount onto the frame rails. 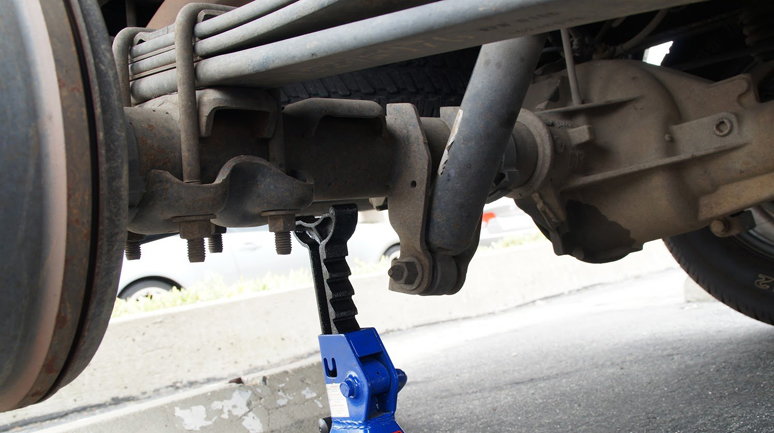
Figure 18. U-bolt holding the leaf spring.
Step 12 – Replace the shackles/shackle hangers
- This step will probably require use of an air chisel and/or a die grinder. There are three rivets mounted on the factory hanger brackets that must be removed. You may also need to drill these holes larger.
- If your kit has new shackles included, install them. Otherwise, bolt the factory shackles back onto the truck with the new shackle hangers.
- You may have to remove some ABS brake lines from their brackets as they are in the way of the new mounting hardware. The lines are routed along the frame rails on both sides of the truck.

Step 13 – Install leaf springs and new axle plates/u-bolts
- Place the axle plates over each side of the axle and set the axle to the correct height. Secure the axle plates with new u-bolts.
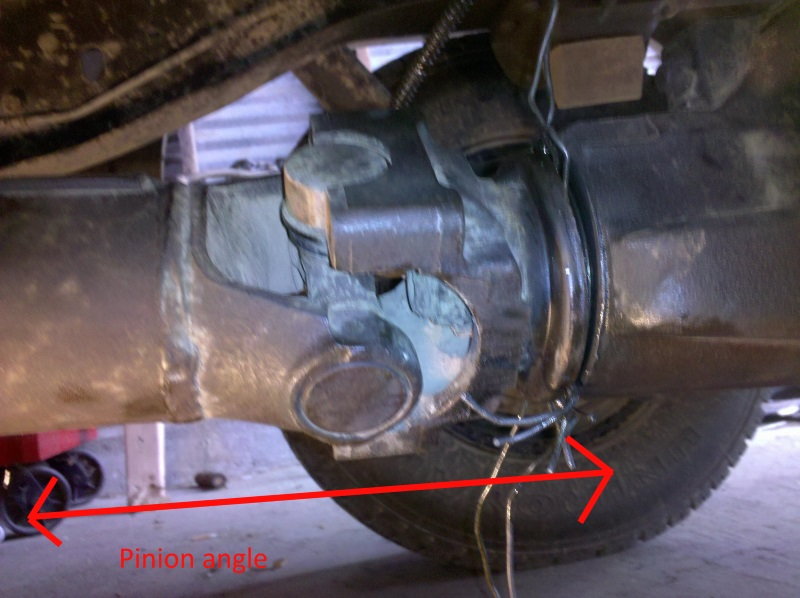
- You will want to measure the pinion angle to be sure it's at the specification in your lowering kit's instructions.
Step 14 – Finish the rear installation
- Re-install all brake line hangers, and make sure all removed/installed components have been torqued correctly.
- Install the new rear shocks and factory hitch assembly.
- Re-install the wheels and torque them from 100-140 ft lb. depending on the type of wheel you have (larger studs receive more torque).
- Once you lower the truck down, look for any loose components underneath. Ensure there is proper clearance between components.
- Turn the steering wheel from lock to lock. The steering system should not come into contact and become blocked/binded.
- After a few hundred miles, re-check the torque on the bolts.
Related Sites
- Belltech Installation - Belltech.com
- DJM Suspension Installation - Djmsuspension.com