Chevrolet Silverado: How to Change a Tire
Do you know what to do when you get a flat tire? After reading this, you will.
This article applies to the Chevrolet Silverado GMT800, GMT900, and K2XX (1999-Present).
Every now and then, drivers experience getting a flat tire. Some debris in the road, a nail in the driveway, etc. It's a good thing most cars today are equipped with spare tires. There are also those times where your vehicle's tire(s) are just worn and need replacement. Whatever the case, it is a good thing to know how to change your tire appropriately.

Materials Needed
- Lug nut wrench
- Hydraulic jack
- Jack stands
- Wheel chocks
- Mallet
- Flat tip screwdriver
Step 1 – Safety first
Before you can actually change out the flat tire, you'll need to secure the vehicle safely.
- Pull over to the side of the road.
- Turn the hazard lights or light flares on.
- Ensure the road is leveled and flat.
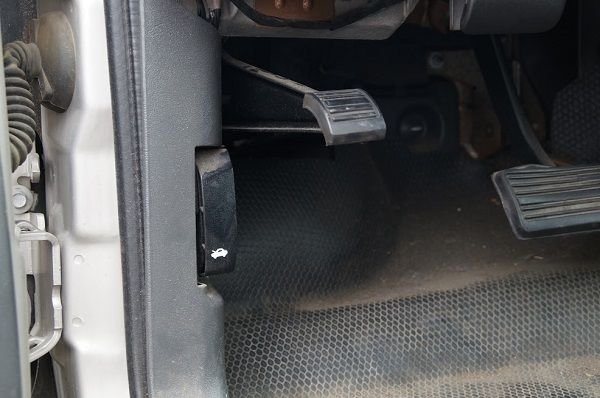
-
Pull up or depress the e-brake.
Pro Tip
On manual cars, make sure the car is in gear and with the brake engaged.
Step 2 – Raise the vehicle
Depending which wheel is flat, you'll need to raise that part of the vehicle.
- Loosen the lug nuts while the car is still on the ground.
- Jack the vehicle up at the appropriate jacking points.
- Secure the chassis with jack stands.
-
Chock the wheels.

Pro Tip
You will want to place the chocks on the wheels opposite to the ones that will be raised: rear tires if the flat is in the front, and front tires if flat is on the rear.
(Related Article: How to Jack Up Your Truck - ChevroletForum.com)
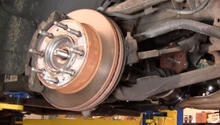
Step 3 – Remove flat tire
Now that the vehicle is secured and above level ground, the flat tire can be removed.
- Using the lug nut wrench, remove the lug nuts on the flat tire.
-
Remove the flat tire and set it aside.

Pro Tip
If lug nuts are not exposed, a hub cap cover may be covering them. Use a flat tip screw driver to pry and remove the cover. If the wheel does not lift right off, you may need to strike the lower part of the back of the tire with the rubber mallet a couple of times.
Step 4 – Replace flat tire
Now that you have removed the flat tire, the spare can go on.
- Secure the spare tire to the lug nut holes or studs.
-
Tighten lug nuts (alloy wheels: 85 ft./lbs.; steel wheels: 100 ft./lbs.)

Step 5 – Lower the vehicle
Now that the spare is on, everything can be restored and you can continue on your journey.
- Slightly raise the vehicle to clear the jack stands, and remove them.
- Remove the wheel chocks.
- Lower the vehicle to the ground.
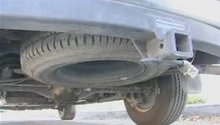
- Secure the flat tire in spare tire's recess.
- Remove, disassemble, and replace jack.
Featured Video: How to Change a Flat Tire
Related Discussions
- Silverado Car Jack - ChevroletForum.com
- Tools for Lowering Spare/Jack - ChevroletForum.com
- Tire Jack Location - ChevroletForum.com