Removing interior panels on my 98...
 February 2nd, 2008, 2:18 PM
#1
CF Beginner
Thread Starter

Join Date: Sep 2007
Posts: 6
Likes: 0
Received 0 Likes
on
0 Posts
I am replacing the rear speakers on my 98 single cab silverado...
I just need to know how to remove those panels so I can get to it
I just need to know how to remove those panels so I can get to it
 February 19th, 2008, 2:22 PM
#2

should be the same as my 01:
remove the mirror cover panel(tirangular panel above door panel) by popping out the two clips on the front and then lifting up
pop off the handle cover
pop out the light and pull out the plug and bulb
pop out the lock slide so it soes not get hooked on the pin when you lift up on the panel
pry up and remove the assembly for the window and lock switches
unplug the lock and window plug
there are two screws you need to remove
one is behind the window and lock switch assembly
the other is right on the other side of the handle isvisable
press in and lift up the panel and it will lift up a couple inches then you can remove it- it takes a little pressure
to install rest the lower tabs on the highest notch, this aligns the other clips, then lower into place
April 26th, 2008, 1:29 AM
#3

Nah...totally different to the 01.
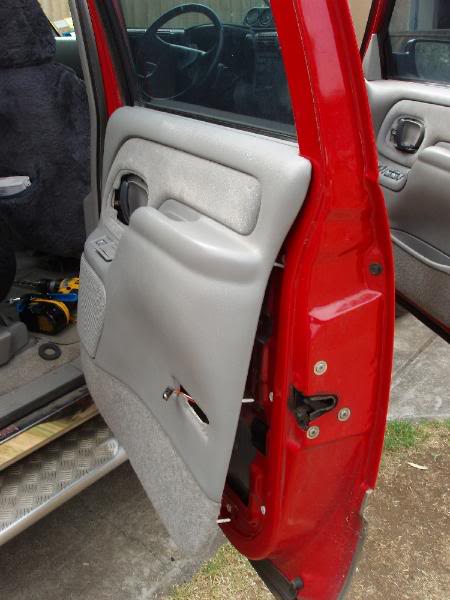
Here's how to do it. (this is a 'how to' I put together for another forum on replacing door handles).
Changing door handles on an OBS (98) Suburban.
Start with removal of the interior door trim and panel.
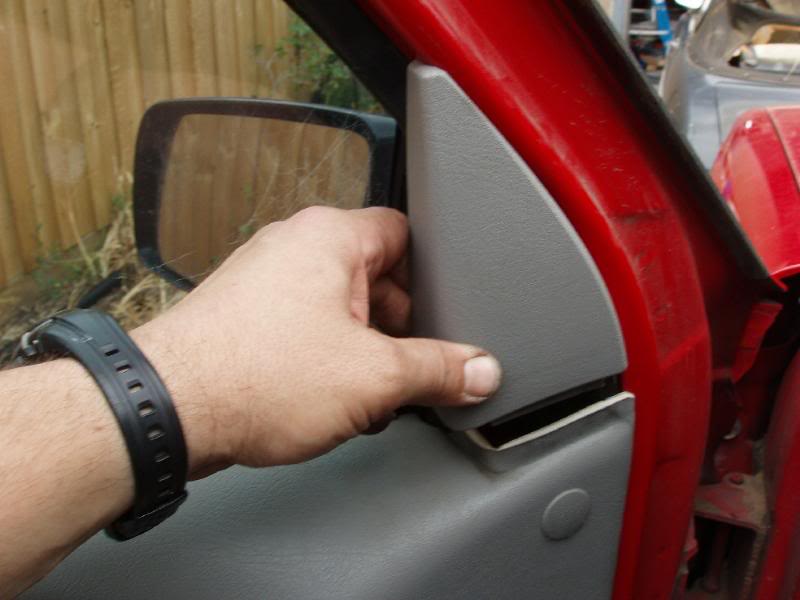
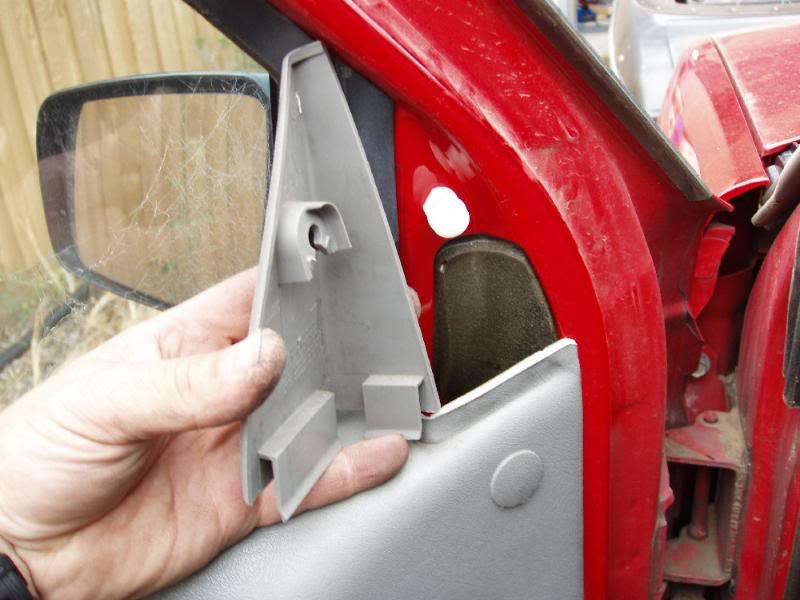
Firmly pull the triangle piece (plastic piece covering the back of the mirror mounting screws) until it releases. It�s very tight and requires quite a bit of force.
Once released a little it can be slid up and off.
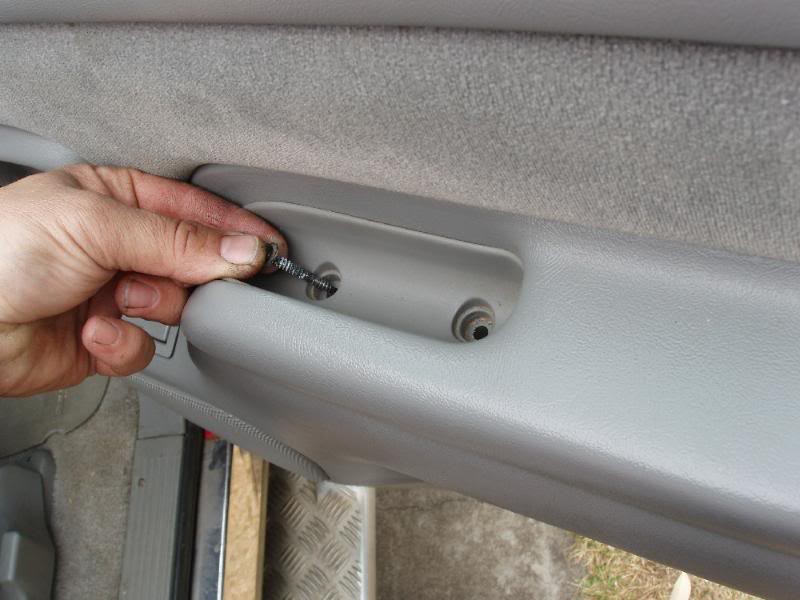
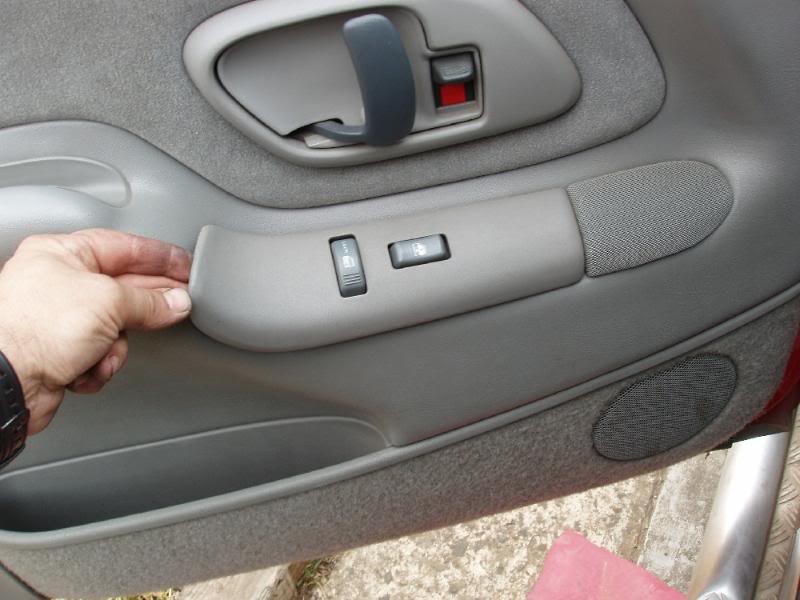
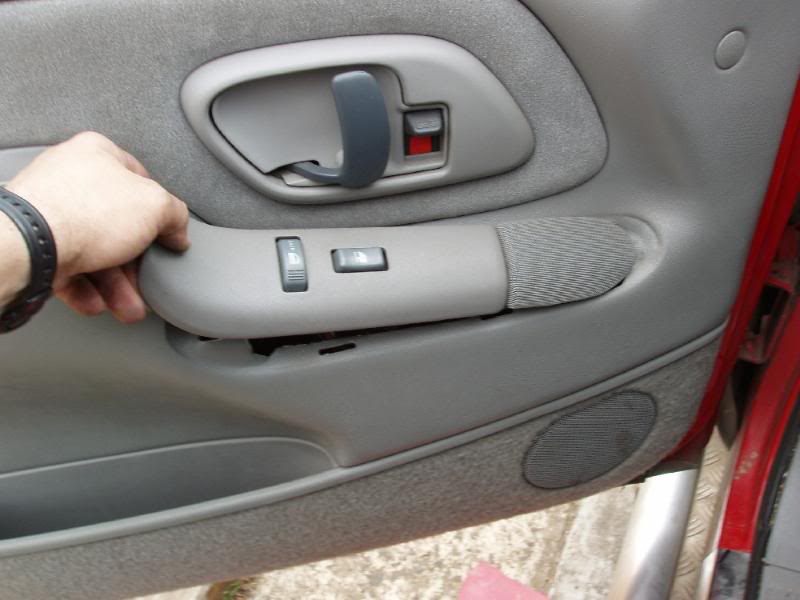
Remove the two Phillips head screws located in the armrest.
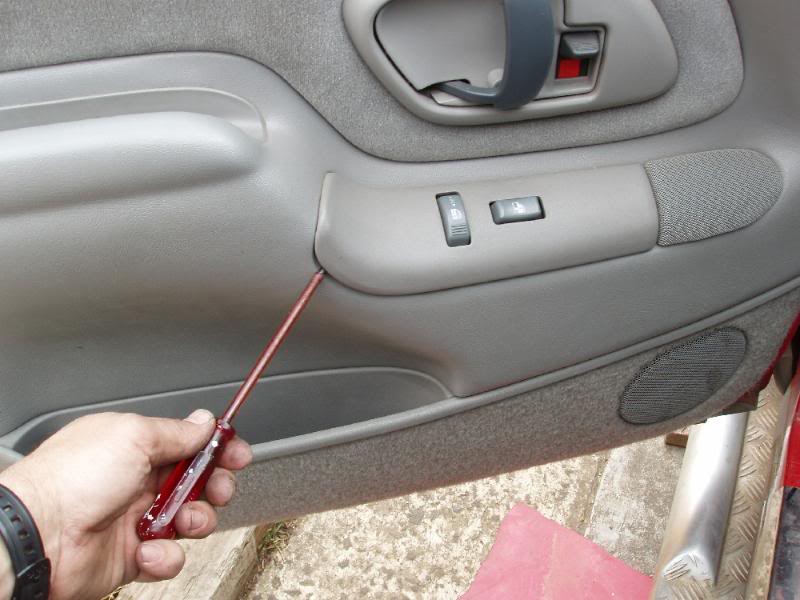
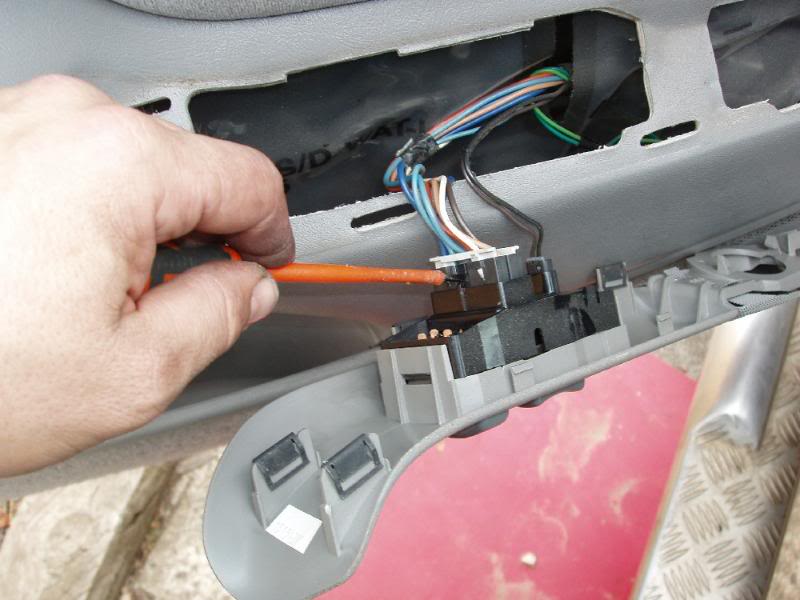
Remove the switch panel/speaker by lifting the rear section straight up until the clips are free. Slide the switch panel backward until the front tab is clear and remove the panel and disconnect the plugs going to the speaker and switches.
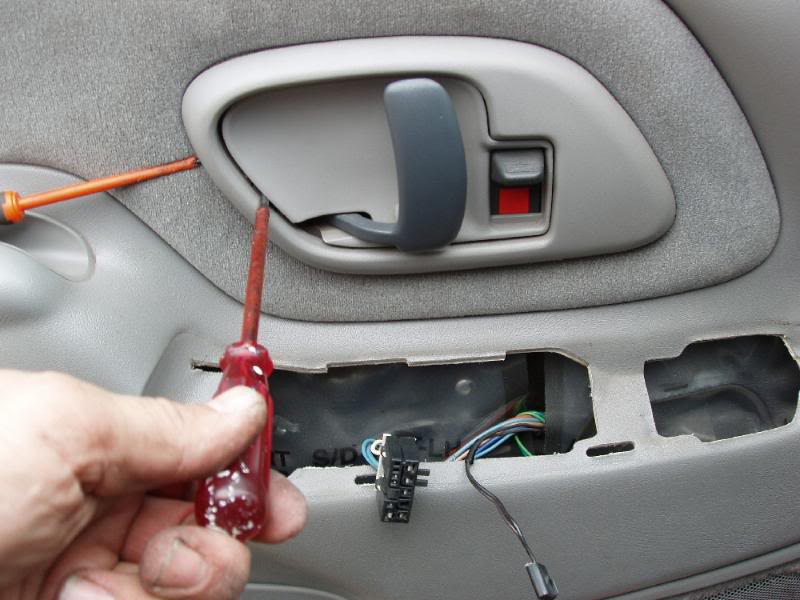
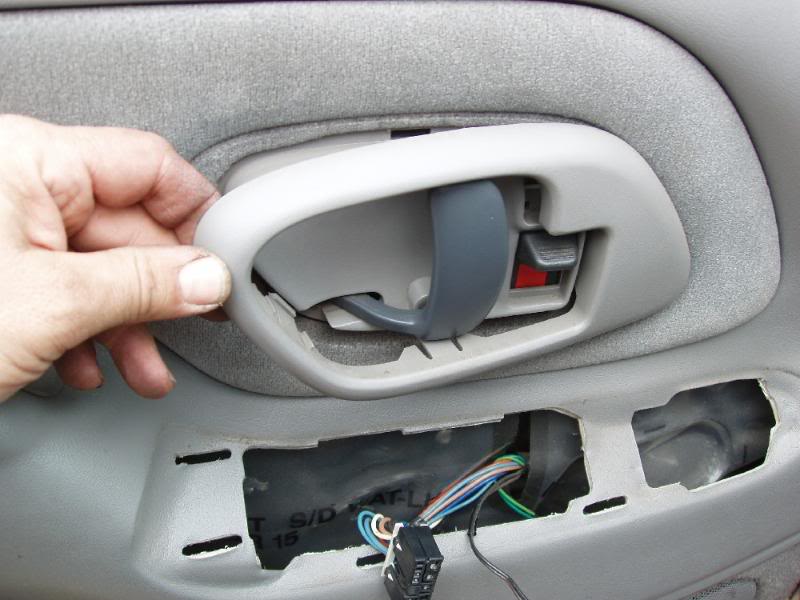
Remove the door handle bezel.
Use a small screwdriver to put pressure on the bezel as you slide a bigger, flat bladed screwdriver between the bezel and handle assembly at the tree points shown in the pictures.

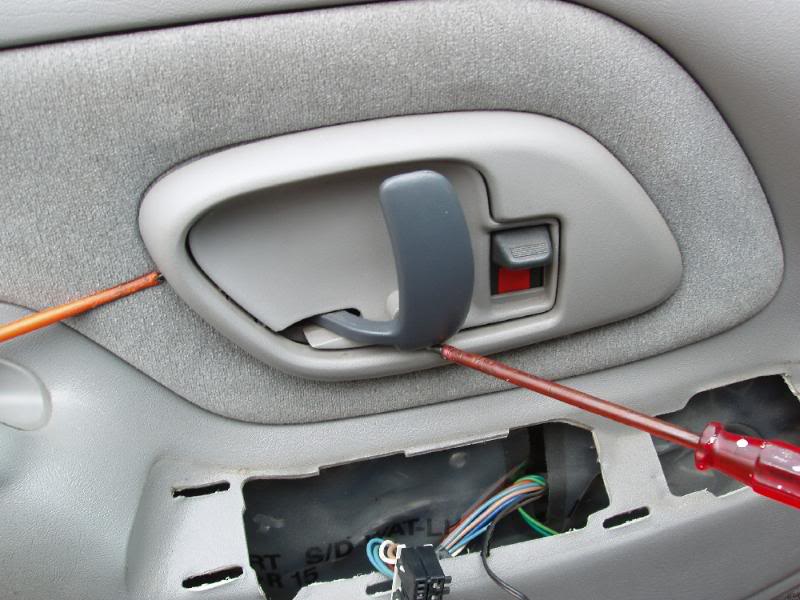
After the three clips have �popped� releasing the rear section of the bezel, gently push the bezel forward to release the front clip/tab.
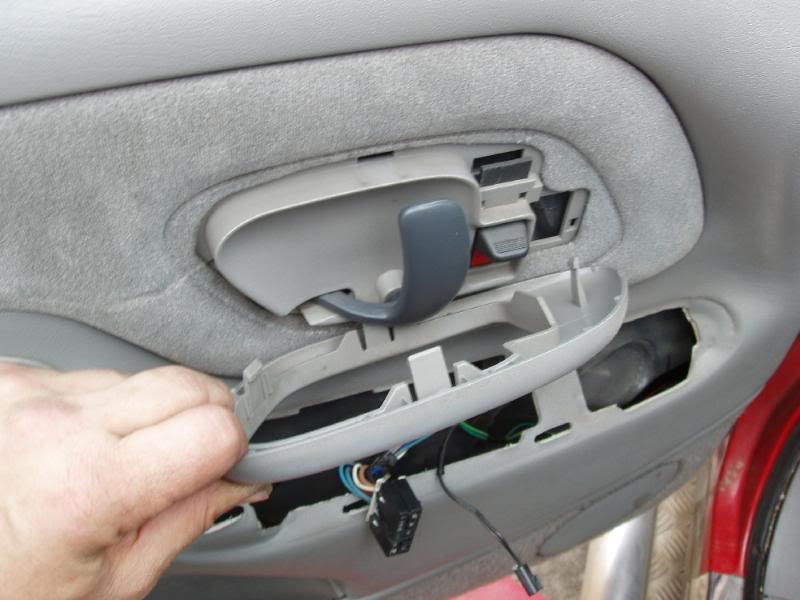
Work your fingers under one corner of the door trim and pull firmly.
Keep working your way around pulling in the area�s where you can feel the trim is fixed to the door. Get as close to the fixing plugs as possible and pull HARD!
You may break a couple of fixing plugs in this process so it�s advisable to buy some spares before undertaking this process.

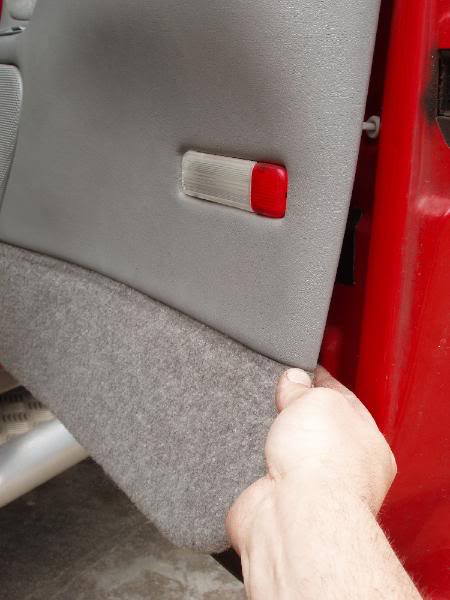
Once all of the fixing plugs have been released, the door trim can be lifted up and away from the door. The top of the trim hooks down over the top of the door between the top of the door and the window glass.
Here's how to do it. (this is a 'how to' I put together for another forum on replacing door handles).
Changing door handles on an OBS (98) Suburban.
Start with removal of the interior door trim and panel.
Firmly pull the triangle piece (plastic piece covering the back of the mirror mounting screws) until it releases. It�s very tight and requires quite a bit of force.
Once released a little it can be slid up and off.
Remove the two Phillips head screws located in the armrest.
Remove the switch panel/speaker by lifting the rear section straight up until the clips are free. Slide the switch panel backward until the front tab is clear and remove the panel and disconnect the plugs going to the speaker and switches.
Remove the door handle bezel.
Use a small screwdriver to put pressure on the bezel as you slide a bigger, flat bladed screwdriver between the bezel and handle assembly at the tree points shown in the pictures.
After the three clips have �popped� releasing the rear section of the bezel, gently push the bezel forward to release the front clip/tab.
Work your fingers under one corner of the door trim and pull firmly.
Keep working your way around pulling in the area�s where you can feel the trim is fixed to the door. Get as close to the fixing plugs as possible and pull HARD!
You may break a couple of fixing plugs in this process so it�s advisable to buy some spares before undertaking this process.
Once all of the fixing plugs have been released, the door trim can be lifted up and away from the door. The top of the trim hooks down over the top of the door between the top of the door and the window glass.
August 7th, 2009, 5:20 PM
#4
CF Beginner

Join Date: Aug 2009
Posts: 2
Likes: 0
Received 0 Likes
on
0 Posts
Should anyone have pictures of removing rear interior panels of cargo area, I would really love to see them. The ones removing the door panels are great.
Thanks
Thanks
August 17th, 2009, 4:01 PM
#6
CF Beginner

Join Date: Aug 2009
Posts: 4
Likes: 0
Received 0 Likes
on
0 Posts
Great tutorial so far... I have gotten as far as posted but am now faced with a pretty securely attached door latch mechanism...Any advice on how to proceed from there. See below...
August 20th, 2009, 1:12 PM
#7
CF Beginner
Join Date: Aug 2009
Posts: 4
Likes: 0
Received 0 Likes
on
0 Posts
OK, drilled out the rivet. SLid the old part out ...slid the new one in and put in an aluminum rivet. Pretty simple once done.
I think the Al rivet will work rather than a metal screw. Doesnt seem to be a lot of stress on the rivet.
We'll see, if it doesn't should be very simple now.
thanks Howard for your pictorial, it was the most helpful thing I found.
Rob
I think the Al rivet will work rather than a metal screw. Doesnt seem to be a lot of stress on the rivet.
We'll see, if it doesn't should be very simple now.
thanks Howard for your pictorial, it was the most helpful thing I found.
Rob
Trending Topics
August 23rd, 2009, 5:26 PM
#9
CF Beginner

Join Date: Aug 2009
Posts: 4
Likes: 0
Received 0 Likes
on
0 Posts
DUDE. . . so far the best info on the web. I have been struggling w/it for two hours. . . will let you know how it worked. 3 seconds later POP right off!
I cant say thank you enought for taking your time to post this for the rest of us morons out here.
THANK YOU!
Big Dave
I cant say thank you enought for taking your time to post this for the rest of us morons out here.
THANK YOU!
Big Dave
October 11th, 2009, 2:36 AM
#10
CF Active Member
Join Date: May 2009
Location: Anchorage, AK
Posts: 131
Likes: 0
Received 0 Likes
on
0 Posts
Very helpful & the pics are nice to refer to !
My baby just bought me speakers & and an amp
&& is planning on getting me some subs & a deck
so I'm excited to install my speakers & finally get
my sound system in !
My baby just bought me speakers & and an amp
&& is planning on getting me some subs & a deck
so I'm excited to install my speakers & finally get
my sound system in !

Thread
Thread Starter
Forum
Replies
Last Post
pervitizm
Tahoe & Suburban
3
March 25th, 2009 10:09 AM
Vox
Express & G-Series Vans
3
December 22nd, 2008 7:47 PM
yamaharacer498
OLD - PRIVATE For Sale / Trade Classifieds
0
July 4th, 2008 2:27 AM