Powered Rear Quarter Windows Project
 September 23rd, 2017, 2:06 PM
#1
CF Beginner
Thread Starter

Join Date: Aug 2017
Posts: 7
Likes: 0
Received 0 Likes
on
0 Posts
Hey everyone,
figured I'd post this for people that plan to do this for themselves. I was following this guide for most of the project: Installing Power Rear-Quarter Vent Window Motors on My Chevy Venture (This tutorial did a really good job on covering how to remove the manual arm, no video/pictures from me on it sorry)
Only downside was I didn't have the connectors hanging back there due to the fact I had the complete base model of the Chevy Venture (So only power locks)
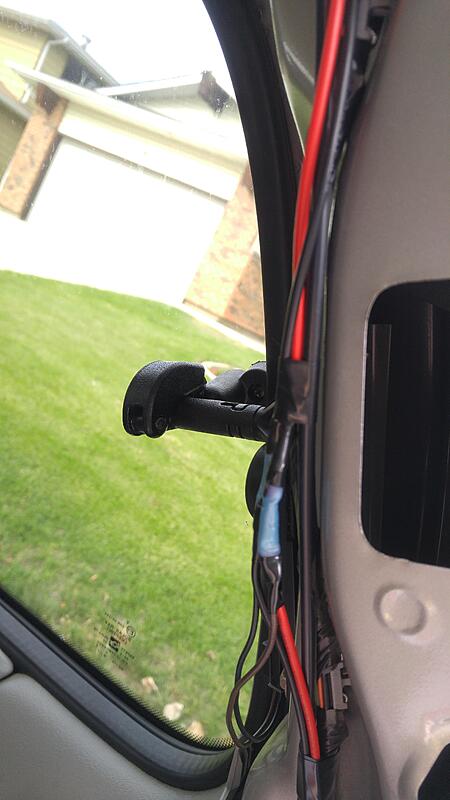
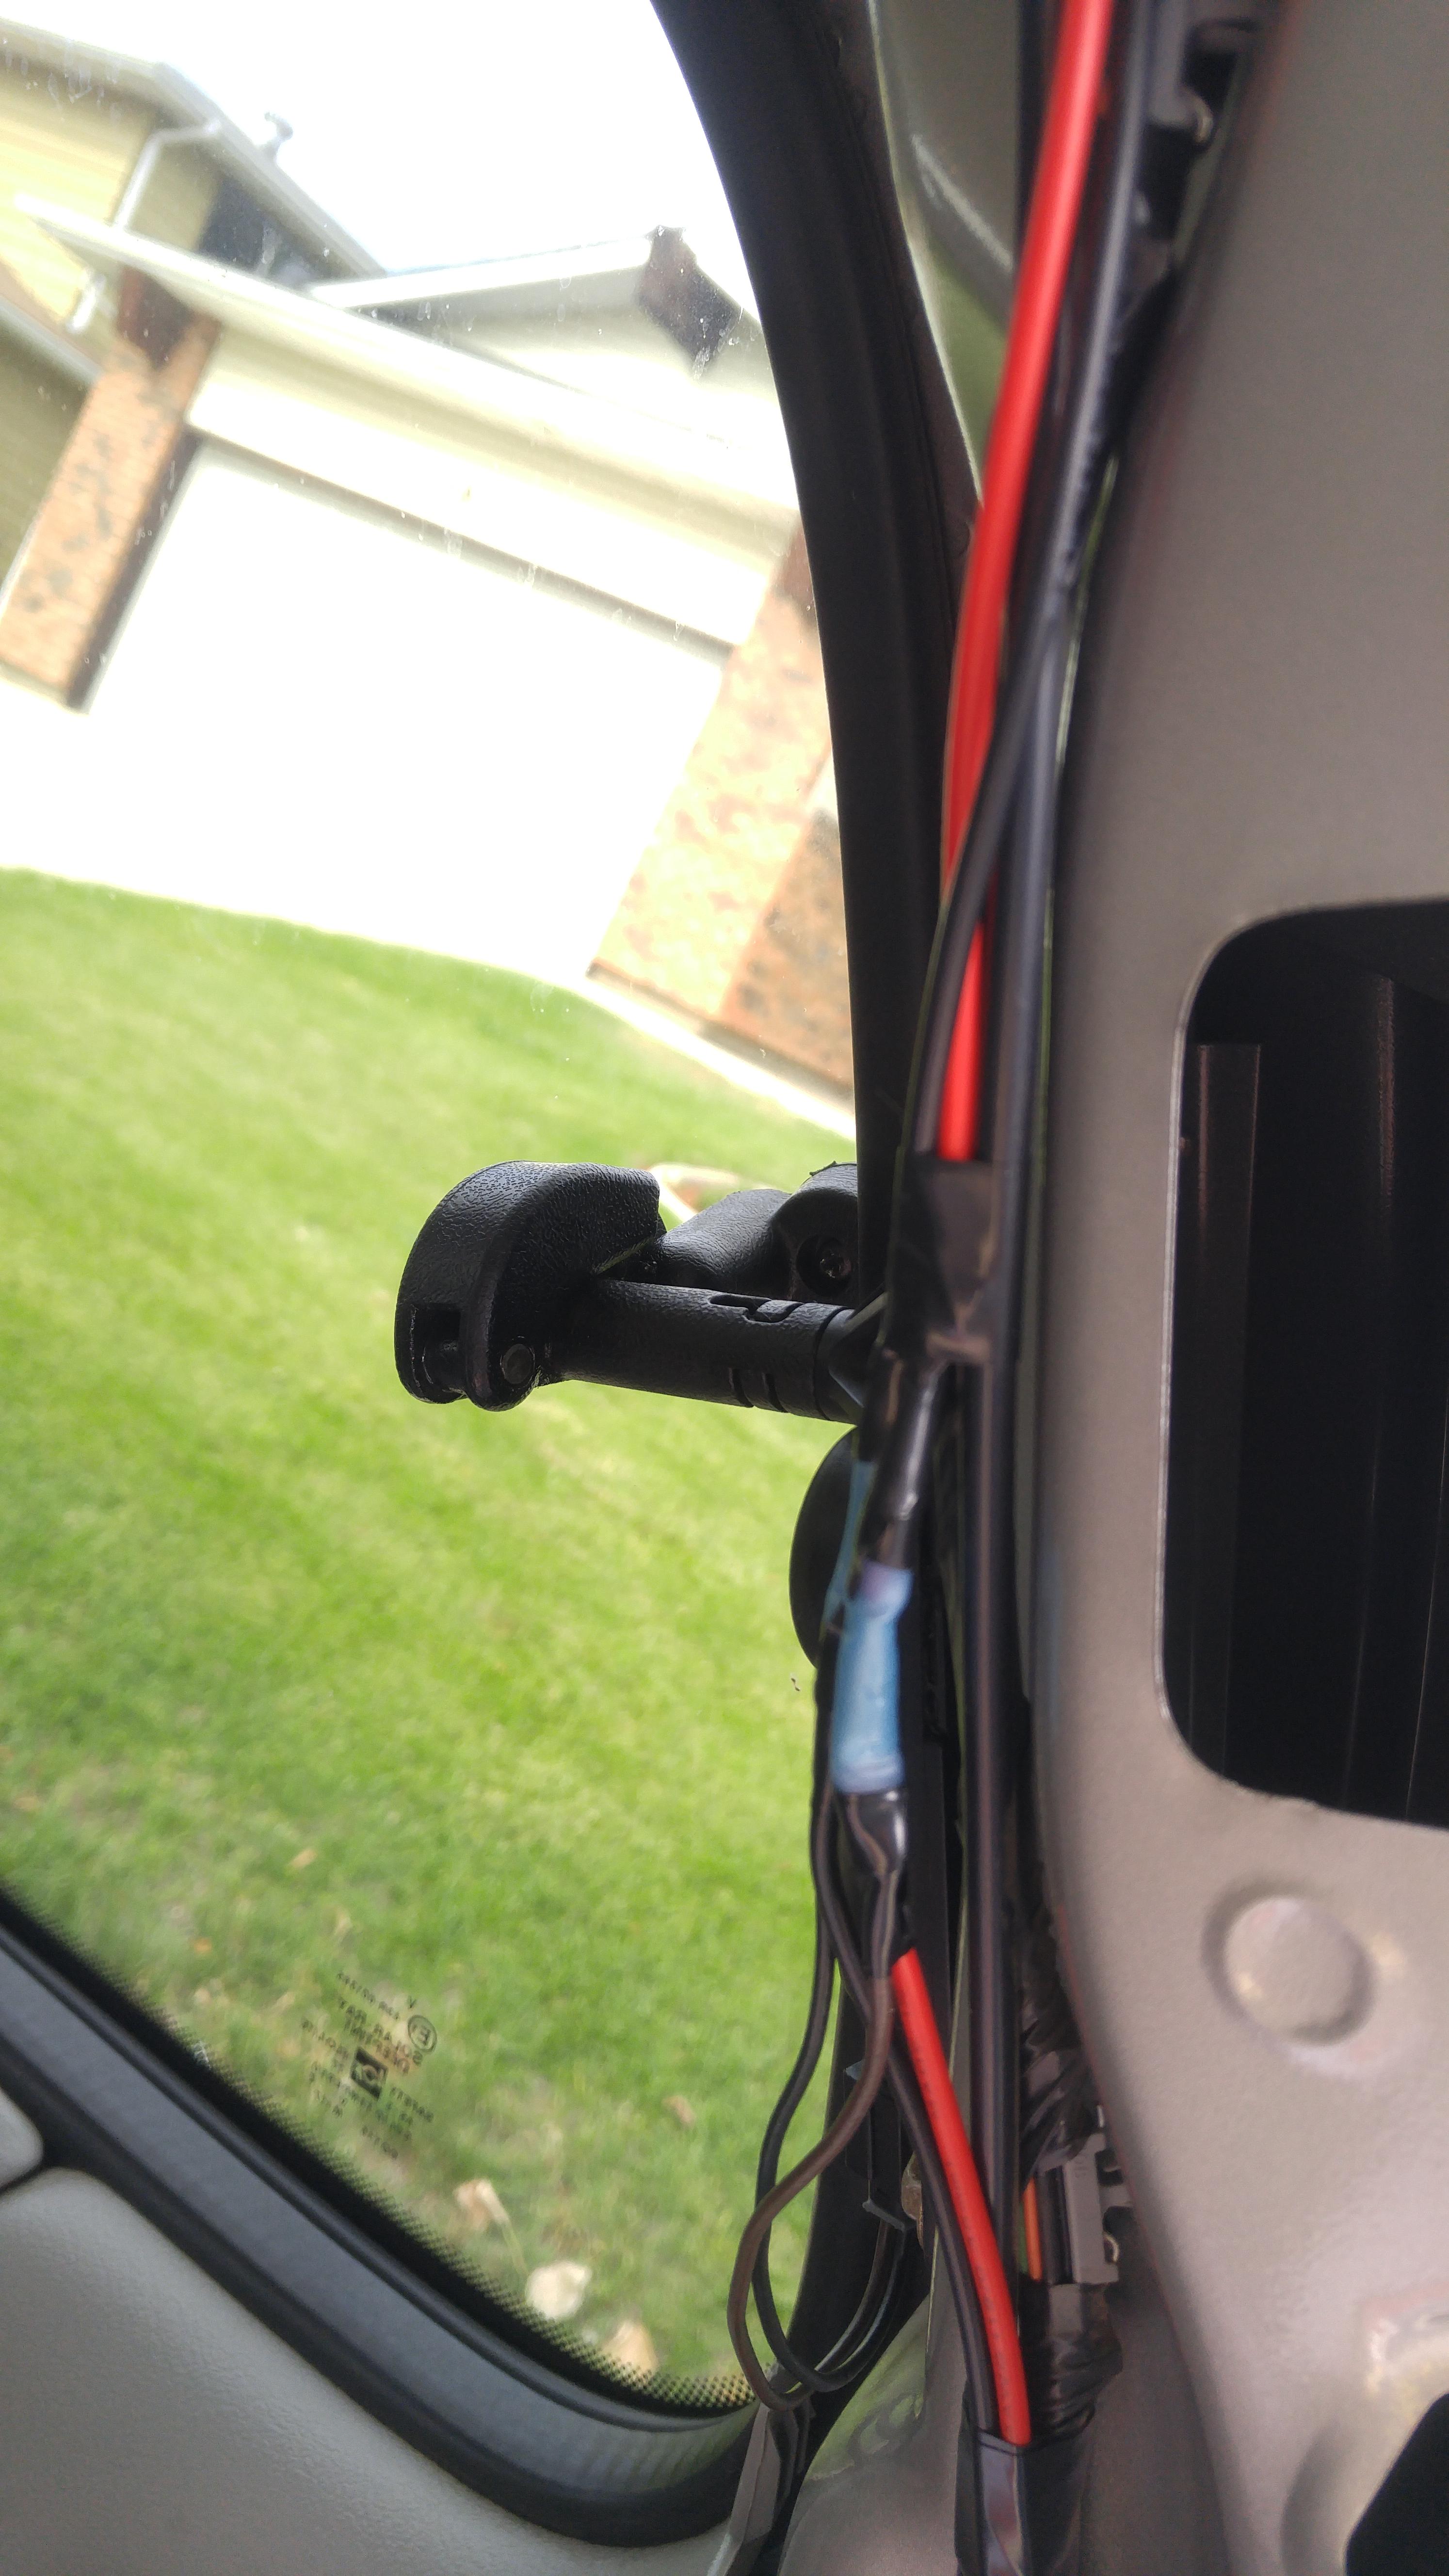
Basically the brown wire is for is for positive and the black is for the ground. Seems simple enough. Here is a picture of my wiring job with the cover off (The plastic screws are easy to break but cheap to replace, just waiting on my amazon shipment of them):
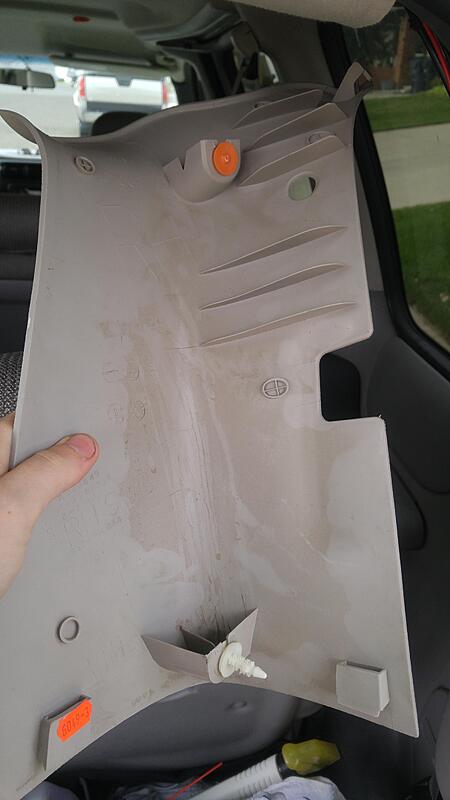
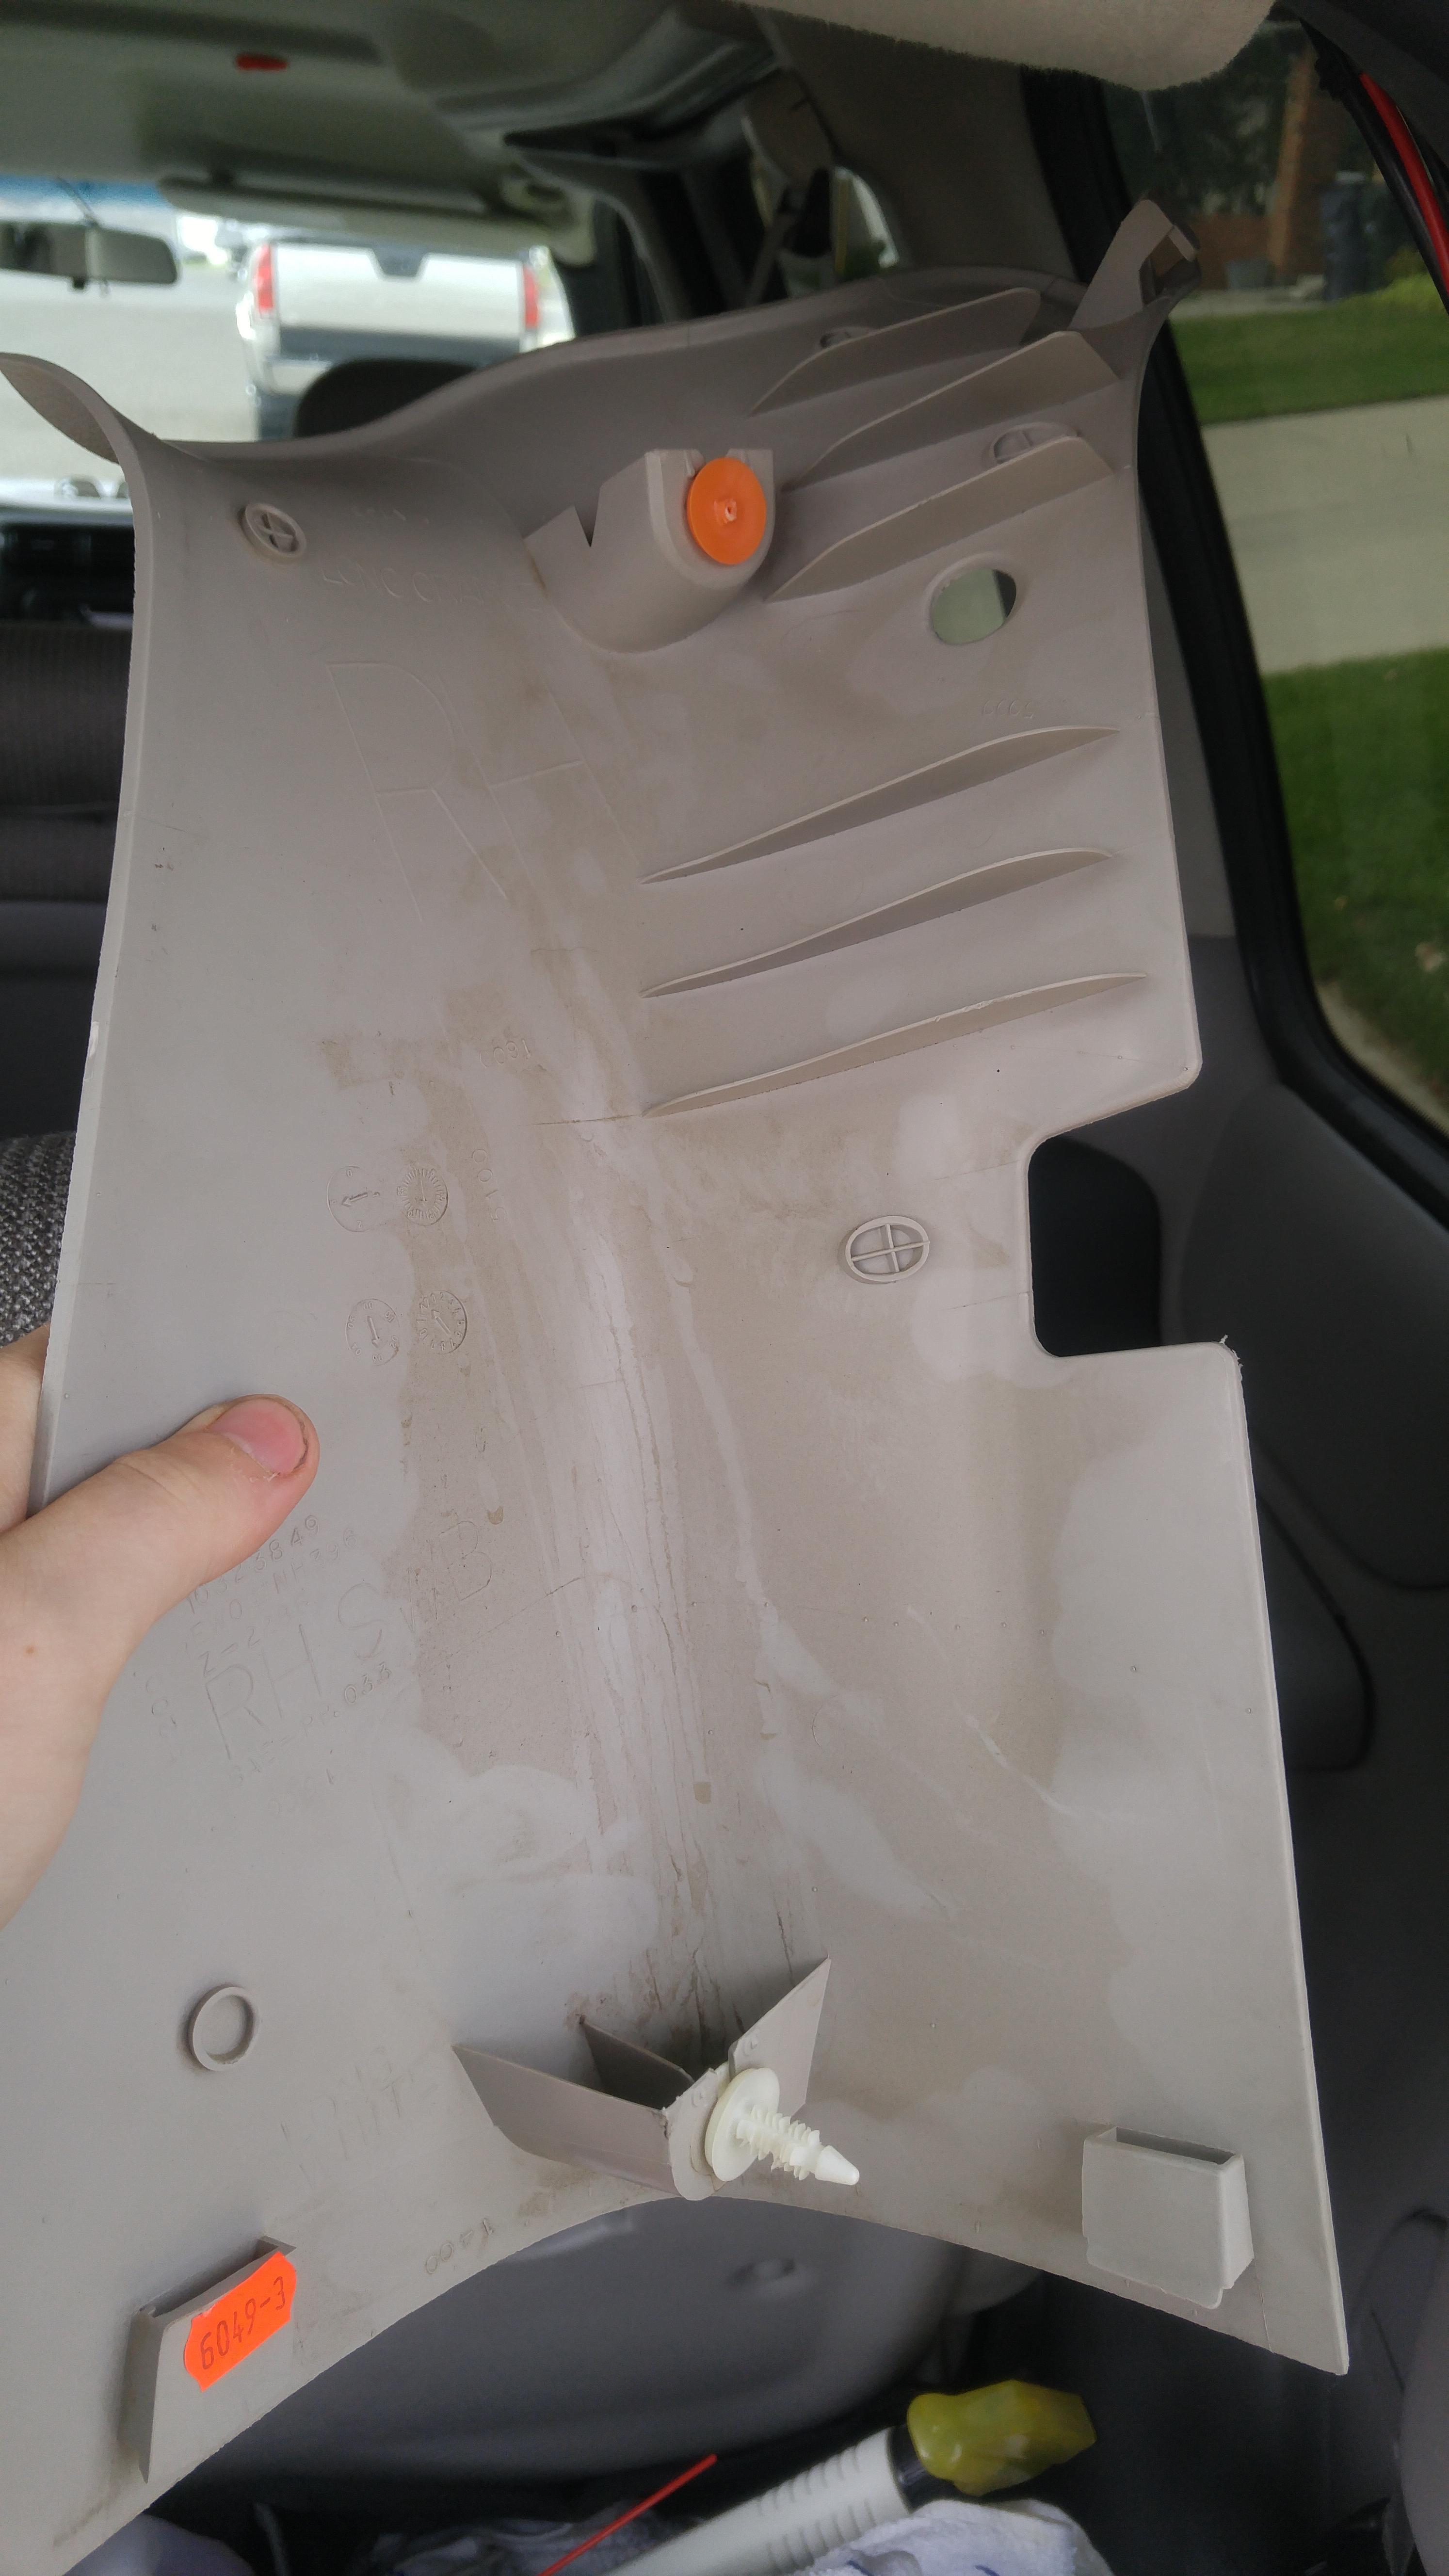
and here is the cover itself if you want a better look at where stuff goes that secure it in place:
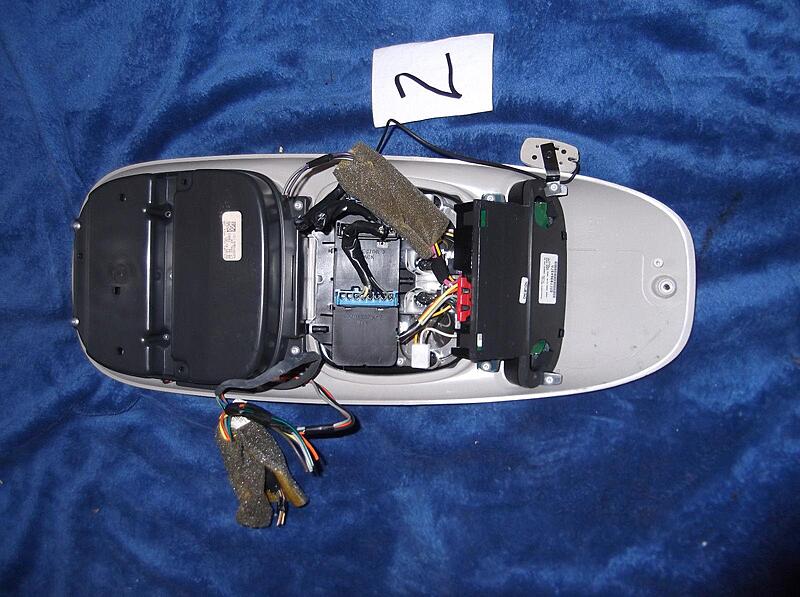
Now the hardest part for me was getting it to look factory/oem. So I had to purchase a whole entire overhead console (e.x here 97-05 Chevy VENTURE MONTANA SILHOUETTE Overhead CONSOLE w/ DOME Map LIGHTOnstar | eBay ) just for a single switch (the one with the small box in the top right) since the switch wasn't made anymore. Plus made wiring it up easier.
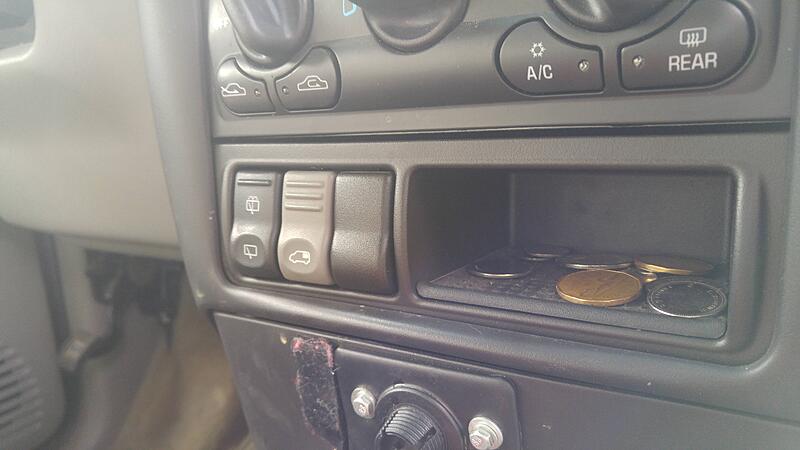
Instead of cutting out the roof to put the console in, I decided to put it in the centre console right next to where the rear wiper switch is shown below (should note in doing this there is a little notch of plastic under the button that would prevent it from being pushed up, can be removed various ways:
Surprisingly all I had to do was cut one side of the blue connector (There is only one big one in the overhead console area) to make it fit into the slot on the centre switch as shown below. All that had to be cut was the plastic slide piece, still clips in nice in snug in the centre (The wiring for it is as follows. Brown and thick black wire is for connecting to the motors. Small grey is for the illumination, yellow is to power the whole thing. Small black is for ground to the switch. Totalling a use of 5 wires (I am going to try and hook the grey up to my rear wiper grey wire to see if I can get it lighting up that way):
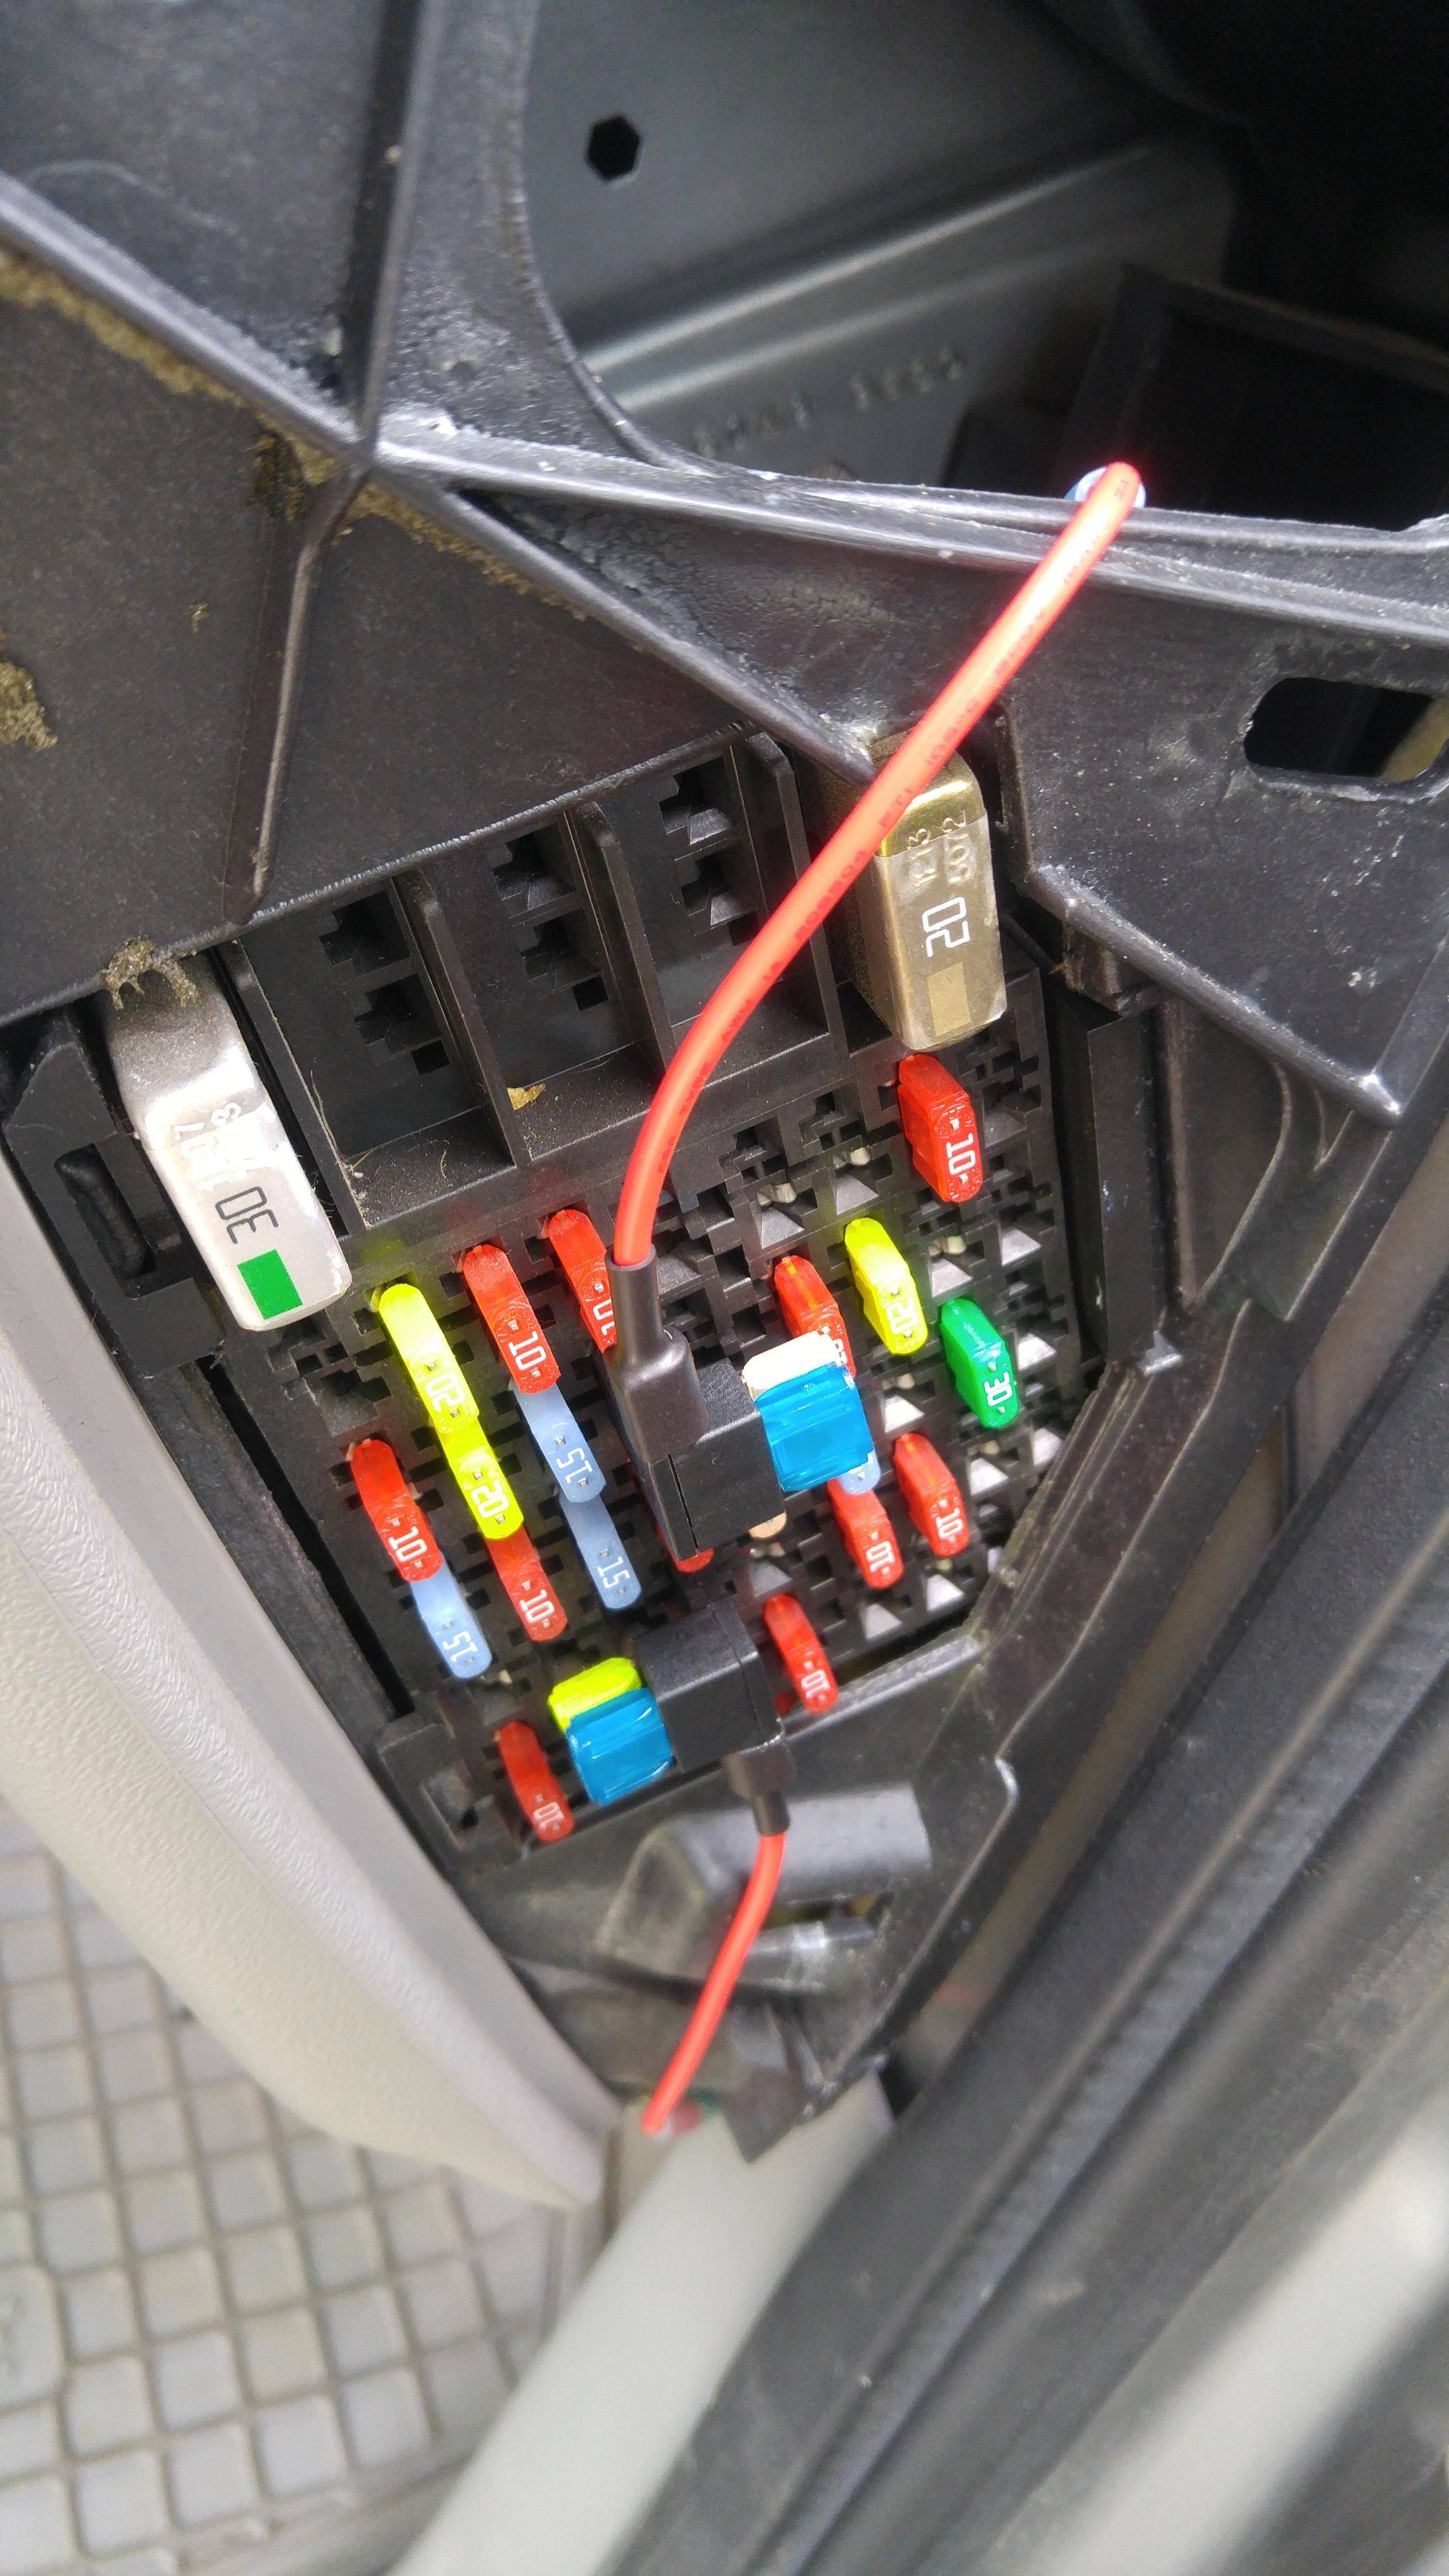
And then I taped a fuse (The other tap is for my cigarette lighter so that it shuts off the power when the van is off)

Taking apart the overhead console was just unscrewing a crap ton of stuff and unhinging clips, nothing too hard.
If you are looking to do this yourself, feel free to ask questions.
figured I'd post this for people that plan to do this for themselves. I was following this guide for most of the project: Installing Power Rear-Quarter Vent Window Motors on My Chevy Venture (This tutorial did a really good job on covering how to remove the manual arm, no video/pictures from me on it sorry)
Only downside was I didn't have the connectors hanging back there due to the fact I had the complete base model of the Chevy Venture (So only power locks)
Basically the brown wire is for is for positive and the black is for the ground. Seems simple enough. Here is a picture of my wiring job with the cover off (The plastic screws are easy to break but cheap to replace, just waiting on my amazon shipment of them):
and here is the cover itself if you want a better look at where stuff goes that secure it in place:
Now the hardest part for me was getting it to look factory/oem. So I had to purchase a whole entire overhead console (e.x here 97-05 Chevy VENTURE MONTANA SILHOUETTE Overhead CONSOLE w/ DOME Map LIGHTOnstar | eBay ) just for a single switch (the one with the small box in the top right) since the switch wasn't made anymore. Plus made wiring it up easier.
Instead of cutting out the roof to put the console in, I decided to put it in the centre console right next to where the rear wiper switch is shown below (should note in doing this there is a little notch of plastic under the button that would prevent it from being pushed up, can be removed various ways:

Surprisingly all I had to do was cut one side of the blue connector (There is only one big one in the overhead console area) to make it fit into the slot on the centre switch as shown below. All that had to be cut was the plastic slide piece, still clips in nice in snug in the centre (The wiring for it is as follows. Brown and thick black wire is for connecting to the motors. Small grey is for the illumination, yellow is to power the whole thing. Small black is for ground to the switch. Totalling a use of 5 wires (I am going to try and hook the grey up to my rear wiper grey wire to see if I can get it lighting up that way):

And then I taped a fuse (The other tap is for my cigarette lighter so that it shuts off the power when the van is off)
Taking apart the overhead console was just unscrewing a crap ton of stuff and unhinging clips, nothing too hard.
If you are looking to do this yourself, feel free to ask questions.
Last edited by dkblackhawk; September 23rd, 2017 at 2:13 PM. Reason: hopefully last edit

 September 24th, 2017, 12:37 AM
#3
CF Beginner
Thread Starter
Join Date: Aug 2017
Posts: 7
Likes: 0
Received 0 Likes
on
0 Posts
Kind of wish I had taken more pictures but it was more of a just see if it works kind of thing especially with wiring it to the centre console. Only thing I wish I had was lights in the front, don't know why that wasn't standard...
April 17th, 2018, 1:05 PM
#5
CF Beginner
Thread Starter
Join Date: Aug 2017
Posts: 7
Likes: 0
Received 0 Likes
on
0 Posts
Thanks! I am hoping to make the wiring in the fuse box OEM but I might need to buy a spare to just learn the ins and outs of it.
April 17th, 2018, 1:18 PM
#6
CF Beginner

Join Date: Apr 2018
Location: Ontario
Posts: 20
Likes: 0
Received 0 Likes
on
0 Posts
Buy a spare from your local junk yard it will be cheaper that way and it probably still works so you would have an extra one floatin around. Just my thoughts anyway. 

