Chevrolet Silverado 1999-2006: How to Replace Thermostat and Housing
The thermostat is a simple device that detects coolant temperatures and opens or closes a passage to the radiator. This passage remains open as long as the coolant is above the thermostat's rated temperature. Since thermostats wear over time and its internal seals begin to deteriorate, the result is poor engine cooling. If the thermostat in your Chevy Silverado stops working, read the following steps for a comprehensive DIY replacement.
This article applies to the Chevrolet Silverado GMT800 (1999-2006).
The thermostat in your Silverado's cooling system is a temperature-controlled valve that contains a wax-based plastic pellet. This pellet detects the coolant heat by swelling as the temperature increases. Connected to the pellet is a mechanical valve that opens the thermostat and allows coolant to enter the radiator. Coolant that does not pass through the thermostat re-enters the engine through the thermostat bypass.
Thermostats have a rated temperature listed on them. Most commonly, thermostats are rated at 180, 190, and 200 degrees Fahrenheit, which fully open about 20 degrees after its temperature rating. Common problems associated with thermostats is engine overheating or an engine that runs too cold. A stuck thermostat that remains open will continuously circulate coolant and not allow the engine to heat to optimal running temperatures. A stuck thermostat that remains closed will prevent coolant from reaching the radiator, causing the engine to overheat rapidly. Read on if your Silverado's thermostat is no longer functioning.

Materials Needed
- Flat head screwdriver
- 10mm socket and ratchet
- Drain pan
- Pliers
- Pry bar
- Fine grit sandpaper
- Coolant (2 gallons)
- Replacement thermostat and thermostat housing
Step 1 – Drain the coolant
- Twist the coolant reservoir cap counterclockwise, and then remove it.
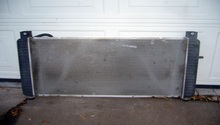
- Located on the bottom, driver's side corner of the radiator is the drain thumb screw.
- Place a drain pan underneath the drain port.
- Twist the thumb screw counterclockwise to remove it, and then allow the coolant to drain.
- Re-install the thumb screw once the coolant has drained completely.
Figure 2. Diagram of the drain thumb screw. 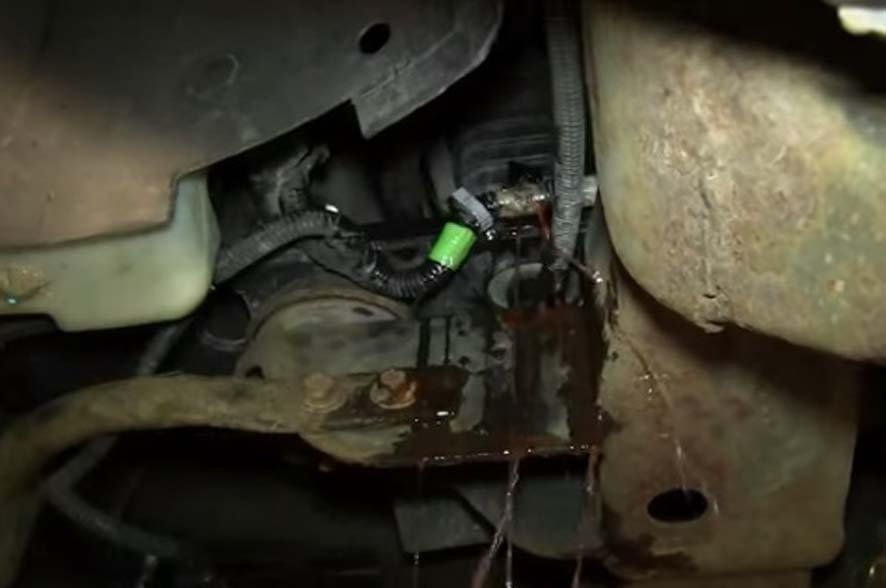
Figure 3. Allow the coolant to fully drain.
Step 2 – Remove the air intake duct
- Two hose clamps hold the intake duct in place. One is located by the air box and the other is located by the throttle body. Loosen both clamps with a flat head screwdriver.
- A hose is clipped to the bottom side of the intake duct. Pull the hose away from the intake duct to separate the two.
- Then carefully lift the intake duct out of the engine bay.
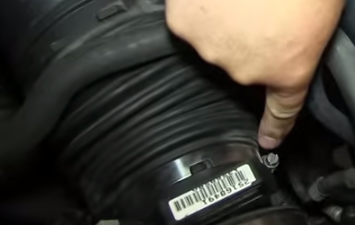
Figure 4. Loosen hose clamp by the air box. 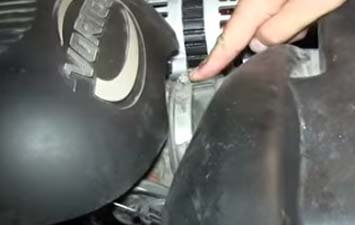
Figure 5. Loosen hose clamp by the throttle body.
Step 3 – Disconnect the lower radiator hose
- Using pliers, squeeze the tabs of the hose clamp and lock it in the open position.
- Place the drain pan underneath the thermostat because more coolant will drain from the housing.
- Pry off the radiator hose from the thermostat housing.
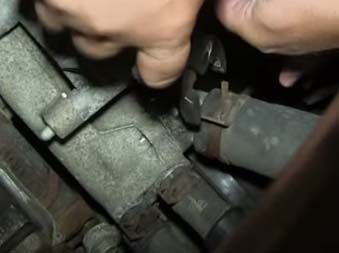
Figure 6. Lock the lower radiator hose clamp with pliers. 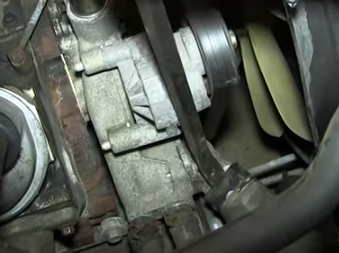
Figure 7. Pry off the lower radiator hose.
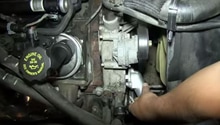
Step 4 – Remove the thermostat and thermostat housing
- Use a ratchet and 10mm socket to remove two bolts from the thermostat housing.
- Slowly pull off the thermostat housing. More coolant will drain and the thermostat will slide out of its position.
- Use sand paper to remove any corrosion on the thermostat housing block.
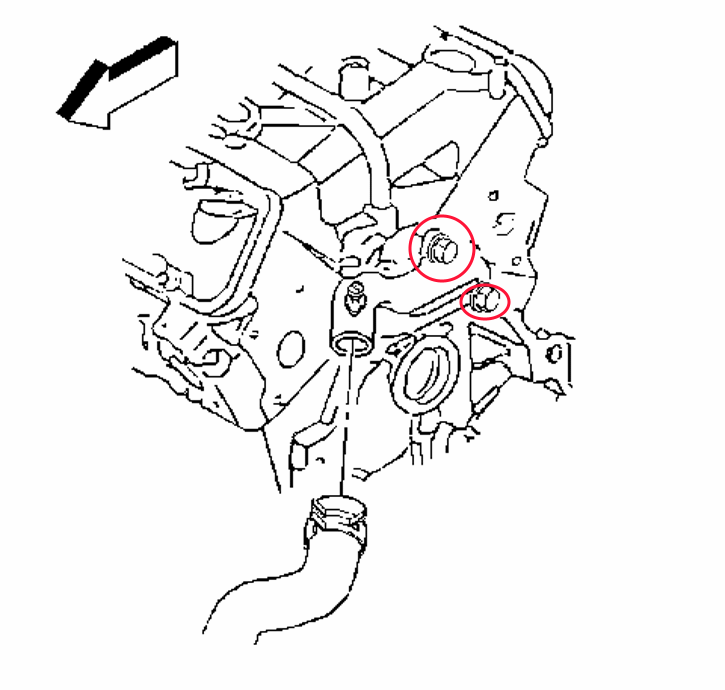
Figure 8. Diagram of lower radiator hose and thermostat housing bolt locations. 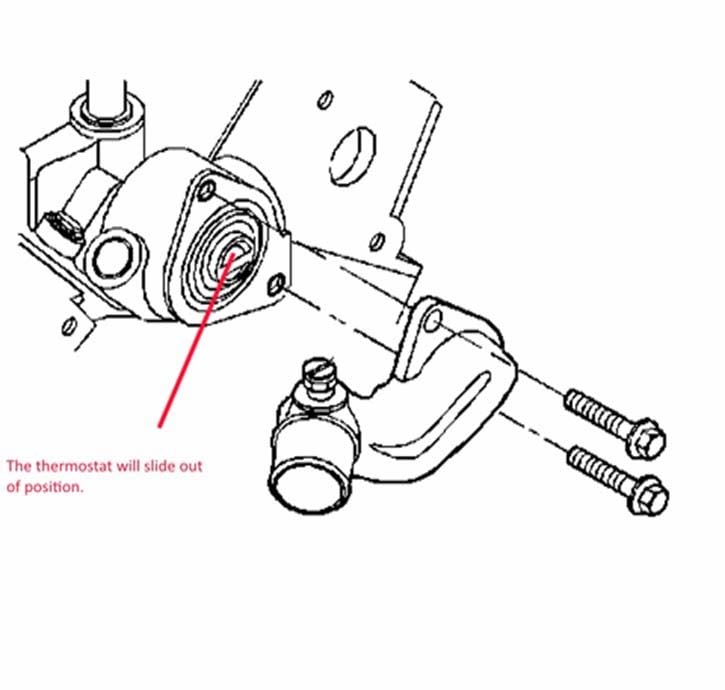
Figure 9. Diagram of thermostat housing and thermostat. 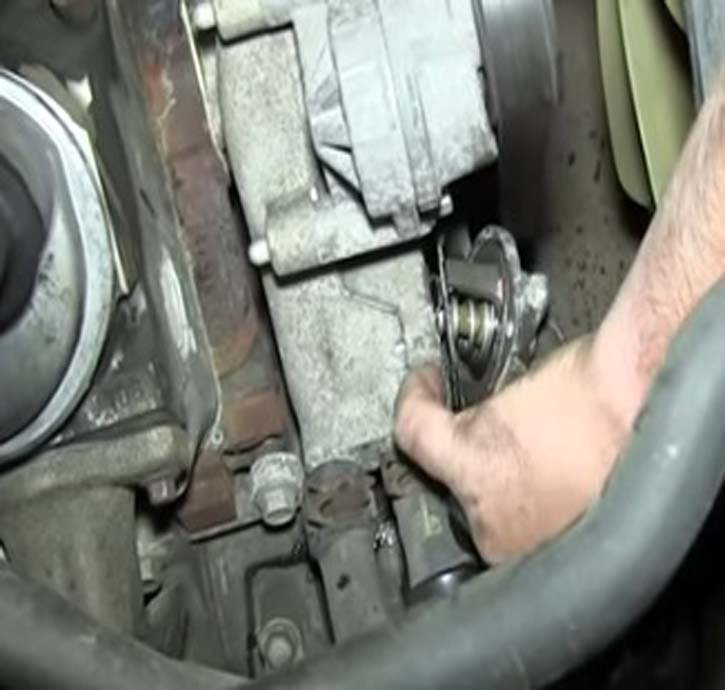
Figure 10. Thermostat and thermostat housing removed. 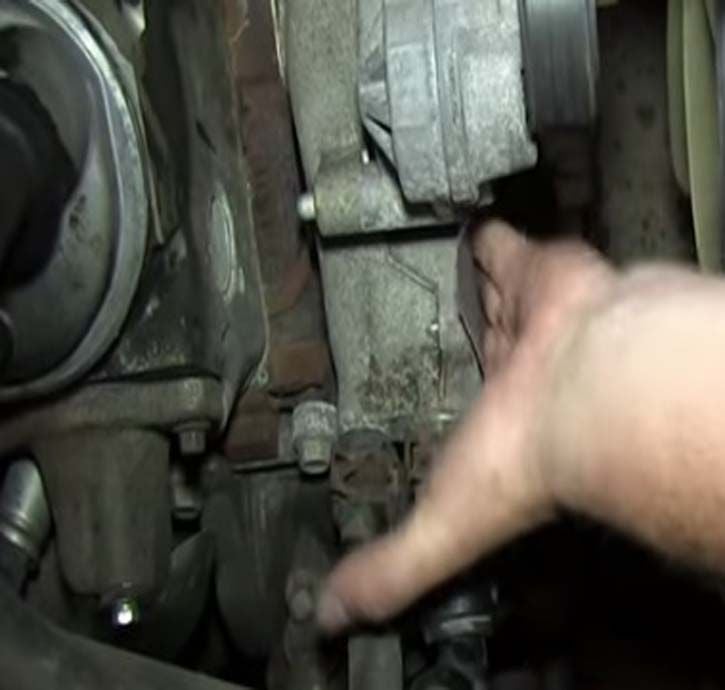
Figure 11. Sand down the thermostat housing block.
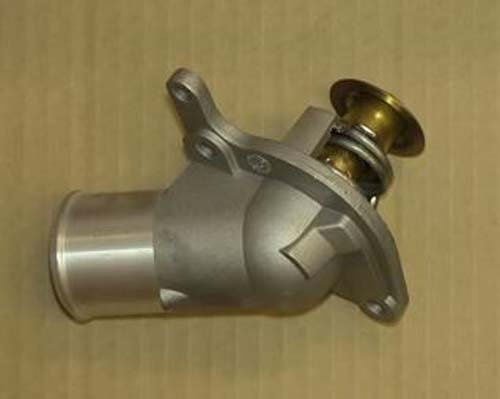
Step 5 – Install the new thermostat and housing
- Correctly position the new thermostat and thermostat housing into the housing block.
- Fasten the two 10mm housing bolts by hand. Then tighten the bolts to about 15 to 17 ft-lbs.
- Slide the coolant hose back onto the housing, and use pliers to unlock the hose clamps.
- Re-install the air duct pipe, sliding one end onto the throttle body and the other end onto the air box.
- Clip the hose to the bottom of the air duct pipe.
- Use the flat head screwdriver to tighten both hose clamps.
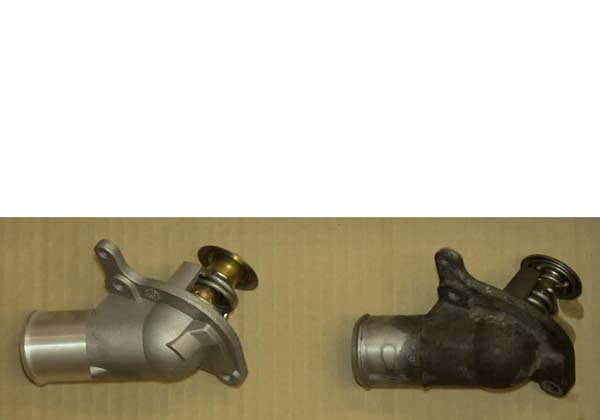
Figure 12. New (left) versus old (right) thermostat and thermostat housing. 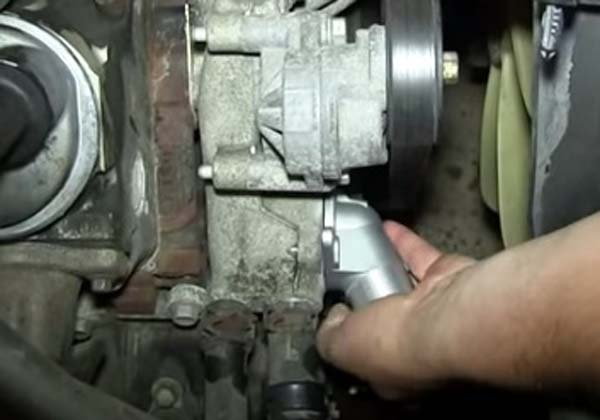
Figure 13. Position and bolt on the new thermostat housing.
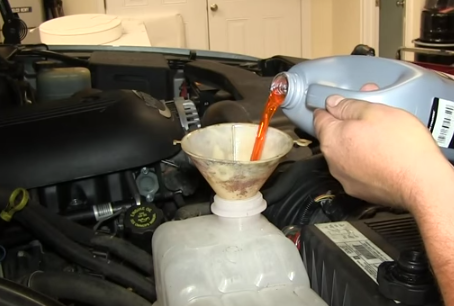
Step 6 – Pour in the engine coolant
- Pour engine coolant into the coolant reservoir up to the max fill line.
- Start your truck's engine and wait for the coolant to warm up.
- Keep the coolant level at the max fill line and pour in more coolant as needed.
- Once the engine reaches normal operating temperatures (about 200 degrees Fahrenheit), install the reservoir cap.
Featured Video: How to Install/Replace Thermostat and Housing
Related Discussion
-
How Do I Replace Dreaded Thermostat - ChevroletForum.com