Chevrolet Silverado 1999-2006: How to Replace Transmission Pan and Change Fluid
A modern automatic transmission is a marvel of precision machining, hydraulics, and electronics. You can do this complicated piece a big favor by being sure it always has the fluid it needs.
This article applies to the Chevrolet Silverado GMT800 (1999-2006).
The automatic transmission in your truck works hard for you every time you drive it. Next to the engine, it is the most expensive component to replace. A little bit of simple maintenance will keep it working for a long time. Your transmission has clutches, valves, a pump, and torque converter that work together to select the gear that is necessary to do the work you need from it. Automatic transmission fluid is the one thing that all of these components need in order to work. The transmission pan holds fluid, which is required to make the transmission work. If your transmission pan is bad, then it has to be replaced. Clean fluid is essential to making the transmission last. The pump creates hydraulic pressure to make the valves shift through the gears and circulate fluid throughout the transmission. The fluid gets used hard and it is designed to do the task it needs to.
Materials Needed
- Jack and jack stands (optional)
- Small screwdriver
- Small chisel
- Latex gloves
- Drain pan
- Ratchets
- Extensions
- 10mm and 15mm socket
- 15mm deep socket
- Pliers
- Punch
- 10mm wrench
- Torque wrench
- Filter change kit for your transmission
- Funnel
- Transmission pan (if replacing)
- Dexron VI transmission fluid (5 quarts for filter change)
-
Anti-seize compound
Some of these trucks set up pretty high, so you may not have to jack it up. If you do decide to jack up your truck, then use the appropriate jack and jack stands.
(Related Article: How to Jack Up Your Truck - ChevroletForum.com)
Step 1 – Drain the trans fluid
Fortunately, there is a drain plug in the bottom of the pan. Put your drain pan under the plug and drain the fluid. Replace the drain plug.

Step 2 – Get access to the transmission pan bolts
Pro Tip
On some Silverados you have to loosen the exhaust (or possibly remove it) for extra clearance. Removing the nuts on the exhaust manifold studs can be difficult. If you break one, then you will hate life. Soak the threads down with penetrating fluid or use an Acetylene torch to heat the nuts up and loosen them up. It may take a little longer, but see if you can get the pan off without dealing with them.
All trucks use a cable to shift the transmission. The bracket for it uses two bolts on the pan. You may be able to snake around the cable to get to the bolts, but if not, remove the cable from the bracket. It is held in place by a metal clip that you can pry out with a small screwdriver. Once it is removed, the cable slips out of the bracket.
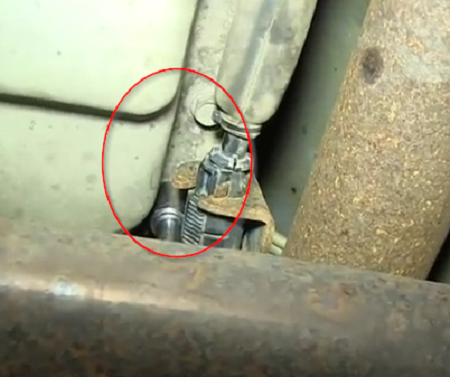
Pro Tip
The transmission crossmember may partially block access to the rear pan bolts. Use a 10mm wrench in Step 3 to snake around it and take the bolts out.
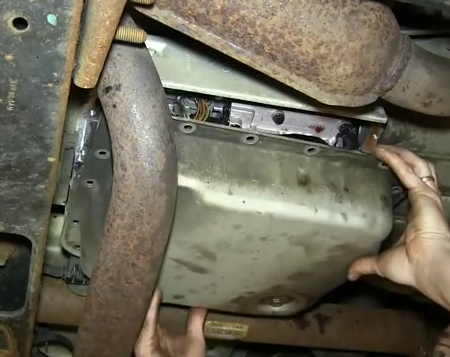
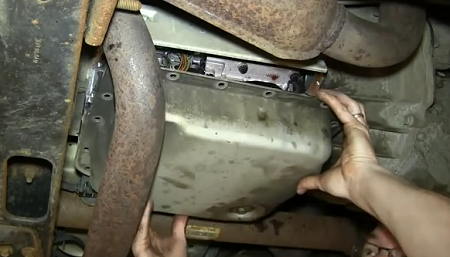
Step 3 – Remove pan bolts and pan
Using a 10mm socket and extension, remove the transmission pan bolts. There will still be fluid in it, so be careful. The pan will be loose now, so take it down while working it through any exhaust or crossmember that is still in the way.
If you only want to replace your transmission pan, you can skip down to the Step 6.
Pro Tip
Since you already drained the fluid, it makes sense to replace the filter and fluid.
Step 4 – Remove and replace filter
The filter is not bolted in, but rather it is held up by the seal in the transmission case. Pull down on the filter and twist slightly to pull it off. Your kit should include a new seal. If it does, use a small chisel or old screwdriver to drive one edge in without damaging the case. Use pliers to pull the seal out. Press the new seal in evenly. Drive it in the case with a socket turned upside down. This is a good time to wipe the lip on the transmission (where the pan bolts) clean.

Figure 4. Removing filter. 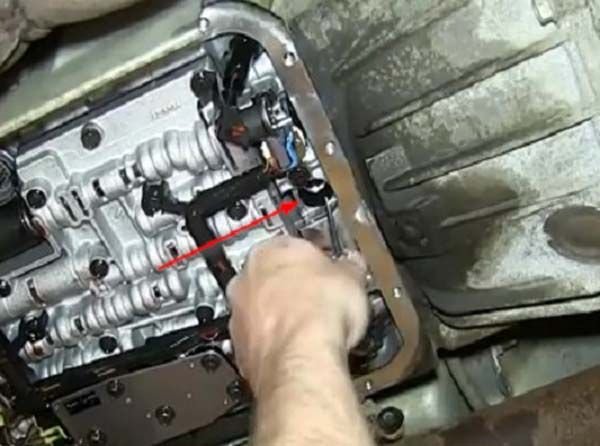
Figure 5. Use chisel to remove seal. 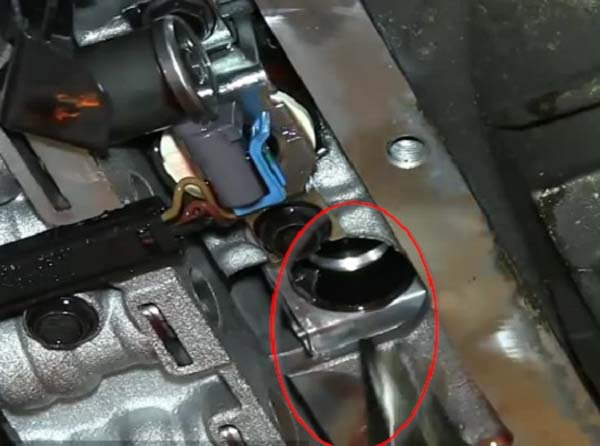
Figure 6. Remove seal with pliers.
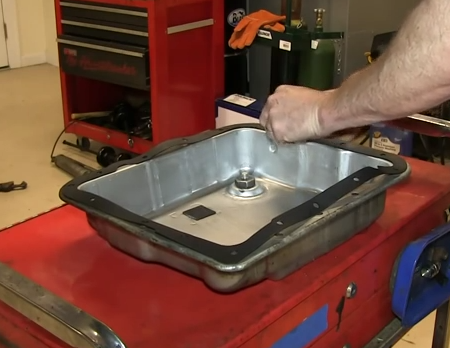
Step 5 – Clean transmission pan
Thoroughly clean the inside of the pan and lip where it bolts to the transmission. There is a magnet in the bottom of the pan that collects metal particles from the fluid. Wipe the metal off and replace in the pan.
Step 6 – Install transmission pan
Lay the new gasket on the clean pan (Figure 7). With the new gasket on the pan, snake it up and onto the transmission. Start a couple of bolts by hand to hold it up. Start the rest of the bolts by hand, making sure non of them are cross threaded. Be sure that the shifter cable bracket and gasket are still in place. Snug them up by hand, and then tighten them to 15 ft./lbs. with a torque wrench in a criss-cross pattern. Tighten any other bolts that you may have loosened or removed and set the truck down on the ground.
Pro Tips
- Do not use silicon sealer unless it is absolutely needed. It can come loose and wreak havoc inside the transmission. You can use dabs to hold the gasket on while installing it.
- Putt some anti-seize compound on the exhaust stud threads to make it easier to remove in the future.
Step 7 – Refill transmission fluid
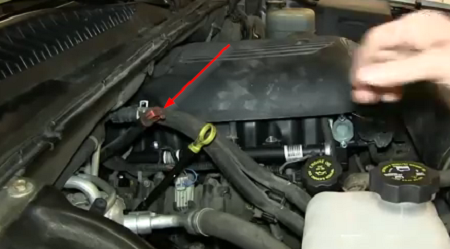
Open the hood of your truck to find the transmission dipstick on the passenger's side to the back of the engine.
Pour four quarts of the Dexron fluid into the transmission. Start the truck. Run the transmission through all of the gears until you feel it engage in each. After the truck has warmed up, check the fluid again to see where it registers. It should need one additional quart. Add it and check again after it is hot. It should now show that the fluid level is within the correct range.
Drive your truck for a short time, and recheck the fluid to be sure it is at the level called for. Also, look for any leaks under it.
Pro Tip
Use a funnel that has a small extension in the dipstick tube and comes toward the front of your truck to make it easier to pour.
Related Discussions
- Transmission Fluid Change - ChevroletForum.com
- How Much Fluid for 4L60E - ChevroletForum.com