Chevrolet Silverado 2007-2013: How to Replace Electric Radiator Fan
The radiator fans keeps your engine cool at stop lights and in traffic, where air isn't passing through the radiator. When the fans stop working, the engine will soon follow if you don't act quickly. This guide will show you how to replace your radiator fans.
This article applies to the Chevrolet Silverado GMT900 (2007-2013).
The radiator fans are responsible for preventing your truck's engine from overheating. If your radiator fans stop spinning, then it's a major cause for concern. The best option is to fix or replace them immediately. Fortunately, installing a new fan unit is fairly simple and doesn't require the help of a mechanic. Follow the instructions below to learn more about replacing a broken radiator fan unit.

Materials Needed
- Replacement radiator fan
- Flat head screwdriver
- Ratchet with 10mm and 13mm sockets
- Pliers
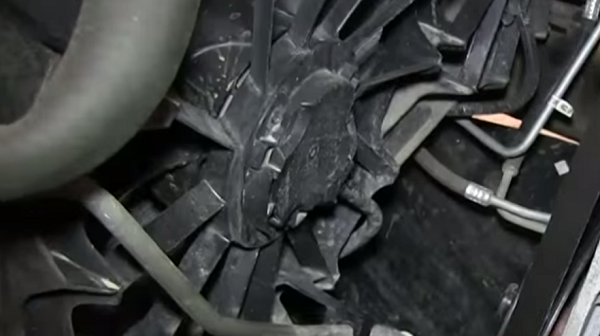
Step 1 – Unplug the fans
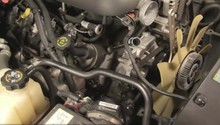
Start by un-clipping the large hose on the top of the radiator fan unit and the smaller hose next to it. Un-clip the two hoses attached to the bottom of the unit. Then, disconnect the electrical harnesses plugged to the back of each fan.
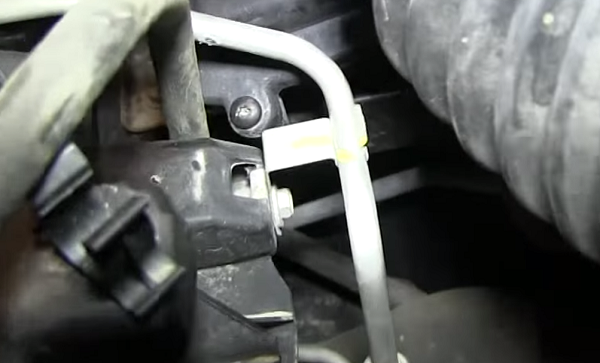
Step 2 – Remove the mounting bolts
There are four bolts you need to remove in total. Two 13mm bolts at the top of the fan, and two 10mm bolts on the far left side of the fan. The 13mm bolts should give you no problem, but the 10mm bolts are a bit tricky to get to, especially the one sitting at the bottom of the fan unit.
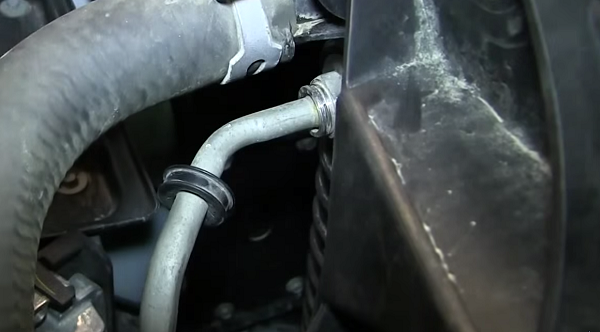
Step 3 – Pull out the radiator hose
There is a small hose you need to unhook before you're ready to remove the fan unit. To remove it, pull back the grommet and remove the c-clip from around the socket. After that, you should be able to pull the hose straight out from the fan unit.
Step 4 – Remove the old fan unit
Now you're ready to remove the old fan unit. Pull it up and out from the truck. Once it's out, you need to transfer two plastic clips from the old unit to the new unit. One is at the top of the fan unit that connects to the smaller hose, and the other is near the bottom that attaches to the two bottom hoses. Pull out the two metal tabs on the side of the old fan unit and transfer those to the new unit as well.
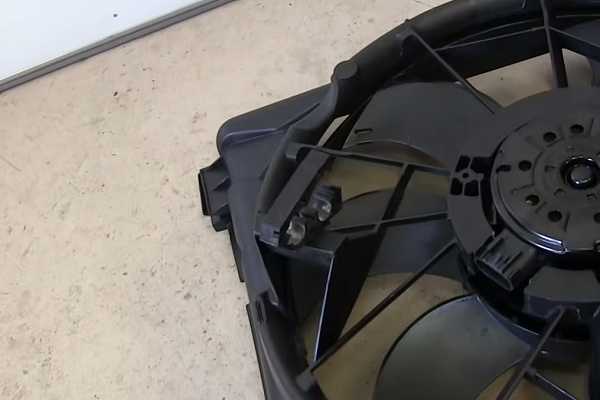
Figure 4. Transfer this clip to the new fan unit. 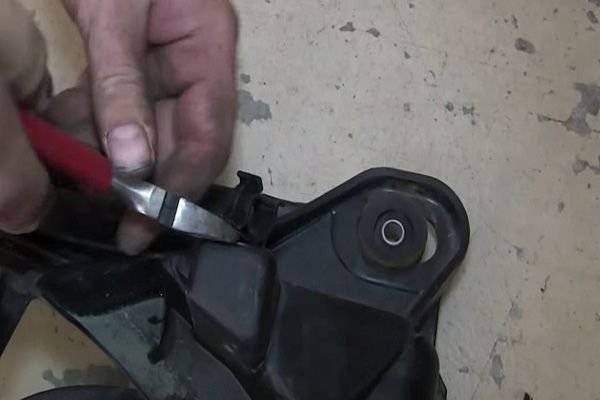
Figure 5. Transfer this clip to the new fan unit.
Step 5 – Install the new fan unit
Installing the new fan unit is simply the reverse of the previous steps:
- Attach the radiator hose and c-clip. Then, secure the grommet.
- Install 10mm mounting bolts on the far left side of the fan unit, and 13mm bolts at the top.
- Plug in electrical harnesses to the fans.
- Reattach the two bottom hoses to the large clip.
- Reattach the top small hose to its clip.
- Reattach the large hose to the top of the fan unit.
Once you've done all of that, your new fan unit is installed. Start the truck and watch the fans spin to life.
Featured Video: How to Install, Replace, Remove Radiator Fan
Related Discussions
- 2008 Chevy Silverado Engine Hot Light - ChevroletForum.com
- 07' Radiator Fan Question - ChevroletForum.com
- A/C Fan Motor Will Not Start - ChevroletForum.com