Chevrolet Silverado 1999-2006: Engine Performance Diagnostics
This article will discuss cracked cylinder heads, weak valve lifters, worn valve seals, and positive crankcase ventilation (PCV) fouling. Read on to see what attention your Silverado may need and how you can protect it from damage.
This article applies to the Chevrolet Silverado GMT800 (1999-2006).
As any of these performance failures can develop into major damage, the focus is on prompt identification of the problems and prevention of a worsening situation. Repair options for cracked cylinder heads and weak valve lifters will vary with the skill and commitment of the DIY'er, but must be addressed quickly. Repairs of the valve seals and PCV system are less time critical and within the abilities of most DIY'ers. Time and cost per project varies widely depending on the circumstance and available warranty.

Materials Needed
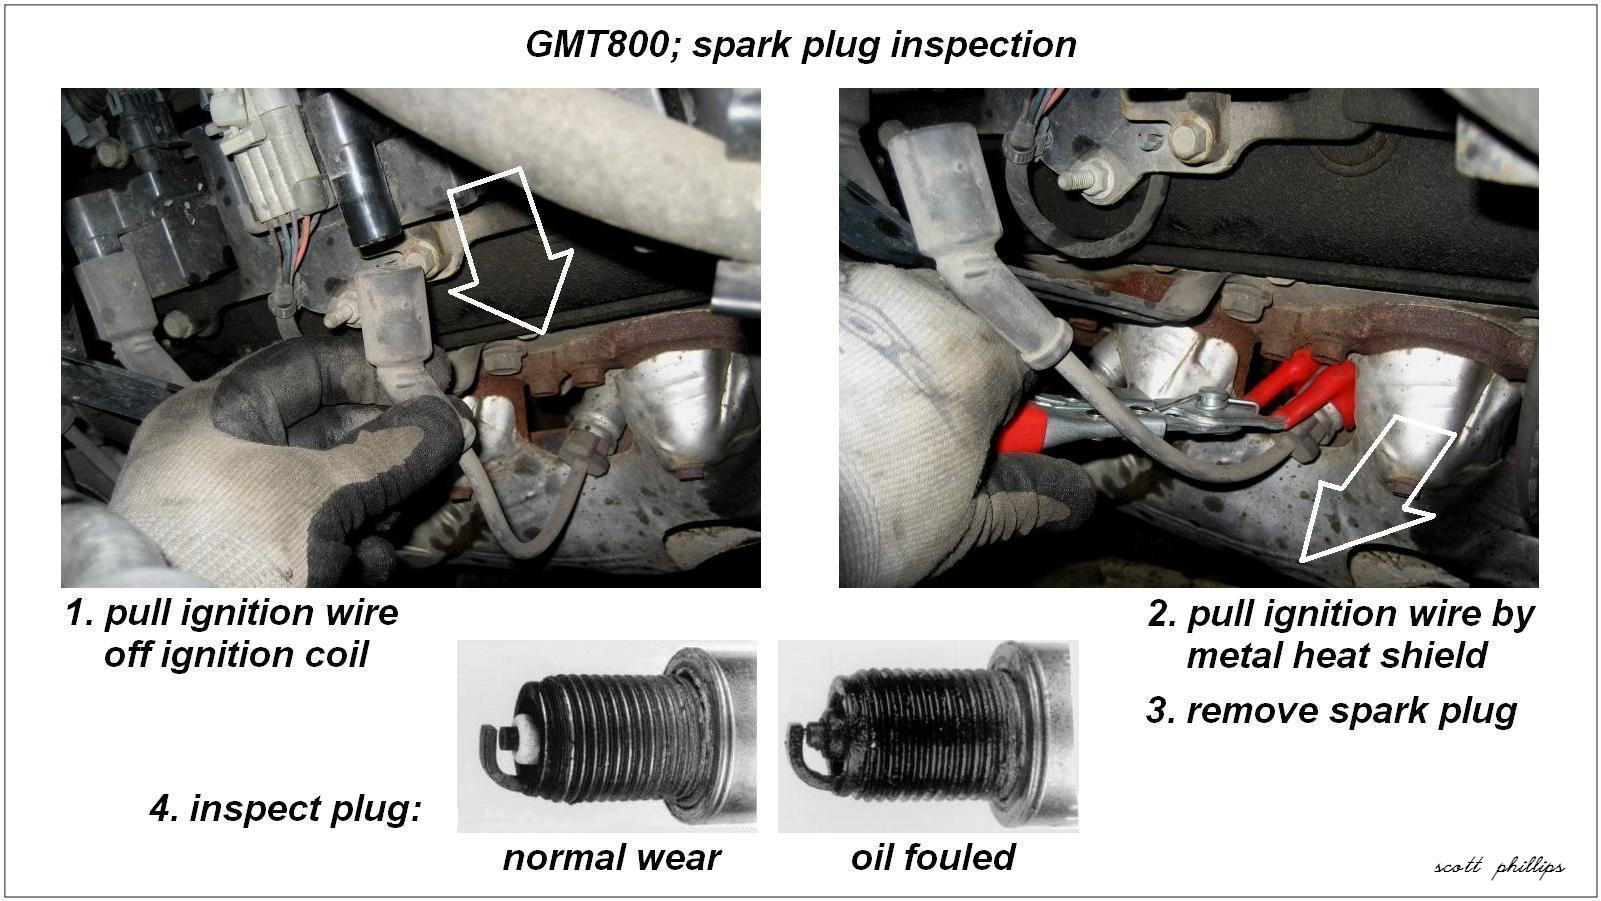
- 8 and 10mm socket wrench
- 5/8" spark plug wrench
- Various socket extensions and flex connectors
- Ignition wire pliers
- Set of cylinder heads (by TSB only)
- Oil pump O-ring (by TSB only)
- Valve seal kit (as needed)
- Set of ignition wires (if damaged)
- PCV valve (by TSB only)
- PCV fresh air hose (if damaged)
- PCV vacuum pipe (if damaged)
- Pipe cleaners
Step 1 – Vortec 4.8L and 5.3L cracked cylinder heads
What causes this problem?
The Silverado Vortec engine needs both oil and coolant, each of which perform independent functions. Oil is pumped through the crankcase and up into the valve train for lubrication and cooling, while coolant is circulated through the cylinder heads for temperature regulation. The extreme heat of combustion occurs in the cylinder heads, so they are plumbed with both oil and coolant channels. The two fluids are always segregated into separate chambers and passageways. During the 2001 to 2006 Silverado model years, GM had several different suppliers making the cast cylinder heads for the Vortec 4.8 and 5.3 liter engines. Some cylinder heads, made by the supplier Castech, began to crack, allowing coolant to seep into the oil. If left uncorrected, this coolant contamination of the oil can cause major engine damage.
What are the components involved?
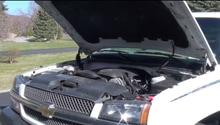
Typically, the cracked cylinder heads are marked 706 or 862 in the front corner under the oil filler (as shown in Figure 1). However, these casting numbers alone do not positively identify Castech heads. The only way to verify that the heads are Castech is to remove the valve cover. The Castech mark is cast into the head under the valve rocker assemblies (as shown in Figure 2). The Castech mark is the ONLY positive identifier of Castech heads.
Why are these components the problem?
Over time, the Castech heads develop cracks in the oil drain wells (as shown in Figure 2). The pressurized engine coolant seeps through the cracks into the oil drain wells and contaminates the engine oil. This coolant/oil emulsion reduces oil viscosity, which causes and can be mistaken for other known problems, such as cold start knock and valve lifter click. As the coolant/oil emulsion increases, the reduced viscosity oil foams into a frothy mixture, which fails to properly lubricate bearings and fails to pump up the valve lifters; the result is cumulative engine damage. The initial signs of cracked Castech heads are:
- Mileage of 100,000 to 200,000, but sometimes as low as 60,000.
- A slow loss of coolant in the expansion tank.
- No exterior sign of a coolant leak, such as dripping from the radiator, hoses or water pump.
- Frothy yellow emulsion under the oil cap (as shown in Figure 1).
- Occasional puffs of white exhaust smoke on cold start.
- Valve lifter clack on cold start.
- The head casting numbers are typically 706 or 862.
To verify that Castech heads are installed and cracked:
- Remove the valve cover and valve rockers.
- Locate the Castech mark under the valve rockers.
- Small amounts of orange DexCool may be visible in the oil drain wells or around bolt heads (as shown in Figure 3).
- The cracked areas will be cleaner and shinier than the surrounding, oil smudged metal (as shown in Figure 3).
- Coolant/oil emulsion will be on the underside of the valve covers (as shown in Figure 3).
- Pressure test the cooling system and look for air bubbles as well as DexCool leaking at the suspected crack areas.
Note
Locating the Castech mark involves moving wire bundles, removing the ignition coils, removing the valve cover, and removing the valve rockers. It is a task best suited to an experienced DIY'er or a professional.
How to fix the problem:
- Go to a GM dealer. GM has issued Technical Service Bulletin 06-06-01-019B: "Information on Gradual Coolant Loss Over Time with No Evidence of Leak Found." This GM service identifies cracked Castech cylinder heads as described above and prescribes replacing the cylinder head assemblies.
- Go to an independent repair shop that services GM and is familiar with the Castech head issue.
- Replace the cylinder heads yourself, as many DIY'ers have done.
Cost to fix the problem:
About $1,500 to $2,000 at dealers and service shops.
- However, GMT800 owners report that all or some percentage of the repair has been covered by GM when the TSB is addressed at a dealership. The amount covered is a function of mileage, factory warranty or extended warranty, and the owner's ability to negotiate.
- Owners report that some used car dealers have covered the repairs under their own warranties.
- For a DIY, the cost of two replacement cylinder heads varies from about $200 used to about $,1000 new or rebuilt.

Figure 1. Vortec 4.8 and 5.3 liter cylinder heads and oil cap. 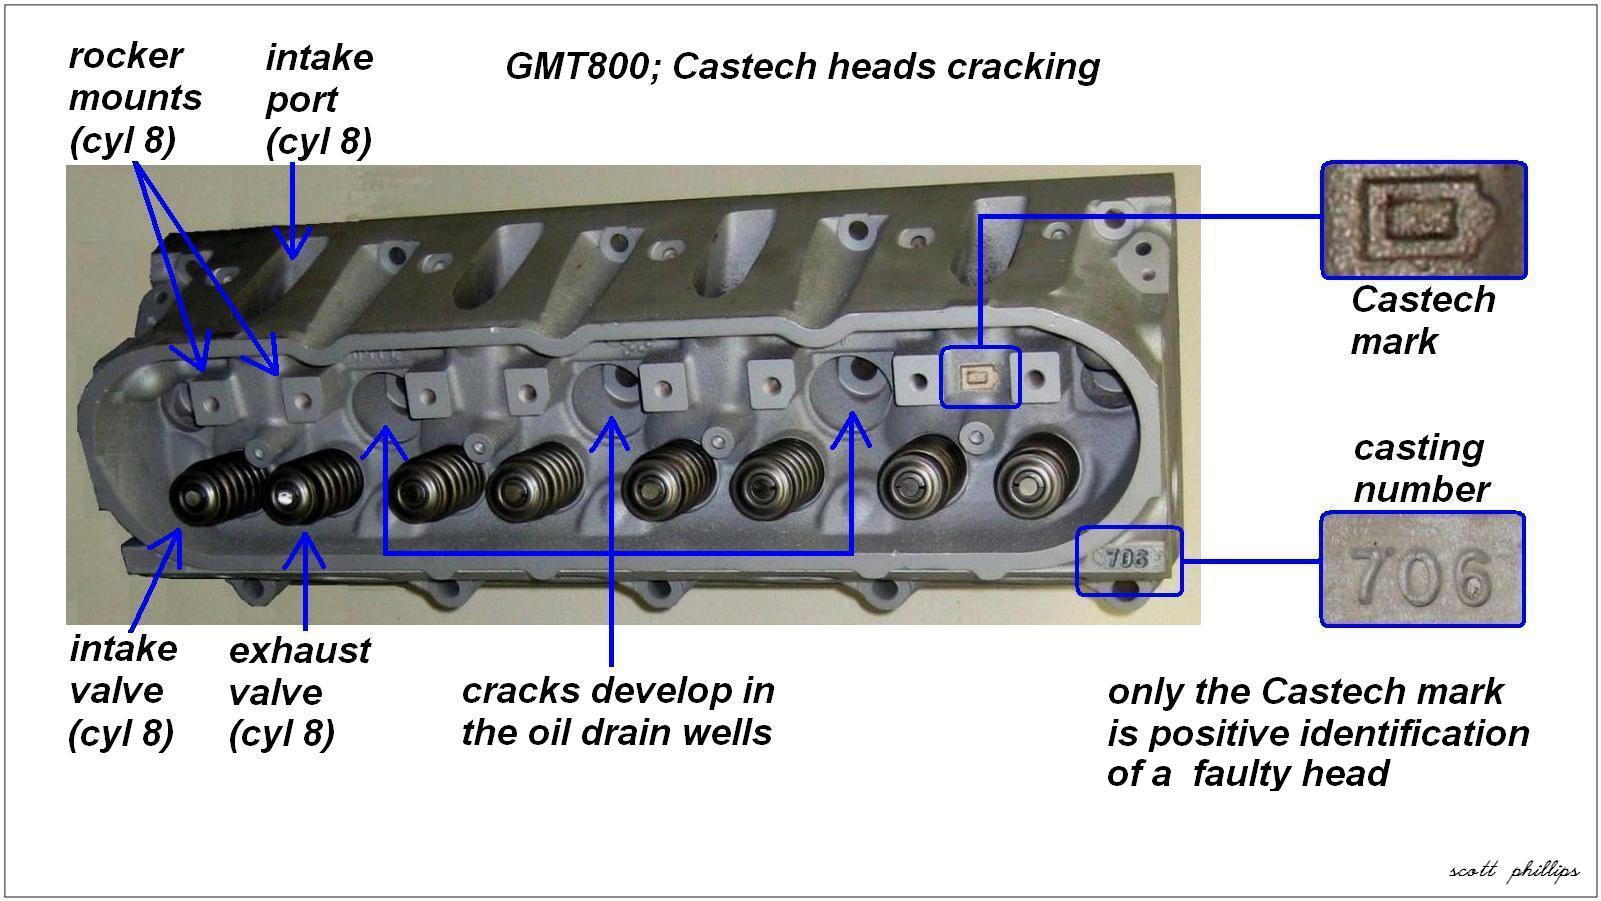
Figure 2. Castech heads cracking and coolant leak. 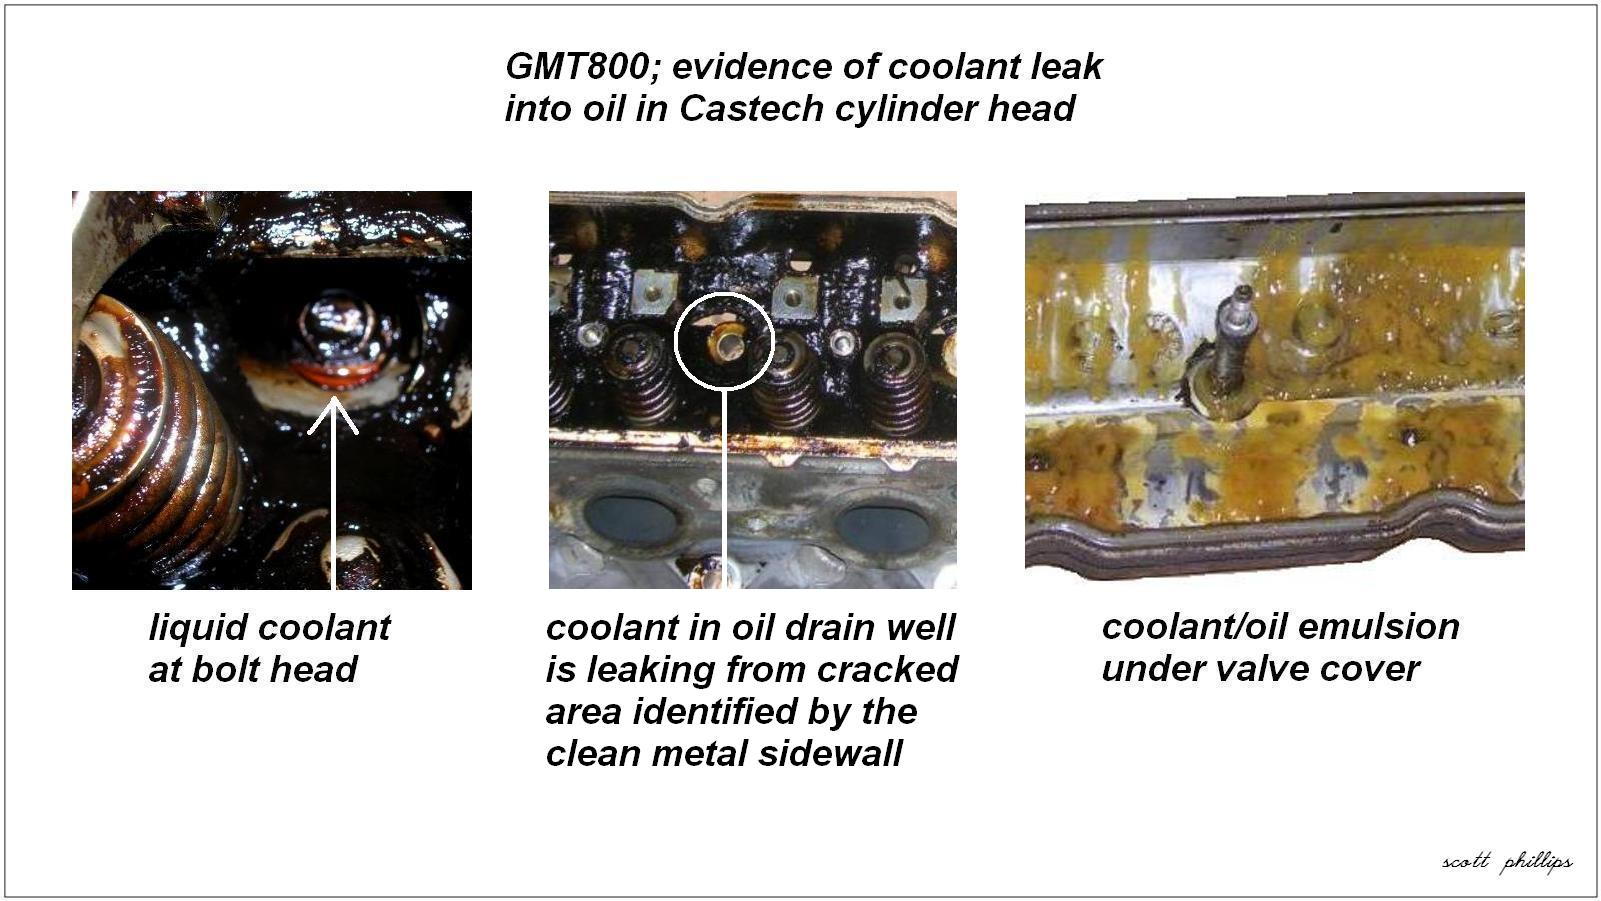
Figure 3. Castech cylinder head coolant leak.
Step 2 – Valve lifters and camshaft noise and damage
What causes this problem?
Valve lifter noise is a light, rapid metallic clicking: imagine 16 metal butterflies crashing together inside a jar. Low oil level or old oil with dirty sludge prevents the valve lifters from pressurizing and maintaining contact between the lifters, push rods, and rockers.
What are the components involved?
The camshaft sits in the vee of the engine, between the cylinder heads. It operates the push rods, which push the rockers that open the valves. To keep these separate components in contact, hydraulic lifters are placed between the cam lobes and the push rods. Pressurized engine oil hydraulically pushes the lifters against the push rods, eliminating space between the components (refer to Figure 4).
Why are these components the problem?
The lifters are designed with small orifices that allow pressurized oil into the lifter body. When the oil is low or contaminated, it is unable to pass through the orifices and pressurize the lifter. This allows space between the lifters, push rods, and rockers, which hammer at the contact points, causing the metal butterfly noise and eventually destructive impact damage.
There are four basic faults that reduce lifter performance:
- The cracked cylinder heads, as described in Step 1, allow coolant to contaminate the oil and reduce its viscosity. The foamy emulsion is unable to pressurize the lifters.
- Some 2001 to 2003 Silverado engines have faulty oil pump O-rings, which aerate the oil and prevent lifter pressurization. This problem is identified in TSB 02-06-01-038 (12/02/2002).
- Low oil level provides inadequate volume to pressurize the lifters.
- Aged, dirty oil loses its viscosity, and the sludge blocks the orifices in the lifters, preventing lifter pressurization.
How to fix the problem:
- Replace the cracked cylinder heads.
- Replace the faulty oil pump O-ring with GM part 12563963, as prescribed in TSB 02-06-01-038.
- Check the oil and coolant levels at every gas fill-up. Change the oil on schedule and keep it full.
Cost to fix the problem:
- Replacing cracked cylinder heads varies from $200 to $2,000, as described in Step 1.
- Replacing the oil pump O-ring starts with about $6 for the part and may reach $400 for shop service, depending on your warranty.
- Otherwise, maintaining fresh, full oil is the most effective prevention of lifter and valve train problems.

Step 3 – Valve seal leaks causing exhaust smoke and oil consumption
What causes this problem?
Blue oil smoke on start-up and excessive oil consumption (1 quart in 2,000 miles) is typically a result of leaking valve seals.
What are the components involved?
The intake valve lets the air/fuel mixture into the cylinder, and the exhaust valve lets the burned gasses out. The lower, mushroom half of each valve is inside the sealed cylinder and the upper stem is outside, so the valve rides in a seal to keep the cylinder airtight.
Why are these components the problem?
With age, the valve seal leaks when cold. Engine oil seeps into the cylinder and is burned on start-up, throwing blue smoke from the tail pipe. Engine heat then usually tightens up the valve seal and stops leakage. When the engine cools, oil again seeps past the valve seal. This is different from piston ring leakage, which typically causes blue oil smoke, even when the engine is warm and particularly when revved.
Cylinders with leaking valve seals can be identified by removing the spark plug and looking for oil slurry (refer to Figure 5).
- Grasp the ignition wire by the rubber collar and pull it off the ignition coil.
- Then grasp the ignition wire by the metal heat shield and pull it off the spark plug.
- Use a 5/8" spark plug socket and needed extensions to remove the spark plug.
- Inspect the spark plug. Light dry soot is normal, but oil slurry indicates leakage.
Pro Tip
Older ignition wires are brittle. You should expect them to break, so be prepared to replace them.
How to fix the problem:
Oil additives will not fix this. The leaking valve seals must be replaced.
Cost to fix the problem:
Replacing the valve seals starts at about $50 for a valve seal kit and may go up to $500 for shop service.
Featured Video: Chevy Silverado Valve Seal Replacement:
Step 4 – PCV system fouled, causing oil consumption
What causes this problem?
Excessive oil consumption (1 quart in 2,000 miles) that is not otherwise explained may be a result of oil fouling in the positive crankcase ventilation (PCV) system.
What are the components involved?
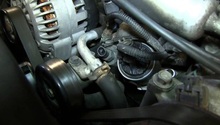
The PCV system circulates fresh air through the engine, evacuating corrosive vapors to the intake manifold and burning them in the cylinders. On the right-front side of the engine, the inlet hose carries fresh air from the throttle body to the right valve cover. On the left-rear side of the engine, the hard plastic vacuum pipe carries regulated vapors from the left valve cover to the intake manifold. The PCV valve regulates vapor flow in the vacuum pipe.
- Between 1999 and 2002, GM used a replaceable spring-and-ball type PCV valve, which has since been revised.
- After 2002, the PCV regulating was done by a non-replaceable baffle inside the valve cover.
Why are these components the problem?
- The 1999 to 2002 spring-and-ball replaceable valve can malfunction, allowing too much oil to flow to the cylinders and burn. GM TSB 01-06-01-029B revised this valve with a fixed orifice PCV valve: part number 12572717.
- The post-2002 baffle system may clog and prevent oil vapor from flowing to the cylinders, causing valve cover leaks.
How to fix the problem:
Fresh air hose. See Figures 8 to 9:
- Remove the fresh air hose by pulling it off the two nozzles.
- Clean the nozzles with pipe cleaners.
- If the hose is damaged or can't be cleaned, get a new hose.
- Very lightly lubricate the nozzles with engine oil and re-install the hose.
Vacuum pipe. See Figures 6 to 10:
- Remove the 8mm bolt in the Vortec engine cover. Tilt the cover up and pull it forward out of the rear clips.
- Remove the 3 and 10mm bolts in the engine cover mount and remove the mount.
- Remove the 10mm nut on the wire bundle atop the engine, and flex the wire bundle away as needed.
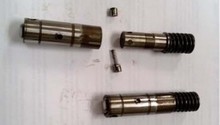
- Remove the vacuum pipe by pulling it off the two nozzles. For 1999 to 2002 Silverados, the PCV valve is located in the valve cover end of the pipe. For post-2002 Silverados, the valve cover will have a fixed nozzle and no replaceable valve.
- For 1999 to 2002 Silverados, replace the PCV valve with the revised valve: GM part number 12572717.
- Clean the nozzles with pipe cleaners.
- If the pipe is damaged or can't be cleaned, get a new pipe.
- Very lightly lubricate the nozzles with engine oil and re-install the pipe.
- Install the wire bundle, cover mount, and engine cover.
Cost to fix the problem:
The revised PCV valve is about $8, and the PCV hose and pipe are $12 to $15 each.

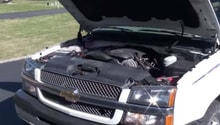
Figure 6. Vortec engine cover. 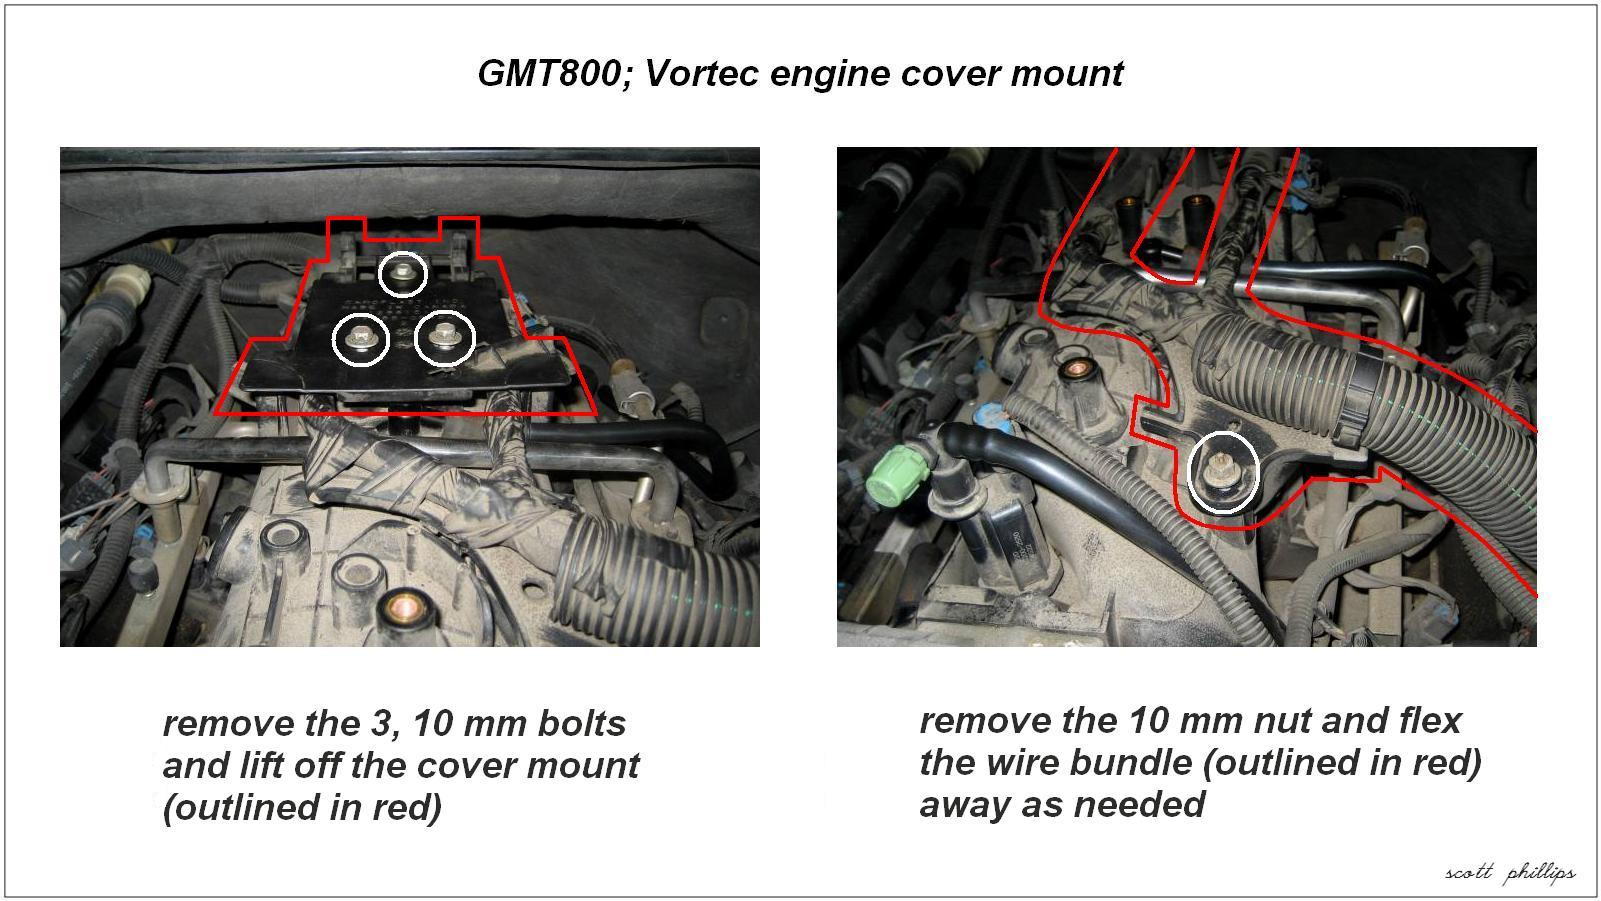
Figure 7. Engine cover mount and wire bundle. 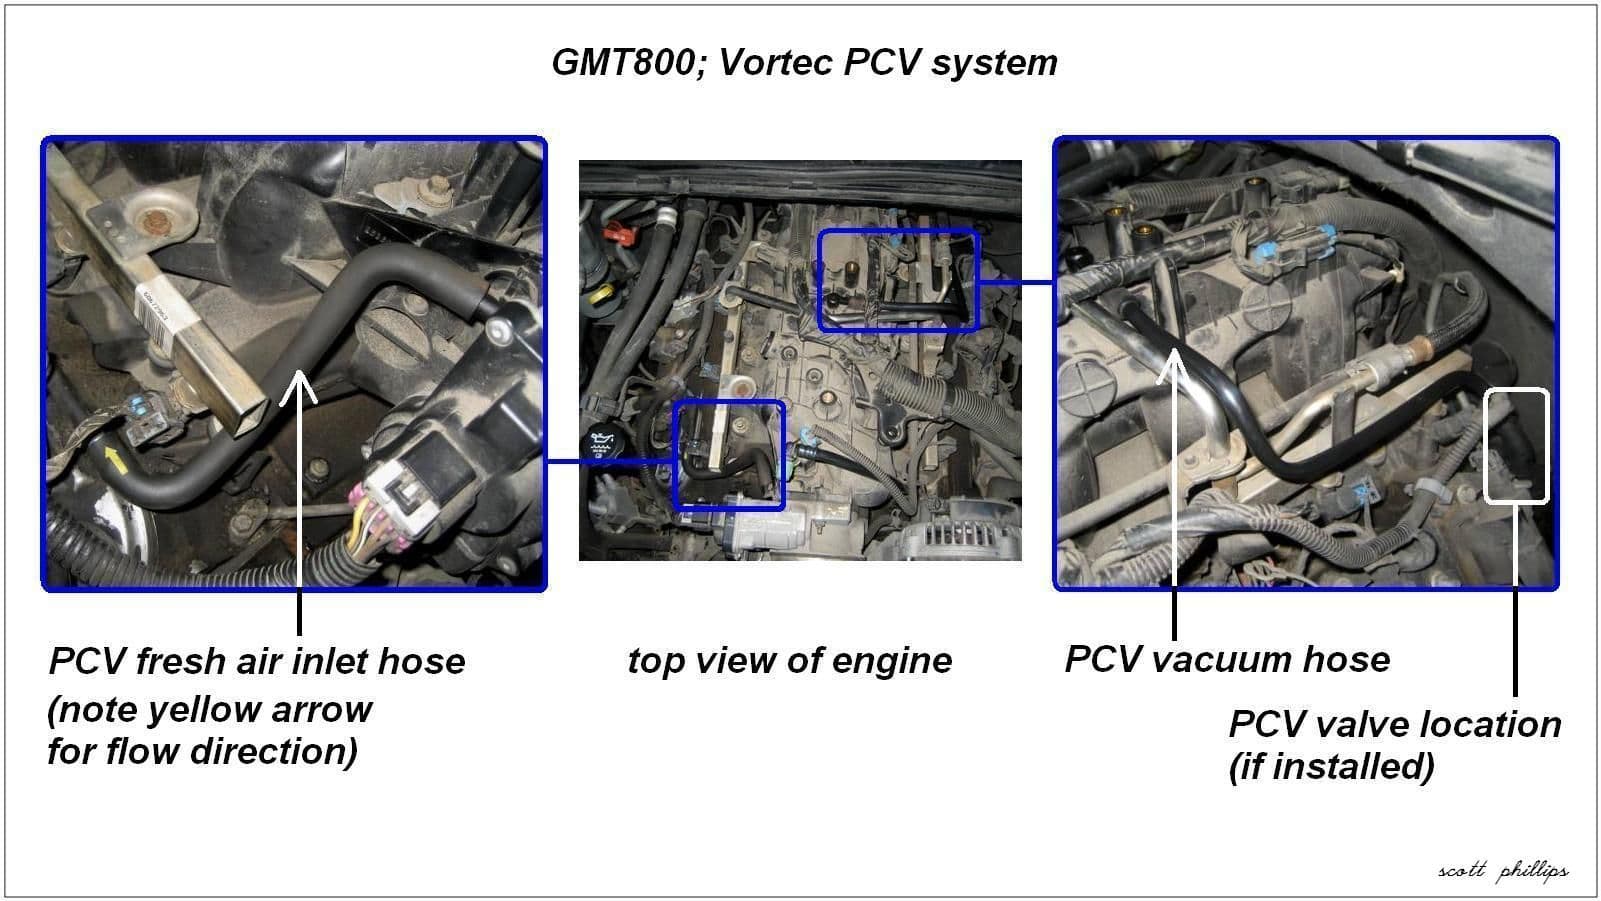
Figure 8. Vortec positive crankcase ventilation system. 
Figure 9. Vortec fresh air inlet hose. 
Figure 10. Vortec PCV vacuum pipe.
Related Discussions
- 2006 Silverado Engine Problems - ChevroletForum.com
- Smoke Start Up - ChevroletForum.com
- Bluish White Smoke Startup - ChevroletForum.com