Chevrolet Silverado 1999-2006: How to Replace A/C Belt Tensioner
Belt noise is mechanical. Repetitive squeaking indicates the belt is not running true, and prolonged squealing means the belt is overheating. Both noises point to a bad A/C belt tensioner. With basic tools and little time, you can replace the tensioner in your Silverado quickly in the comfort of your own garage.
This article applies to the Chevrolet Silverado GMT800 (1999-2006).
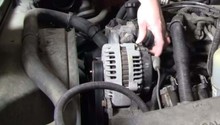
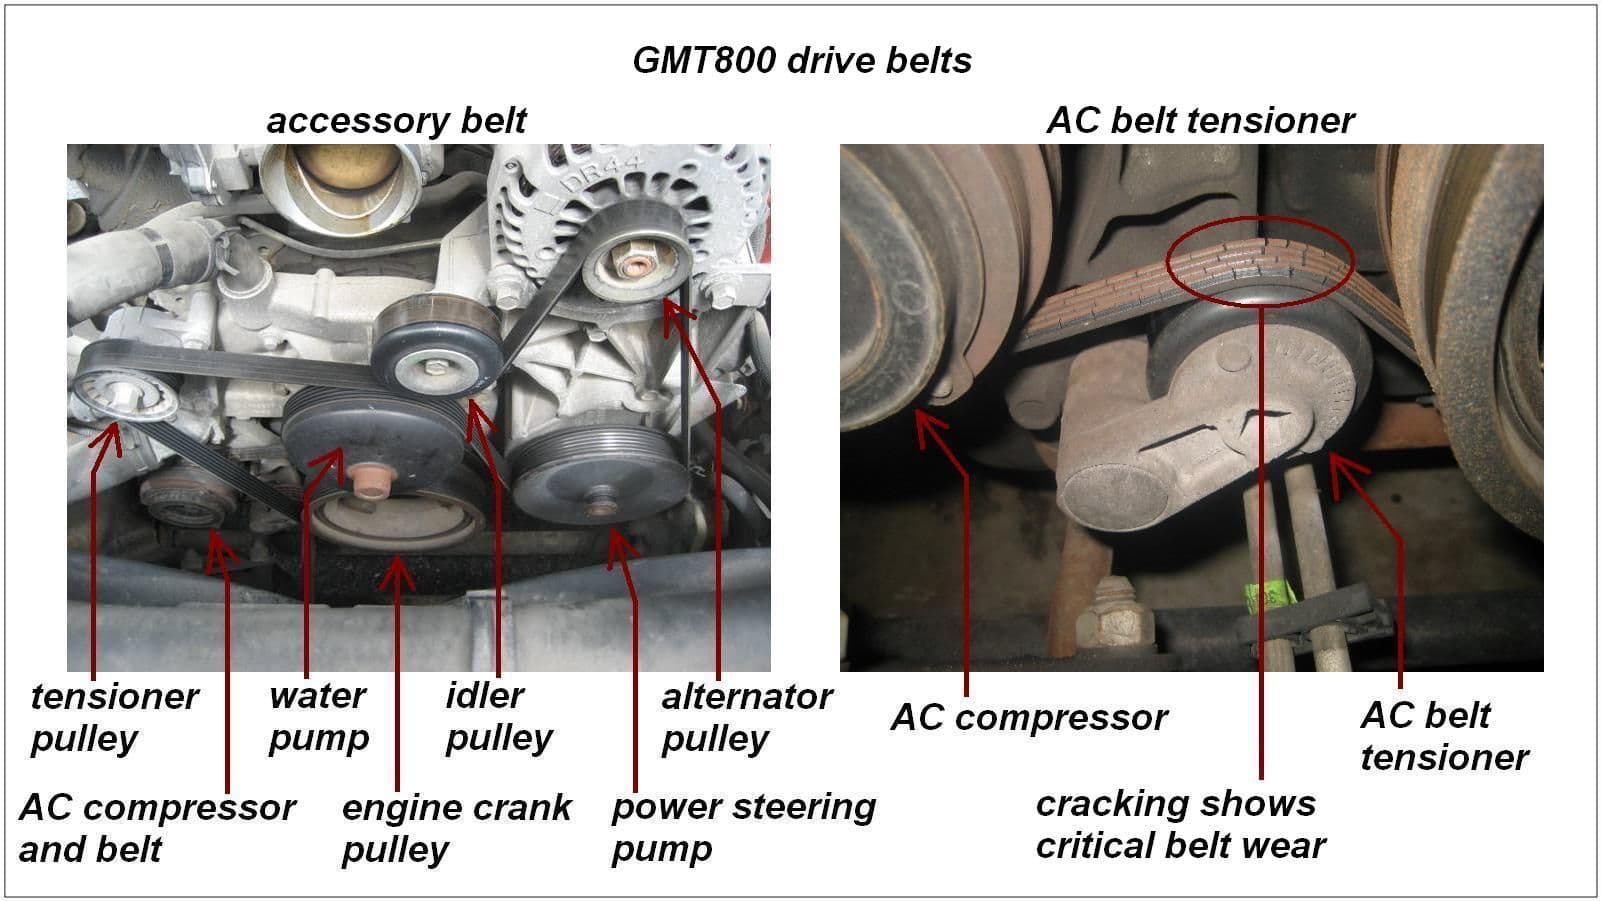
The Vortec 4.8, 5.3, and 6.0 liter engines have a main accessory drive belt for the water pump, power steering, and alternator. The air conditioning compressor is driven by a separate belt that is mounted low on the engine and behind the accessory belt. Both belts have GM auto-tensioners, which maintain spring pressure to automatically adjust for optimum tension as the belt wears. Belt noise begins when the spring weakens or the pulley bearing begins to wobble.
The engine crank pulley drives both belts. To remove the A/C belt, the accessory belt must first be loosened and slipped off the engine crank pulley. See Figure 1 to familiarize yourself with the belt-driven components. In this comprehensive DIY guide, you will learn how to replace the A/C belt tensioner in your Chevrolet Silverado.

Materials Needed
- Replacement A/C belt tensioner (GM #12580196)
- 8mm socket wrench (or battery side-terminal wrench)
- 15mm and 3/8" drive socket wrench with extendable handle
- Flat head screwdriver
- Electrical tape
- Maintenance ramps or jack stands (if needed)
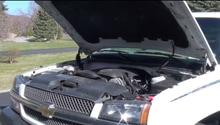
Typically, the GMT800 trucks have enough ground clearance to work without raising the vehicle. Check that you have enough room under the truck to comfortably reach the splash pan (see Figure 5 below). If not, place the truck on jack stands or maintenance ramps.
(Related Article: How to Jack Up Your Truck - ChevroletForum.com)
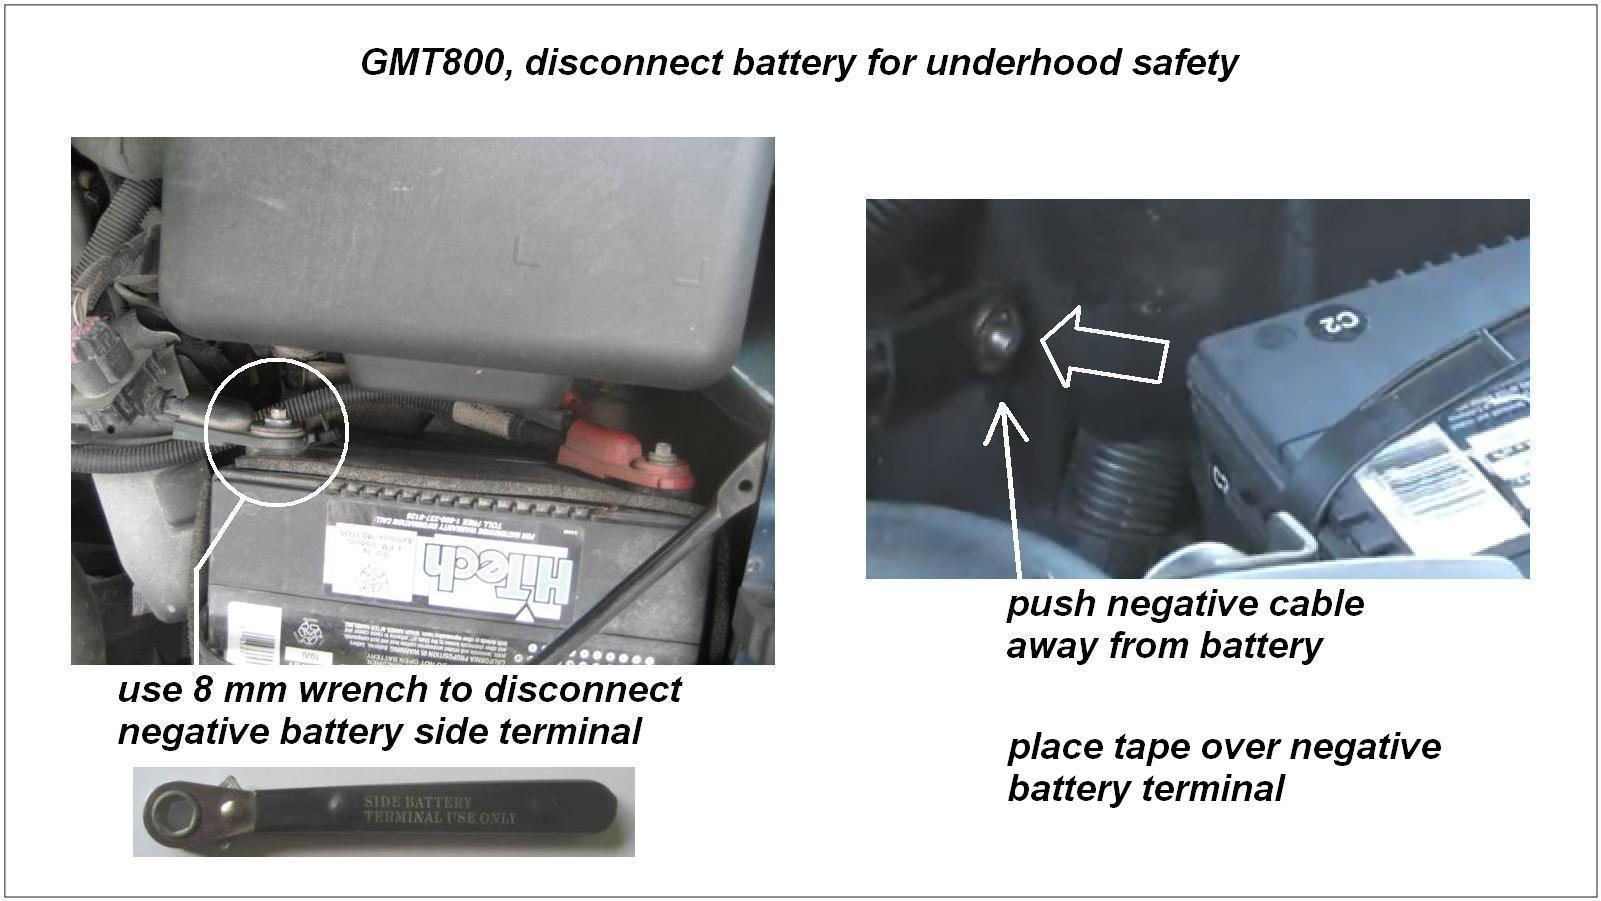
Step 1 – Disconnect the battery
When performing substantial work under the hood, always disconnect the negative (black) battery terminal for safety. Make sure the engine is COLD before beginning work.
- Use an 8mm wrench (or battery side-terminal wrench) to disconnect the negative terminal from the battery.
- To prevent inadvertent contact, push the negative cable away from the battery and place electrical tape over the negative battery terminal.
Note
Before disconnecting the battery, make sure you have any audio or navigation system security codes.
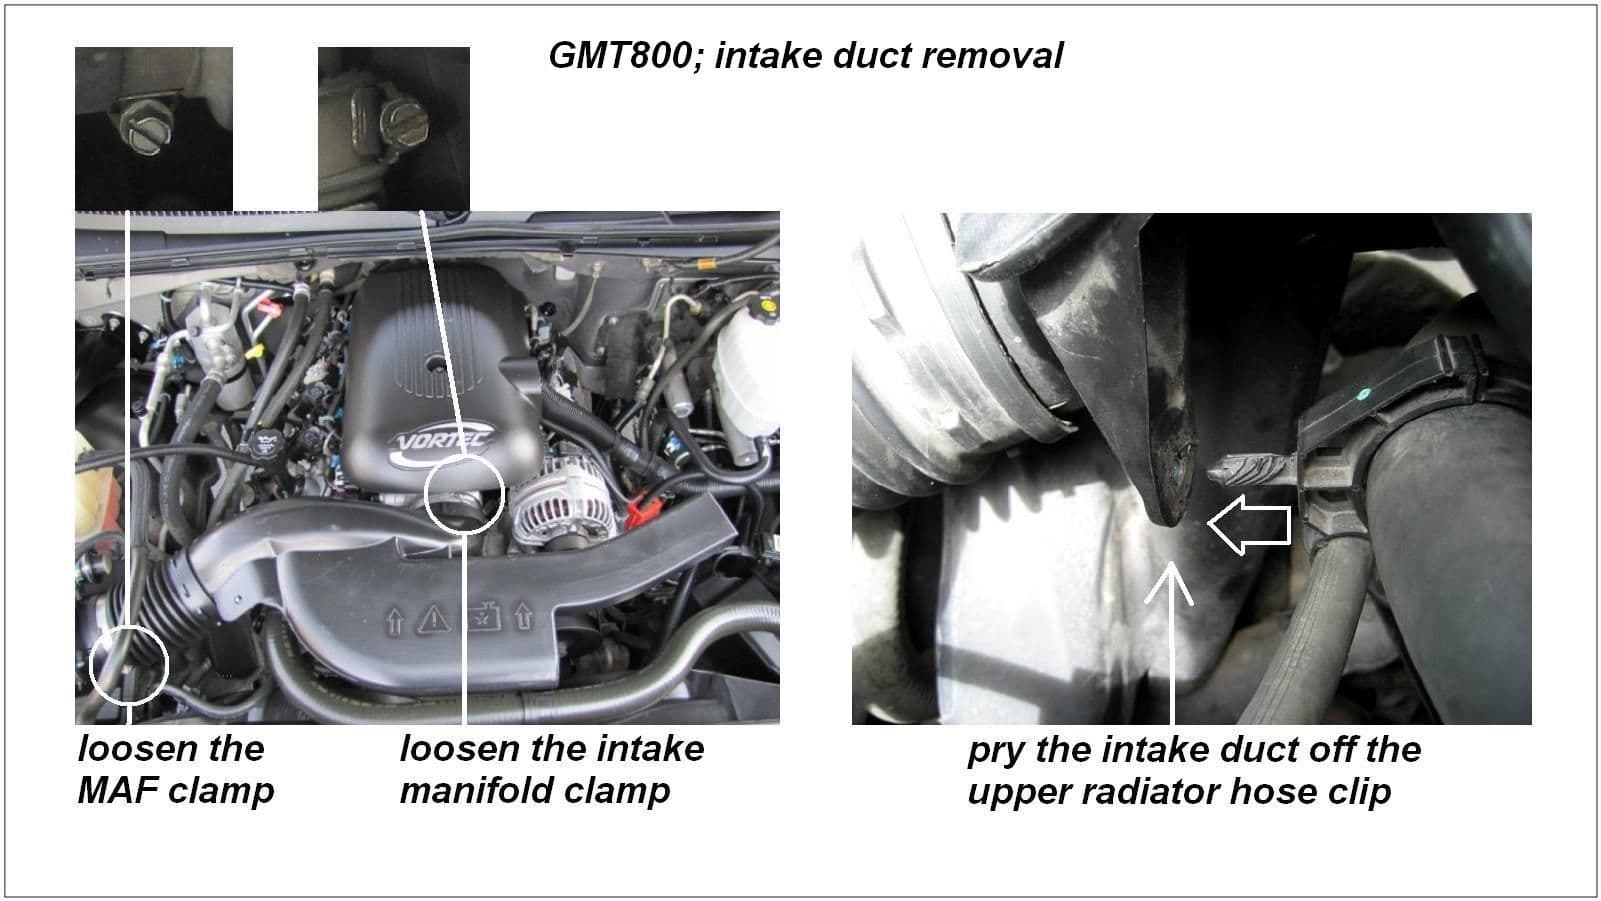
Step 2 – Remove the intake duct
- Use a flat head screwdriver (or 8mm socket) to loosen the hose clamps at the mass airflow (MAF) sensor fitting and intake manifold fitting.
- Slide the intake duct off the fittings.
- Lift the intake duct slightly, and use a flat head screwdriver to pry the intake duct bracket off of the clip attached to the upper radiator hose.
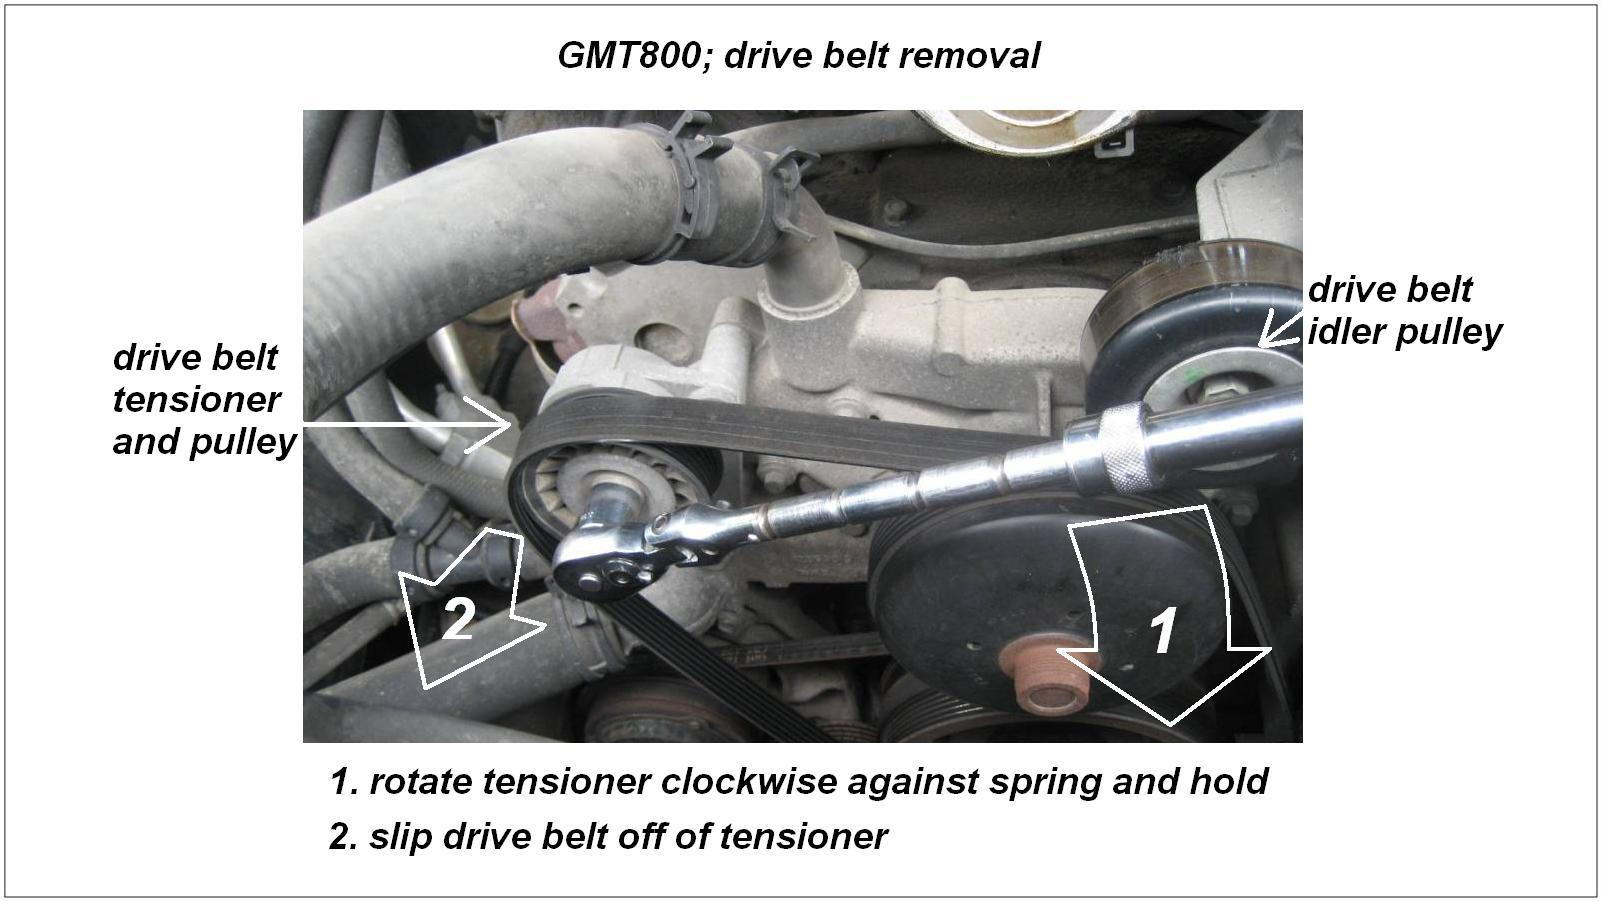
Step 3 – Remove the accessory drive belt
- Place a 15mm socket wrench on the center bolt head of the tensioner pulley. You can use an extendable wrench for extra leverage.
- Rotate the tensioner clockwise against the spring, and hold it. Then slip the belt off the tensioner pulley.
- Release the tensioner slowly back to the spring stop.
- Slip the belt off the crank pulley and let it hang.
Pro Tip
Examine the belt for cracked ribs or fraying, and consider replacing it.
Step 4 – Remove the splash pan
- Use a 15mm socket wrench to remove the five bolts holding up the splash pan.
- Remove the splash pan and set it aside.
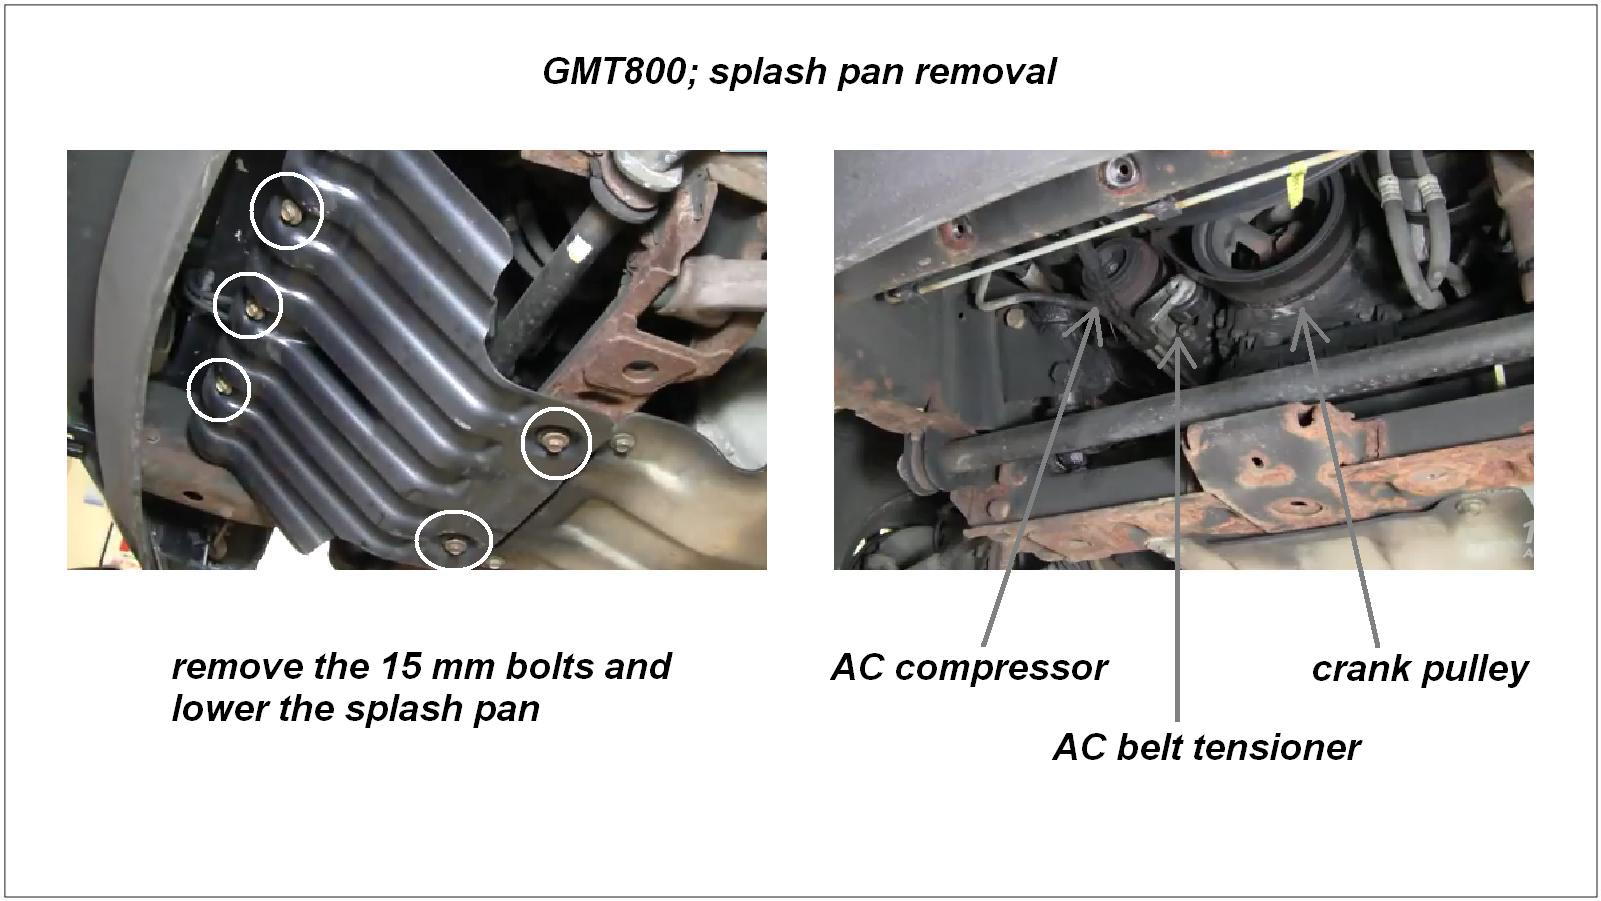
Step 5 – Remove the A/C belt and tensioner
- Insert a 3/8" drive wrench into the square hole of the tensioner.
- Rotate the tensioner clockwise against the spring, and hold it. Then slip the belt off.
- Release the tensioner slowly back to the spring stop.
- Remove the two 15mm bolts and then remove the tensioner.

Pro Tip
Examine the belt for cracked ribs or fraying, and consider replacing it.
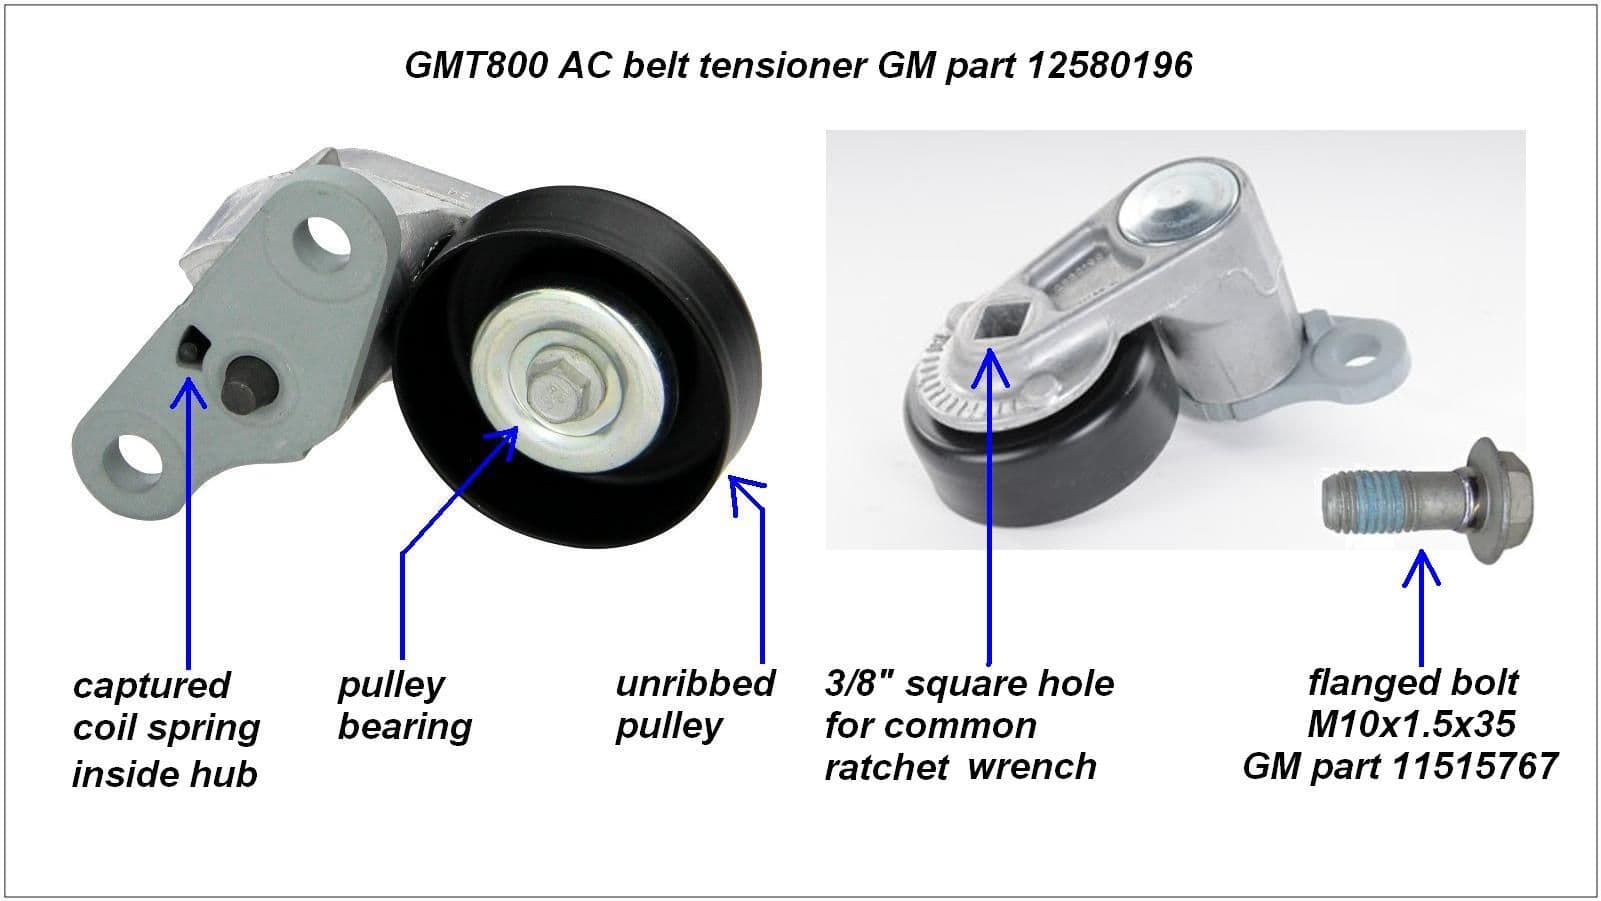
Step 6 – Install the new A/C tensioner and belt
The most common A/C tensioner across the GMT800 line is the GM #12580196. Replacement bolts are GM #11515767. Make sure to verify with your VIN when ordering.
- Position the new A/C tensioner and tighten the bolts.
- Fit the A/C belt around the A/C compressor pulley and the inner track of the crank pulley.
- Rotate the tensioner and slip the belt over the tensioner pulley.
Step 7 – Re-install splash pan and accessory drive belt
- Position the splash pan and tighten the five 15mm bolts.
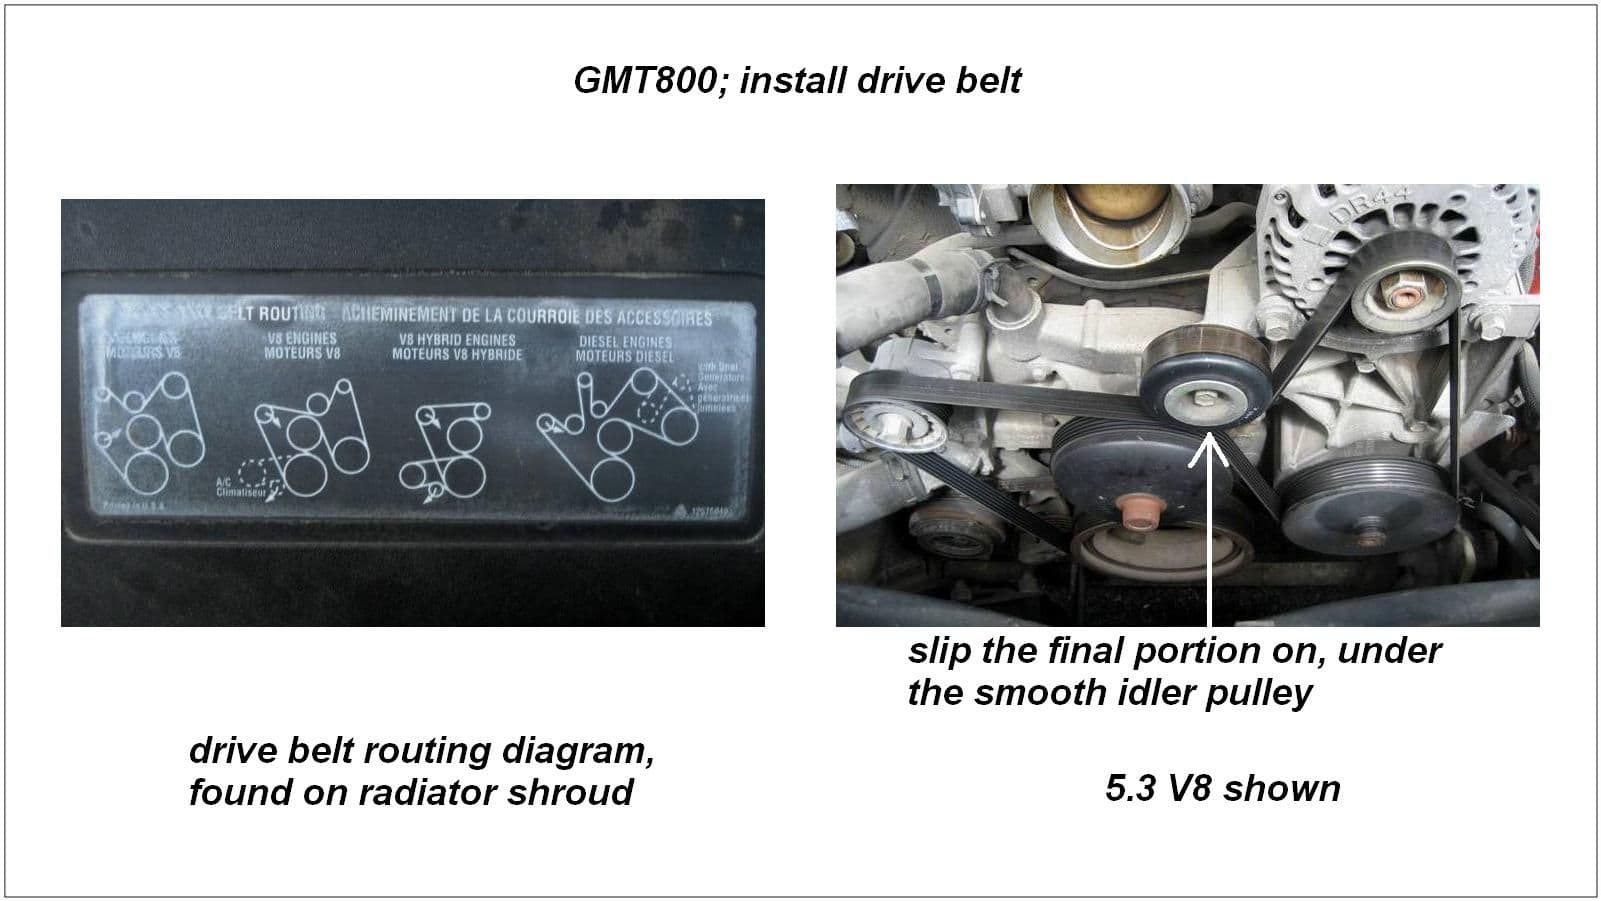
- Fit the belt around the outer track of the crank pulley and around the other pulleys. Refer to the belt routing diagram on the radiator shroud (Figure 8).
- Rotate the tensioner for enough slack to finish and fit the last portion under the smooth idler pulley.
Step 8 – Re-install intake duct and connect battery
- Connect the intake duct bracket to the clip on the upper radiator hose.
- Slide the duct over the MAF sensor as well as the intake manifold fittings, and tighten the clamps.
- Remove the electrical tape from the negative battery terminal, and reconnect the negative lead.
- Enter the audio and navigation security codes as needed.
Pro Tip
Do not over-tighten battery side mount terminals because the side mount seals can break and cause a leak.
Featured Video: How to Replace A/C Belt Tensioner in Chevy Silverado
Related Discussion
- 2005 Silverado V6 4.3L Belt Tensioner Vibrating - ChevroletForum.com