Chevrolet Silverado 1999-2006: How to Replace Fuel Pressure Regulator
If your Silverado's engine is stalling and displaying the symptoms below, the fuel pressure regulator might have gone bad. So if your truck's regulator is in need of a replacement, follow these steps to learn how to do it yourself.
This article applies to the Chevrolet Silverado GMT800 (1999-2006).
The fuel pressure regulator in your Silverdo's engine regulates the amount of fuel entering the fuel injectors. There's a very specific air/fuel ratio that allows the engine to run properly. Too much fuel causes the engine to run rich, and too little fuel causes the engine to run lean. Symptoms of a faulty fuel pressure regulator include engine misfires, stalling at idle, spark plugs electrodes turning black, and gas dripping out the exhaust or in the regulator vacuum line. Replace the regulator as soon as it fails because gasoline may get into the oil system, leading to bigger and more costly damages. Continue reading for the comprehensive DIY instructions.

Materials Needed
- Flat head screwdriver
- Needle nose pliers
- O-ring pick
- Shop rags
Step 1 – Disconnect the vacuum line
- Allow the truck's engine to fully cool down before working under the hood.
- The fuel pressure regulator is located on the driver's side of the engine. Disconnect the vacuum line on top of the regulator by firmly pulling it up and off.

Pro Tip
Fuel leaking out of the vacuum line is an indicator that the fuel pressure regulator is not functioning.
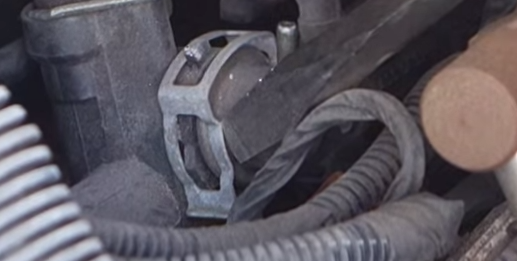
Step 2 – Remove retaining clamp
- Slightly pry out the regulator clamp with a flat head screwdriver.
- Use your hand to pull up on the clamp and remove it from the regulator.
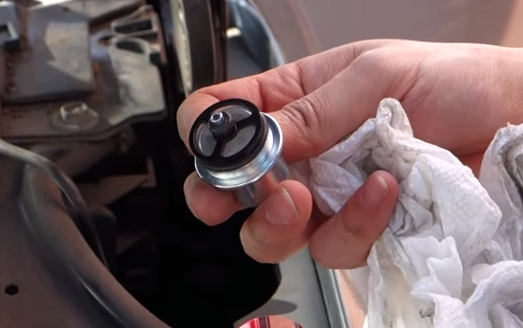
Step 3 – Remove the fuel pressure regulator
- Place shop rags underneath the regulator as a little bit of fuel will spill out.
- To remove the regulator, firmly hold onto it from both sides and pull it back. It should pop right out.

- Use needle nose pliers to remove the O-ring seated inside of the regulator port.
- Then use the pliers to remove the metal regulator screen.
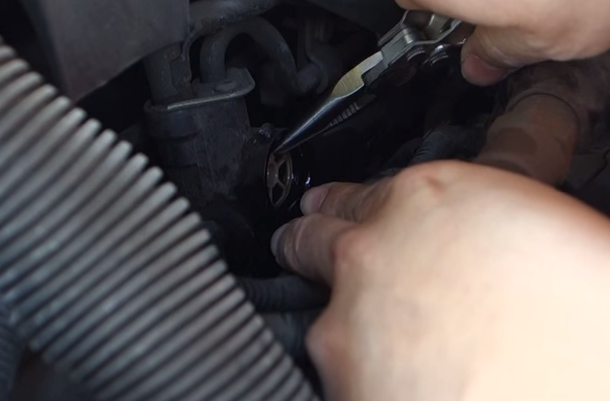
Figure 4. Remove the metal regulator screen. 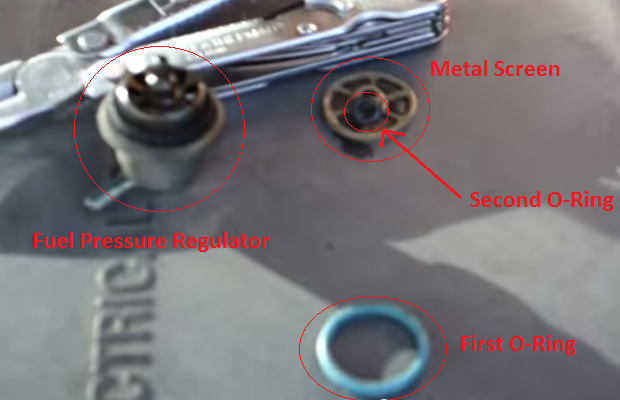
Figure 5. Fuel pressure regulator, metal screen, and O-rings removed.
Step 4 – Install the new fuel pressure regulator
The new regulator should come with new O-rings and a new metal screen.
- Push the new regulator into place, and make sure the vacuum line port is facing up.
- Re-install the regulator clamp.
- Then reattach the vacuum line to the port on the regulator.

Pro Tip
Apply a moderate amount of motor oil to the O-ring for lubrication and a tighter seal.
Featured Video: Replacing a Fuel Pressure Regulator
Related Discussion
- 1999 Silverado 5.3 Fuel Delivery Issues - ChevroletForum.com