Chevrolet Silverado 1999-2006: How to Replace Knock Sensors
A bad knock sensor can cause some serious engine damage. Before that happens, check out this handy guide on replacing knock sensors in your Silverado.
This article applies to the Chevrolet Silverado GMT800 (1999-2006).
Knock sensors play an important as well as essential role in your Silverado's engine functionality, detecting any engine noises caused by early detonation and adjusting the ignition-timing accordingly. When a knock sensor fails, detonation is not properly regulated and serious engine damage can occur, leading to some very costly repairs. Symptoms of a bad knock sensor include a check engine light, loud thumping noises coming from the engine, or shaking, vibrating, and misfires on a cold start. Keep reading as this article will show you how to replace a faulty knock sensor in your Silverado before costly damages occur.

Materials Needed
- 1/4" and 3/8" drive ratchets
- 22mm deep well socket
- Torque wrench
- Fuel line removal tool
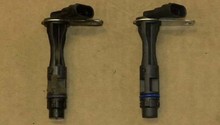
- Replacement knock sensors (2)
- Knock sensor sub-harness
- Intake manifold gaskets (optional)
- Shop rags or small container
- RTV sealant
Pro Tip
In addition to replacing the knock sensor, preventative maintenance can further reduce detonation.
- Lower the compression ratio
- Use higher octane fuel
- Add injector cleaner into the fuel tank
- Retard the ignition timing
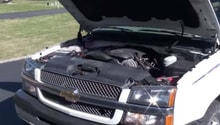
Step 1 – Access the intake manifold
- Always disconnect the negative battery terminal (black cover) when working under the hood.
- Remove the intake hose by loosening the hose clamp on each end: one by the MAF and the other by the throttle body.
- Then, remove the throttle cable and cruise control cable from the throttle body. If you have a 2003 and up Silverado, you also need to unplug the drive-by-wire harness.
- Remove the throttle cable bracket from the intake manifold, and push the bracket along with the cables off to the side.
- Unbolt the main engine harness bracket on the driver's side of the intake manifold.
- Unplug the EVAP solenoid, MAP sensor, and knock sensor sub-harness.
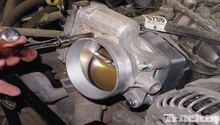
- Remove the throttle body and set it aside.
- Remove the vent hoses from each valve cover.
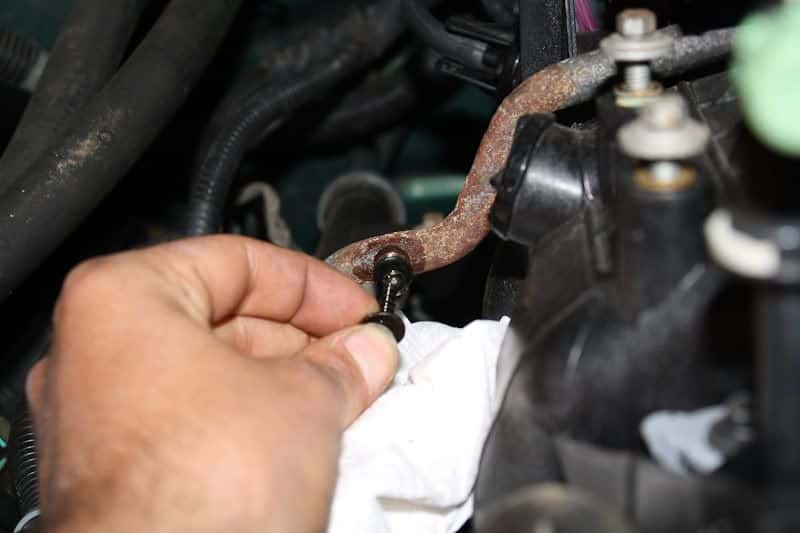
- Relieve fuel pressure through the Schrader valve on the fuel rail crossover, and use a rag or small container to catch any gas run off.
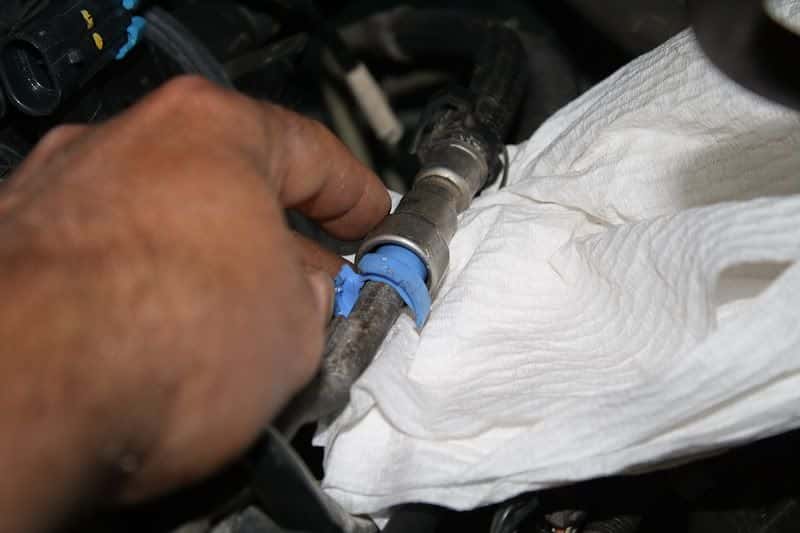
Step 2 – Remove the fuel lines
- Use a fuel line removal tool to disconnect the fuel lines from the fuel rails. The fuel rails are located at the rear, driver's side of the intake manifold. Use a rag or small container to catch any loose gas.
- 1999 to 2003 Silverados have a supply and return line, while 2004 and up Silverados do not have a return line.
- Use the fuel line removal tool to remove the EVAP line located between the engine and the firewall.
Step 3 – Remove the injectors and engine wire harness
- Unplug as well as remove all eight fuel injectors and connectors.
- Disconnect the vacuum line from the brake booster.
- Pull the engine harness to the side, and unplug the alternator connector.
- Unplug the idle air control valve.
- Unplug the throttle position sensor on the throttle body.

Step 4 – Replace the knock sensors
- Remove all of the intake manifold bolts in the reverse order to their bolted down sequence (10 to 1). Refer to Figure 4 below.
- Pull the manifold off. The knock sensors are located underneath the black plugs connected to a wire harness.
- Pull the plugs out and unbolt both knock sensors using a 22mm deep well socket.
- Install the new sensors and torque them to exactly 15 ft-lbs.
- Apply some RTV to the rubber plugs to prevent water from entering.
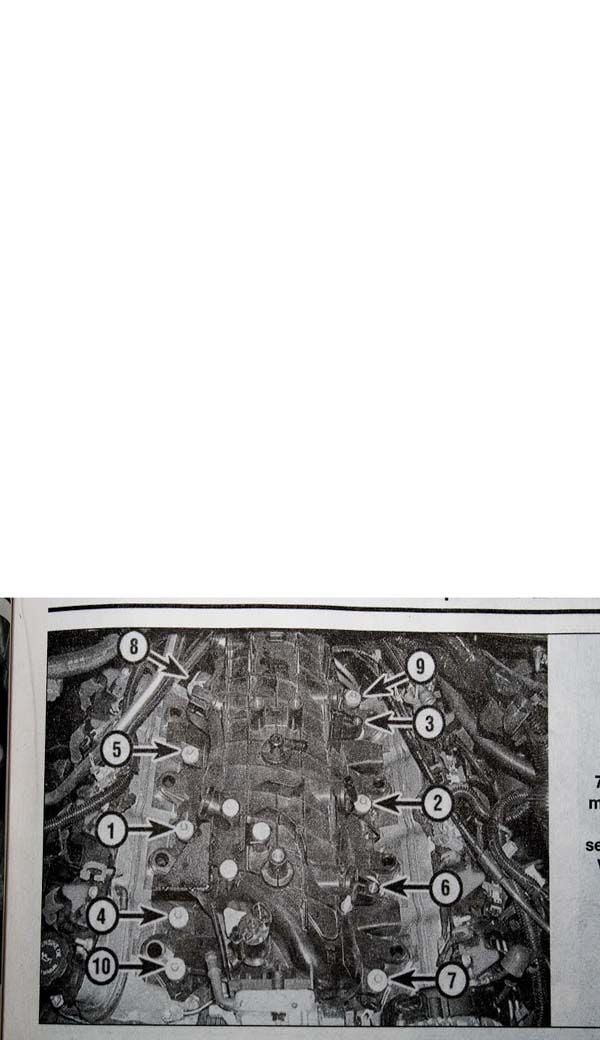
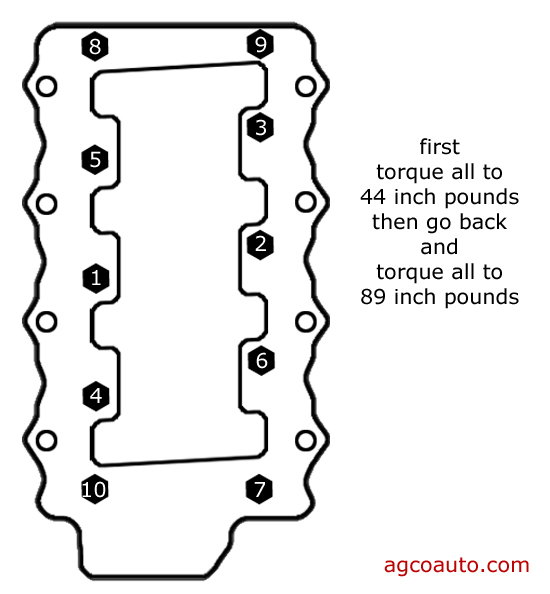
Figure 4. Diagram with intake manifold bolt sequence. 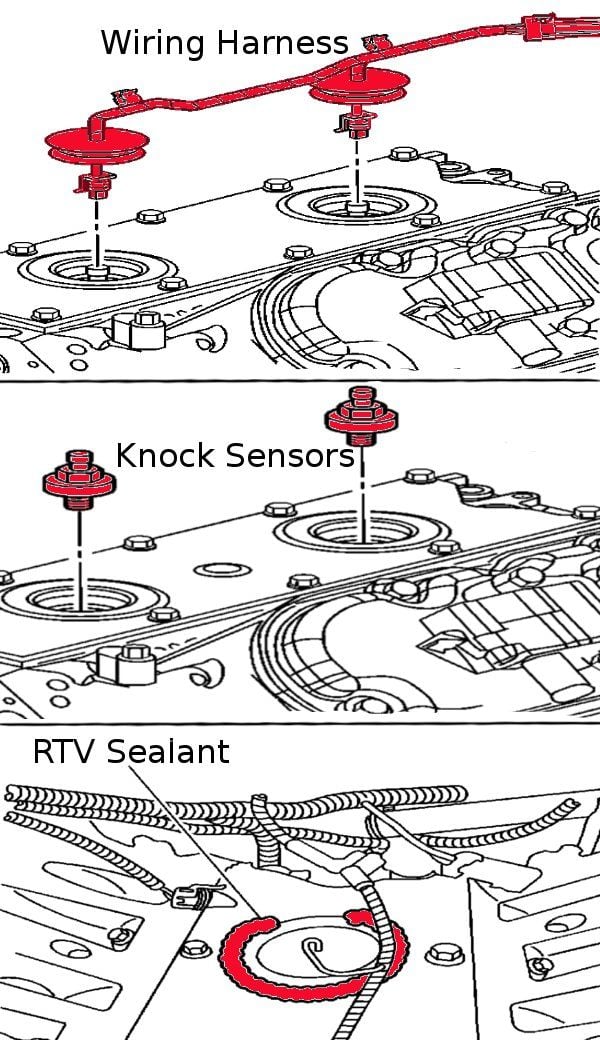
Figure 5. Unplug the wire harness, remove the knock sensors, and apply RTV sealant. 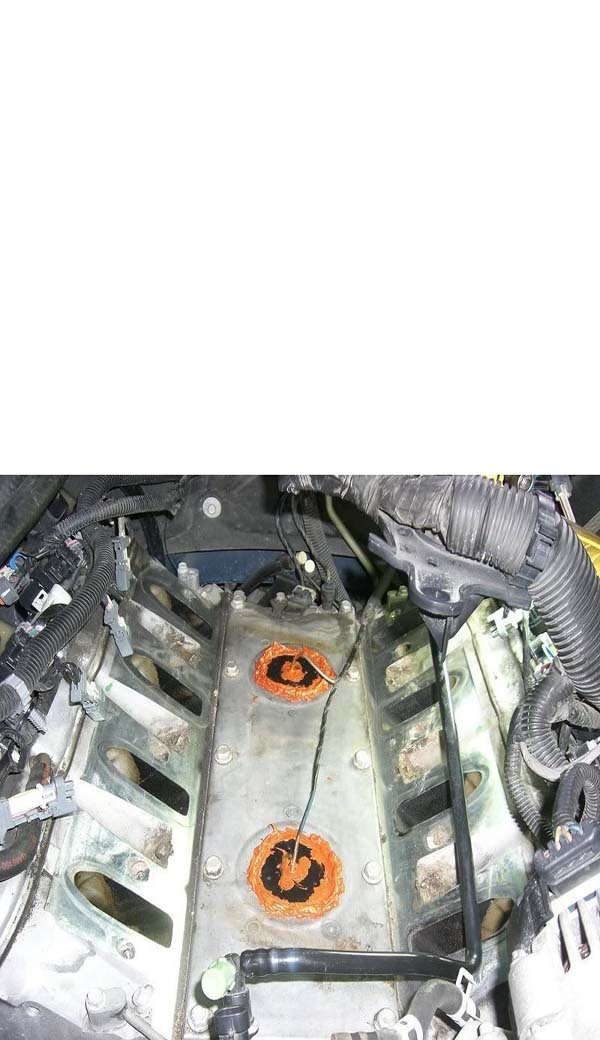
Figure 6. Installed knock sensors with RTV sealant.
Step 5 – Re-install the removed components
- Clip the new intake manifold gaskets to the intake manifold. Make sure all of the surfaces are clean.
- Set the manifold back onto the engine, and torque the bolts in their correct order (1 to 10). Refer to Figure 7. First torque each bolt to 44 in-lbs, and then to 89 in-lbs.
- Put the throttle body back in place, and torque it to 106 in-lbs.
- Connect the knock sensor plugs from the wire harness.
- Plug in all the remaining sensors.
- Reconnect the fuel lines, EVAP line, brackets, and intake hose.
- Reconnect the negative battery terminal (black), and start the truck to ensure the engine knock has disappeared.
Featured Video: How to Replace Engine Knock Sensor in Silverado
Related Discussion
- Silverado Knock Sensor Problem - ChevroletForum.com