Chevrolet Silverado 1999-2006: How to Replace Oxygen (O2) Sensors
If your Chevy Silverado is racking up miles, you might notice a significant decrease in fuel economy and engine power. Even though these symptoms are typical of an aging engine, the O2 sensors might be faulty, causing your check engine light to turn on and your truck to fail its emissions test.
This article applies to the Chevrolet Silverado GMT800 (1999-2006).
O2 sensors measure the oxygen levels in your truck's exhaust gas before and after passing through the catalytic converter. By measuring the amount of oxygen leftover after engine combustion, the truck's on-board computer can adjust the air-to-fuel ratio accordingly. By keeping this mixture balanced, the computer prevents the engine from running too lean or too rich. If the amount of oxygen is too low, the engine will begin to run rich, meaning it's dumping un-burnt fuel into the exhaust. If the amount of oxygen is too high, the engine will begin to run lean, which can lead to detonation and further engine damage if left untreated. Make sure the O2 sensors in your Silverado are functioning properly, and if necessary, replace them by following the steps below.

Materials Needed
- Upstream O2 sensors (2)
- Downstream O2 sensors (2)
- Flat head screwdriver
- 7/8" Crescent wrench
- Breaker bar (optional)
- Wire cutters
There are four O2 sensors in 1999 to 2006 Silverado models: two upstream and two downstream sensors. The upstream sensors are located between the exhaust manifold and the exhaust, while the downstream sensors are located after the catalytic converter.
- Upstream driver's side O2 sensor: Bank 1, Sensor 1 (B1/S1)
- Upstream passenger's side O2 sensor: Bank 2, Sensor 1 (B2/S1)
- Downstream driver's side O2 sensor: Bank 1, Sensor 2 (B1/S2)
- Downstream passenger's side O2 sensor: Bank 2, Sensor 2 (B2/S2)
Replacing the Downstream O2 Sensors
Step 1 – Disconnect the battery and lift your truck (if needed)
Always disconnect the negative terminal (black cover) of the battery when working with electrical components and wiring. It's not necessary to lift your truck, but you can do so for more work space.
(Related Article: How to Jack Up Your Truck - ChevroletForum.com)
Step 2 – Remove the old O2 sensors
Figures 4 through 6 below show the replacement of the B2/S2 (passenger's side) O2 sensor. However, replacement of the B1/S2 (driver's side) O2 sensor is the same process.
- Using your flat head screwdriver, pry out the clip holding the wire harness to the sheet metal.
- Disconnect the O2 sensor wire harness from the sensor.
- Use the 7/8" Crescent wrench to remove the O2 sensor. You may need a breaker bar for extra leverage.
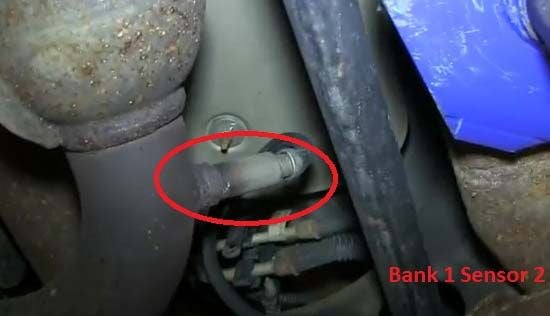
Figure 2. Location of B1/S2 O2 sensor. 
Figure 3. Location of B2/S2 O2 sensor. 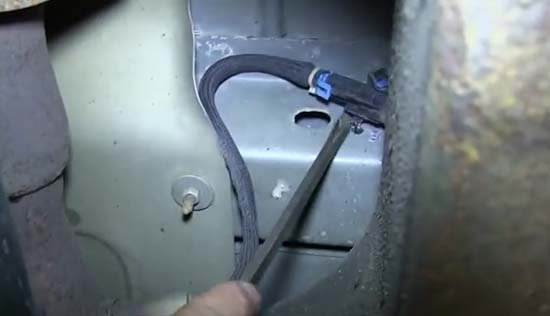
Figure 4. Un-clip and remove the wire harness connector. 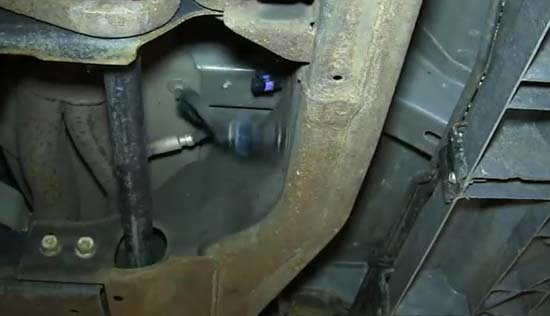
Figure 5. Disconnected wire harness connector. 
Figure 6. Unscrew and remove the O2 sensor.
Step 3 – Install the new O2 sensors
- Hand-tighten the new O2 sensor into place.
- Use the 7/8" Crescent wrench to tighten the O2 sensor to a snug fit.
- Reconnect the wire harness to the new O2 sensor.
- Push the wire harness clip back into place.

Featured Video: How to Replace Downstream O2 Sensors
Replacing the Upstream O2 Sensors
Step 1 – Remove the old O2 sensors
Figures 10 through 12 below show the removal of the B2/S1 (passenger's side) O2 sensor. However, replacement of the B1/S1 (driver's side) O2 sensor is the same process.
- Use wire cutters to cut the clip securing the O2 wire harness to the frame rail.
- Pull the wire harness free and disconnect it.
- Using a flat head screwdriver, pry out the metal clip securing the wire harness that's directly connected to the O2 sensor.
- Use the 7/8" Crescent wrench to remove the O2 sensor. You may need a breaker bar for extra leverage.
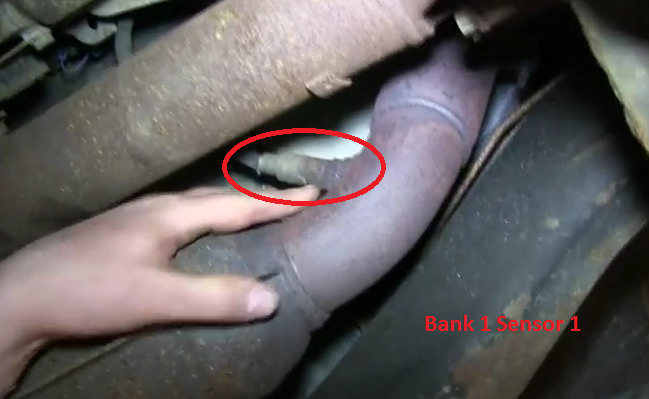
Figure 8. B1/S1 O2 sensor location. 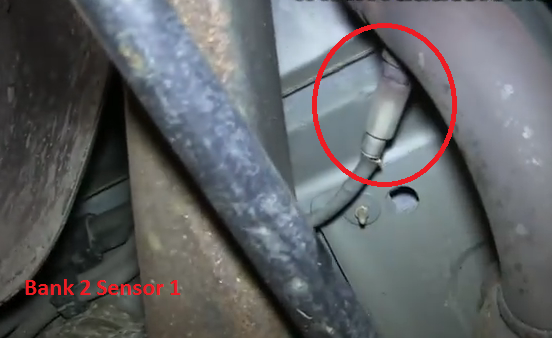
Figure 9. B2/S1 O2 sensor location. 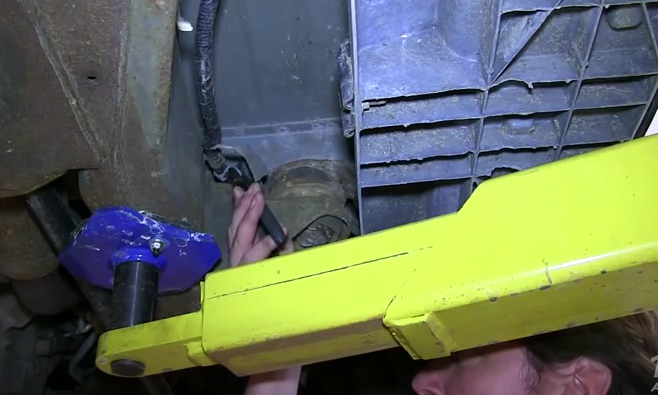
Figure 10. Clip the pin on the wire harness connector near the frame rail. 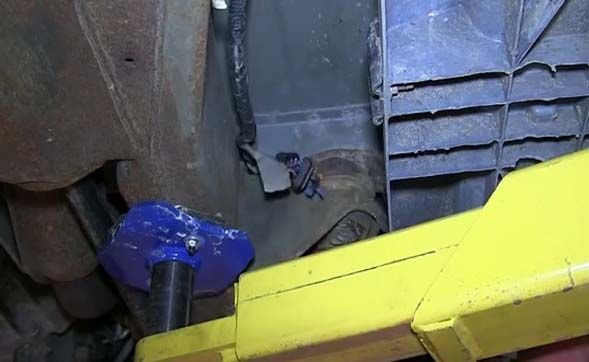
Figure 11. Disconnected wire harness connector. 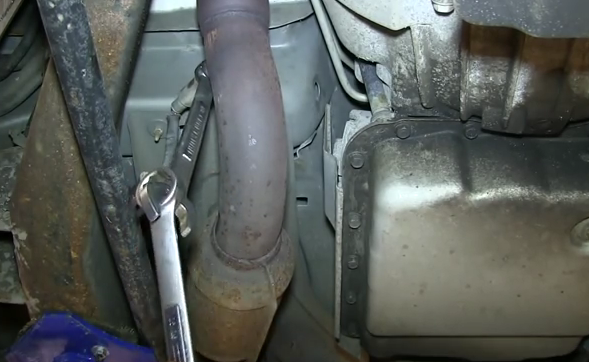
Figure 12. Use a breaker bar to remove the sensor if needed.
Step 2 – Install the new O2 sensors
- Hand-tighten the new O2 sensor into place.
- Use the 7/8" Crescent wrench to tighten the O2 sensor to a snug fit.
- Reconnect the wire harness to the new O2 sensor.
- Route the wire harness to the frame rail.
- Push the wire harness clip back into place.
- Start the engine and let it run for at least five minutes, so the computer can adjust to the new O2 sensor.
Featured Video: How to Install/Replace Upstream O2 Sensor
Related Discussions
- Oxygen Sensor Problem on 2005 Silverado w/8.1L Engine - ChevroletForum.com
- Need to Replace My Oxygen Sensors - ChevroletForum.com