Chevrolet Silverado 2014-Present: How to Flush Your Radiator
Eventually, the radiator will start building up contaminants that will prevent it from doing its job properly. Here's how to flush it and keep it at tip-top condition.
This article applies to the Chevrolet Silverado 1500 K2XX (2014-Present).
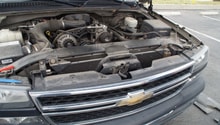
Your radiator operates under extreme conditions all the time. Through a system of hoses and tubes, anti-freeze is routed to the radiator from the engine. Then, the fluid goes through the radiator and returns to the engine; only to do it again and again countless times. The anti-freeze coolant has a temperature of 300 degrees when it leaves the engine, and it's the radiator's job to lower that temperature to a more manageable 210 degrees (based on your truck's thermostat). GM now recommends 50,000 mile changes. It used to be 100,000 miles, but they found that the GM brand "DexCool" was breaking down before 100,000 miles. Changing your anti-freeze and flushing your radiator is an easy job, so it's worthwhile to maintain a 50,000 interval.

Materials Needed
- Anti-freeze coolant
- Catch pan
- Funnel
- 2 gallons of distilled water
- Prestone Flush 'N Fill Kit (optional)
Step 1 – Drain the old anti-freeze coolant
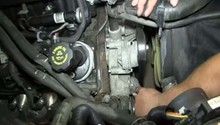
The coolant reservoir is located on the passenger's side of the engine compartment. It has a cap on it and it is labeled. It's not recommended to remove that cap until the engine is all the way cooled. You'll find a drain plug on the radiator on the driver's side. Place a catch pan underneath the drain plug, and remove the drain plug. Other sources indicate that it's a lot easier and a lot faster to disconnect the lower radiator hose, but in either case, make sure to allow all the old anti-freeze to flow into the catch pan.

Step 2 – Fill with new coolant
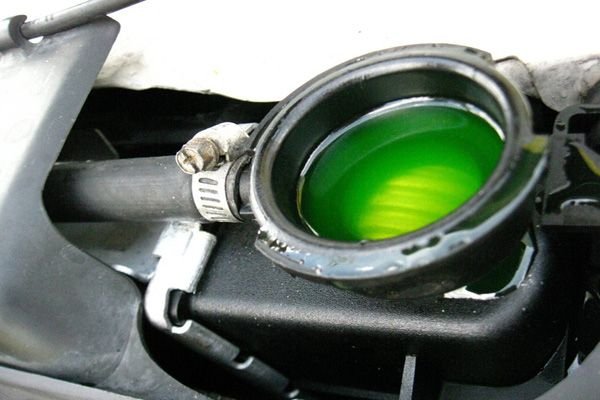
Now is a good time to check the condition of the other hoses, while you're waiting for the coolant to drain. It is suggested that you fill the system with water and let it drain once or twice. You'll find that additional dirt as well as gunk will come out, and if so, you might want to do it again until the water draining is clear. When the old coolant is completely removed, re-install the drain plug (or radiator hose). Using the funnel, pour in the new anti-freeze coolant until it is half an inch from the top.

Step 3 – Check the coolant level
Start the engine and let it run until it gets warm. You'll find that the coolant level in the reservoir is lower than where you left it. Add more coolant as necessary to reach the line. Finally, check again the next morning and fill if needed.
Featured Video: How to Flush Your Coolant
Related Discussion
- Flushing Coolant Questions- ChevroletForum.com