
Big Block in an awd Astro/Safari?


 February 7th, 2010, 5:55 AM
#12
CF Beginner
Thread Starter
Join Date: Aug 2009
Location: Montreal, Quebec, Canada
Posts: 13
Likes: 0
Received 0 Likes
on
0 Posts
Gary's been driving me freakin' bonkers with a more detailed thread of the build. I'll pay $1000 to the first man who agrees to make Gary permanently disappear from the face of the earth..... 
This'll be a work in progress thread, I have wayyy too many pics to sort thru. I went thru the pics I have stored in Photobucket and realize I'll have to download tons more. To make matters worse, my computer's working at the speed of a sleepy sloth. It's always been slow, but it's gotten so much worse lately.
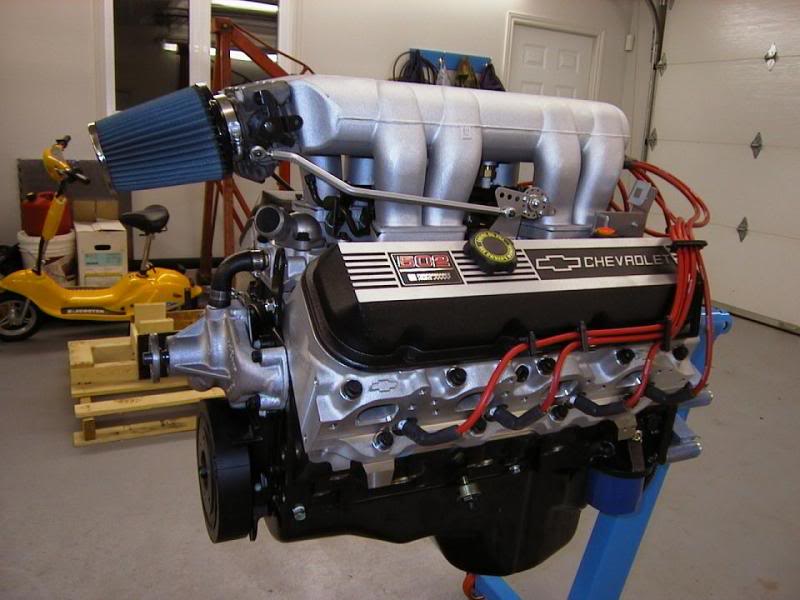
Soon as I brought the $13k crate engine home and put her up on a stand, I had a panic attack. What the hell was I thinking? How in heck am I gonna make this thing fit my van? Especially with those in the know telling me that my front differential is gonna make exhaust routing impossible.
I'd never done a swap before and was worried about under-engineering. Just how strong do the motor mounts have to be? People were telling me I might even twist my awd frame due to the %70+ lbs/ft of torque.
So I figured I'd overbuild to be on the safe side.
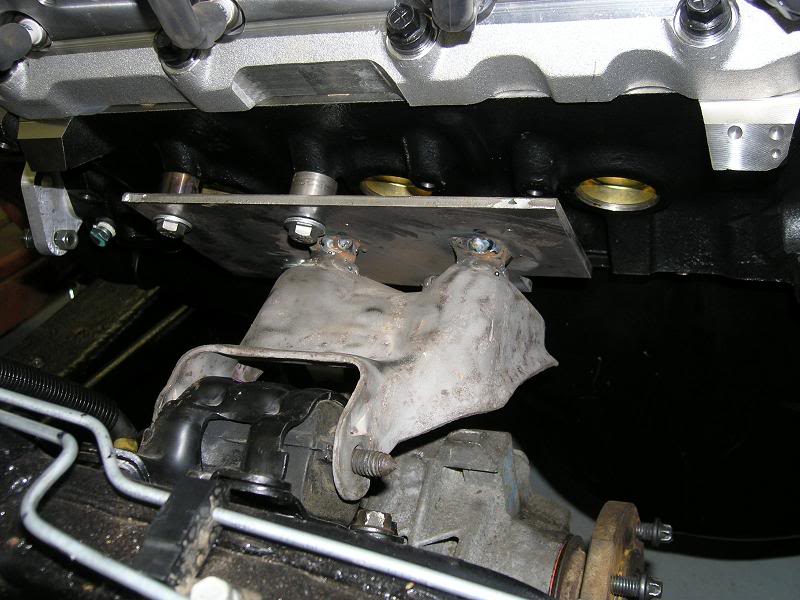
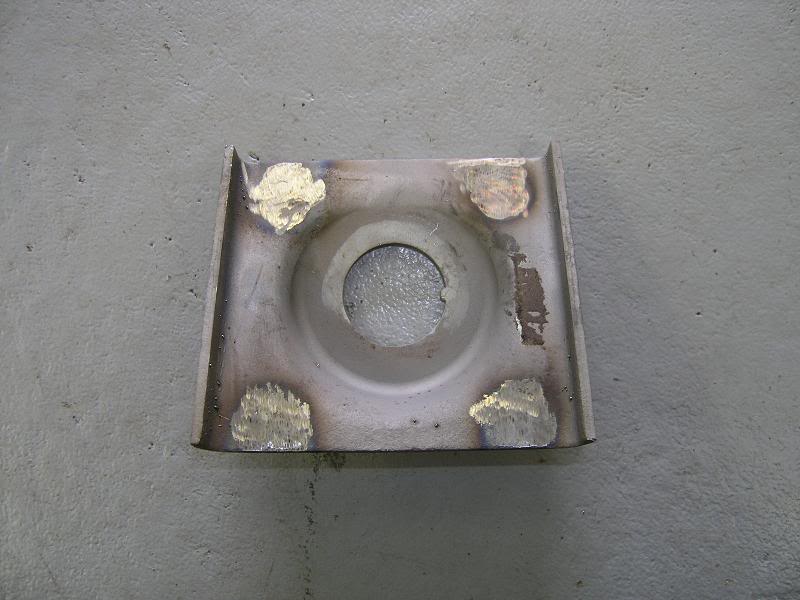
The OEM tranny mount (actually, t-case mount but you know what I mean...) Seems so flimsy. I "solidified" it")
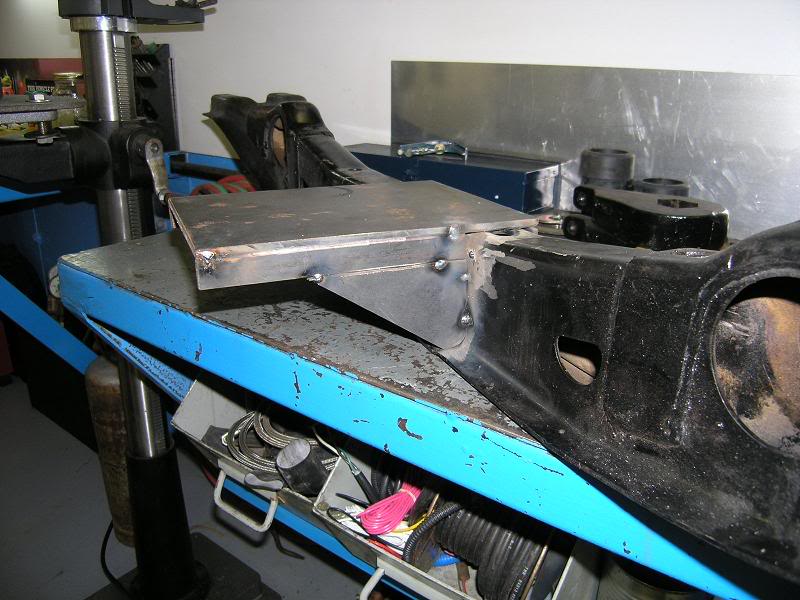
The weld tacks where only to hold it in place. After verifying proper fitting, the mount was welded properly to the crossmember.

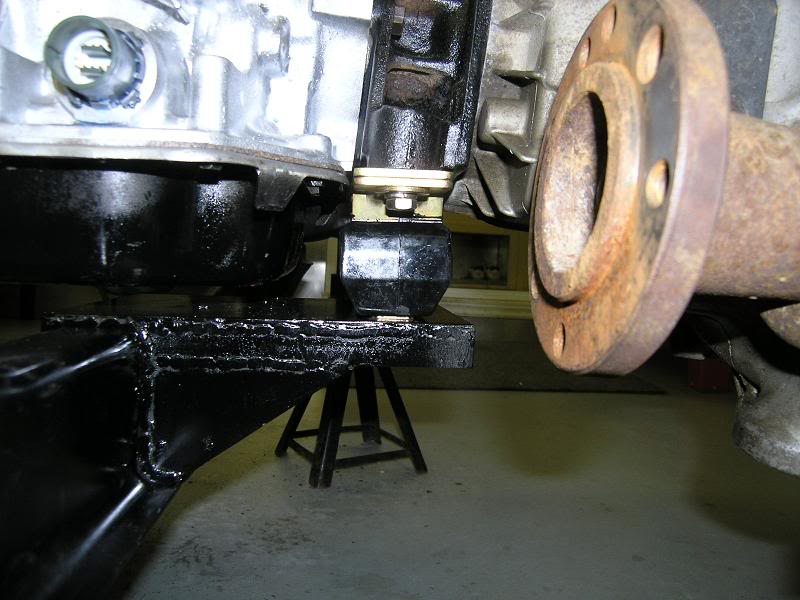
As most of you may know, the M platform uses a subframe a la Nova/Camaro of old. My truck was originally an awd being swapped over to 4wd. I wasn't going for the "low-slung sleeper look". I wanted something that would allow me to run my 325/60R15's without constant rubbing, especially when off-road.
My solution (thanks to the ingenious idea of my old friend Matt Mead from ASV) was to do a welded-on body lift. Simply put, I had 6 mounts made up of schedule 40 steel pipe c/w caps. The OEM bodymount holes were enlarged to allow me to pass the bodymount washer/isolator up to the cap of the schedule 40 spacers. I 1st tried to enlarge the holes using various methods, not pretty.... I ended up borrowing an electricin buddy's hydraulic hole punch kit, opended up those holes easily & they were perfectly round..
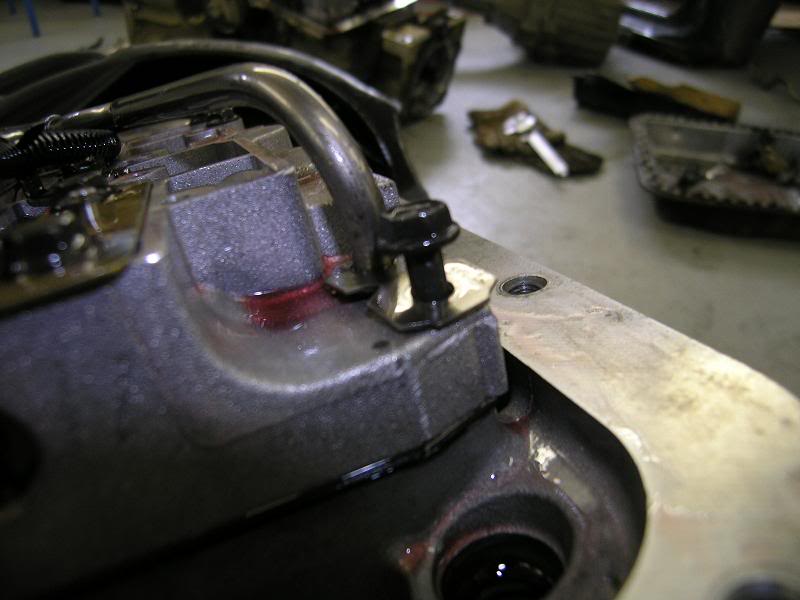
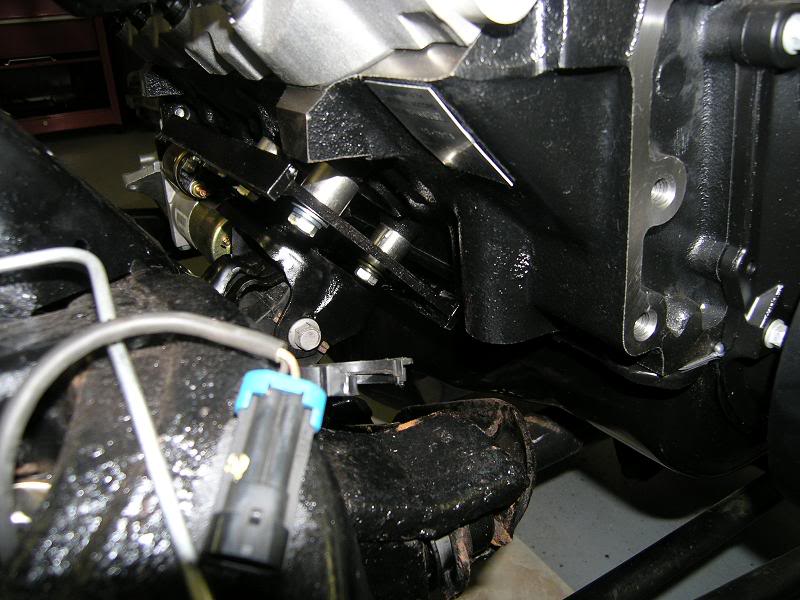
Just goes to show you can't trust anyone to do their job properly. This otherwise awesome 4L80E Raptor tranny from PATC was found to have a bolt that hadn't even been screwed in completely, let alone tightened down. If I hadn't popped the pan to replace the shifter shaft so as to be compatible with my OEM cable-shifter, I'd never have know that the bolt was loose. Prolly woulda put up with months of searching for the "funny" noise coming form under the truck ...I shoulda known, what did I expect from PATC for a measly $5k

I took the crate engine throttle linkage and the OEM one and built a custom assembly out of them both. Seeing as I wanted the cruise control (as well as everything else) to work like a stocker, I attempted to mimick the stocker throttle control geometry as much as possible. Regardless, the one thing I don't like about my throttle is a very radical tip-in. You have to slide your foot a bit up on the pedal so as to have proper control when accelerating from a closed throttle, otherwise you end up snapping your neck clean off LOL
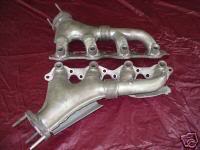
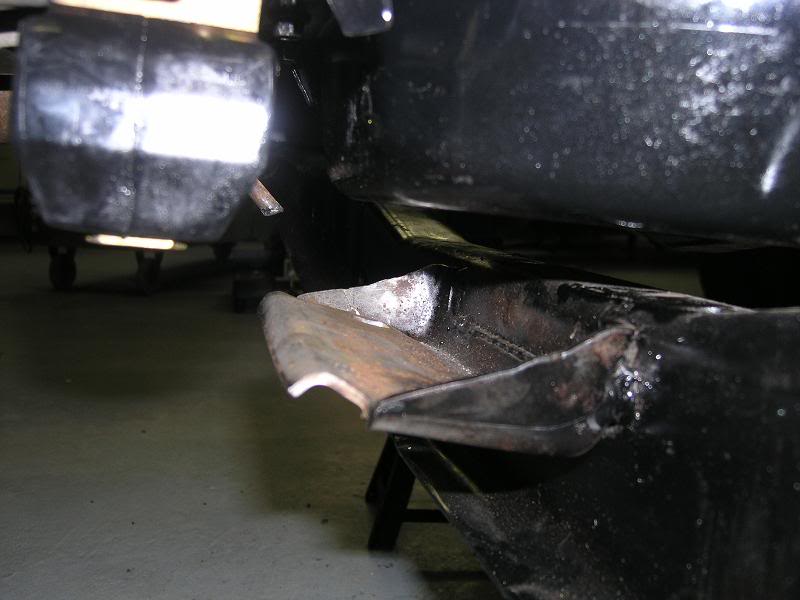
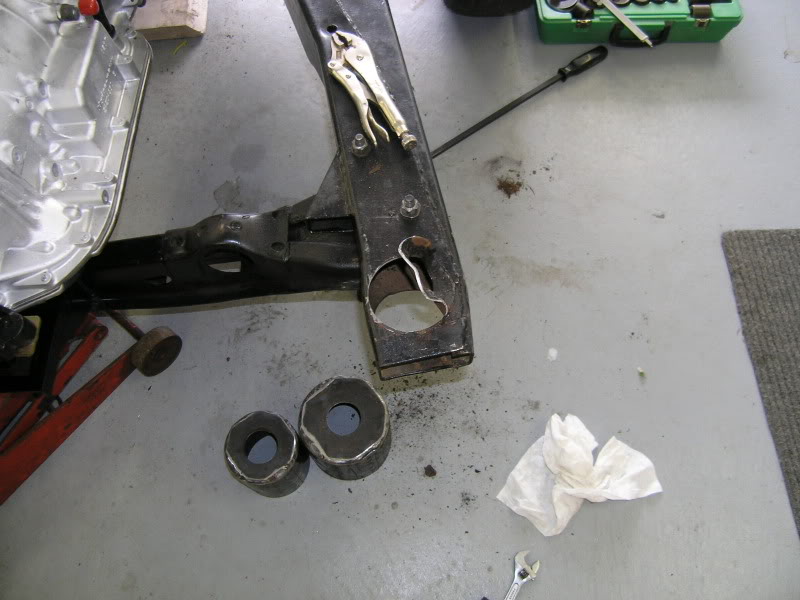
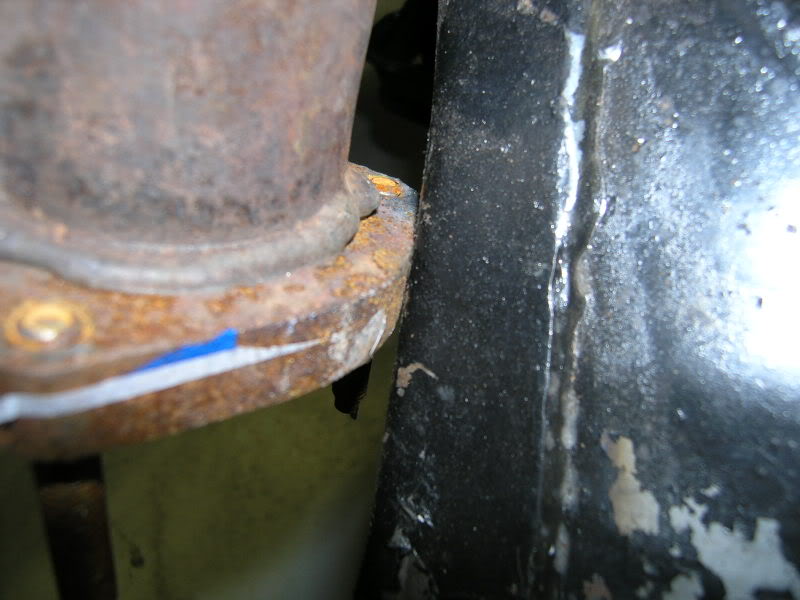
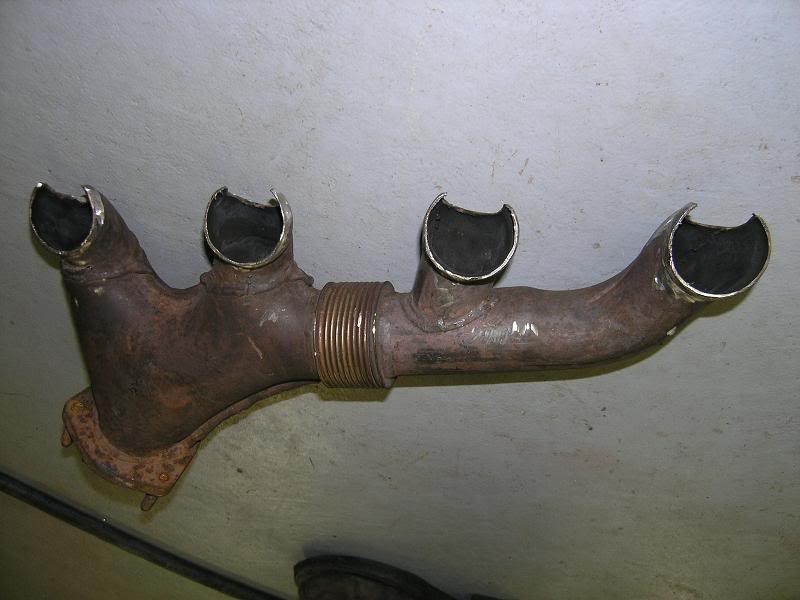
On to the exhaust. I promised myself I'd build something which would be reliable and as close to stock-looking as possible. I hate headers. I've had Hookers and Blackjacks, they all leaked at the head flange. I also didn't wan the additional noise nor the unwanted heat. It gets much hotter under the dog cover of a van than under the hood of a car. Much hotter. So I picked up a set of semi-restrictive OEM stainless manifolds off've a 3/4 ton pickup. I then decided to remove the AIR bungholes because they were impeding flow dramatically. I also had to cut the head flanges off because the angle of the flanges were causing frame interference.
Believe it or not, cutting these flanges off sticks in my mind as one of the more labour-intensive parts of this swap. Funny, huh?

This'll be a work in progress thread, I have wayyy too many pics to sort thru. I went thru the pics I have stored in Photobucket and realize I'll have to download tons more. To make matters worse, my computer's working at the speed of a sleepy sloth. It's always been slow, but it's gotten so much worse lately.
Soon as I brought the $13k crate engine home and put her up on a stand, I had a panic attack. What the hell was I thinking? How in heck am I gonna make this thing fit my van? Especially with those in the know telling me that my front differential is gonna make exhaust routing impossible.
I'd never done a swap before and was worried about under-engineering. Just how strong do the motor mounts have to be? People were telling me I might even twist my awd frame due to the %70+ lbs/ft of torque.
So I figured I'd overbuild to be on the safe side.
The OEM tranny mount (actually, t-case mount but you know what I mean...) Seems so flimsy. I "solidified" it
The weld tacks where only to hold it in place. After verifying proper fitting, the mount was welded properly to the crossmember.
As most of you may know, the M platform uses a subframe a la Nova/Camaro of old. My truck was originally an awd being swapped over to 4wd. I wasn't going for the "low-slung sleeper look". I wanted something that would allow me to run my 325/60R15's without constant rubbing, especially when off-road.
My solution (thanks to the ingenious idea of my old friend Matt Mead from ASV) was to do a welded-on body lift. Simply put, I had 6 mounts made up of schedule 40 steel pipe c/w caps. The OEM bodymount holes were enlarged to allow me to pass the bodymount washer/isolator up to the cap of the schedule 40 spacers. I 1st tried to enlarge the holes using various methods, not pretty.... I ended up borrowing an electricin buddy's hydraulic hole punch kit, opended up those holes easily & they were perfectly round..
Just goes to show you can't trust anyone to do their job properly. This otherwise awesome 4L80E Raptor tranny from PATC was found to have a bolt that hadn't even been screwed in completely, let alone tightened down. If I hadn't popped the pan to replace the shifter shaft so as to be compatible with my OEM cable-shifter, I'd never have know that the bolt was loose. Prolly woulda put up with months of searching for the "funny" noise coming form under the truck ...I shoulda known, what did I expect from PATC for a measly $5k
I took the crate engine throttle linkage and the OEM one and built a custom assembly out of them both. Seeing as I wanted the cruise control (as well as everything else) to work like a stocker, I attempted to mimick the stocker throttle control geometry as much as possible. Regardless, the one thing I don't like about my throttle is a very radical tip-in. You have to slide your foot a bit up on the pedal so as to have proper control when accelerating from a closed throttle, otherwise you end up snapping your neck clean off LOL
On to the exhaust. I promised myself I'd build something which would be reliable and as close to stock-looking as possible. I hate headers. I've had Hookers and Blackjacks, they all leaked at the head flange. I also didn't wan the additional noise nor the unwanted heat. It gets much hotter under the dog cover of a van than under the hood of a car. Much hotter. So I picked up a set of semi-restrictive OEM stainless manifolds off've a 3/4 ton pickup. I then decided to remove the AIR bungholes because they were impeding flow dramatically. I also had to cut the head flanges off because the angle of the flanges were causing frame interference.
Believe it or not, cutting these flanges off sticks in my mind as one of the more labour-intensive parts of this swap. Funny, huh?
Last edited by peter2772000; February 7th, 2010 at 6:24 AM.
 February 7th, 2010, 11:05 PM
#14
this build is the definition of a chevy enthusiast. not only to put a big block in an astro van, but to actually take the time to do it right, not some sloppy hack job. well done.
February 14th, 2010, 6:31 AM
#17
CF Beginner
Thread Starter
Join Date: Aug 2009
Location: Montreal, Quebec, Canada
Posts: 13
Likes: 0
Received 0 Likes
on
0 Posts
Sure do...
You'll notice that sometimes the truck firewall/cab is blue, other times green. Keep in mind that I scrapped a 2nd (green) AWD Safari and cut out the cab/firewall section so as to use it as a template for fitting purposes. This allowed my girlfriend to keep using my van to get to work & back while I did alot of the preliminary fitting in the comfort of my garage without the stress of rushing to finish the swap. This decision was one of the best I'd ever made.
There were alot of details that went into building ZZ. Clearance issues with stuff you never think would be an issue. Such as....
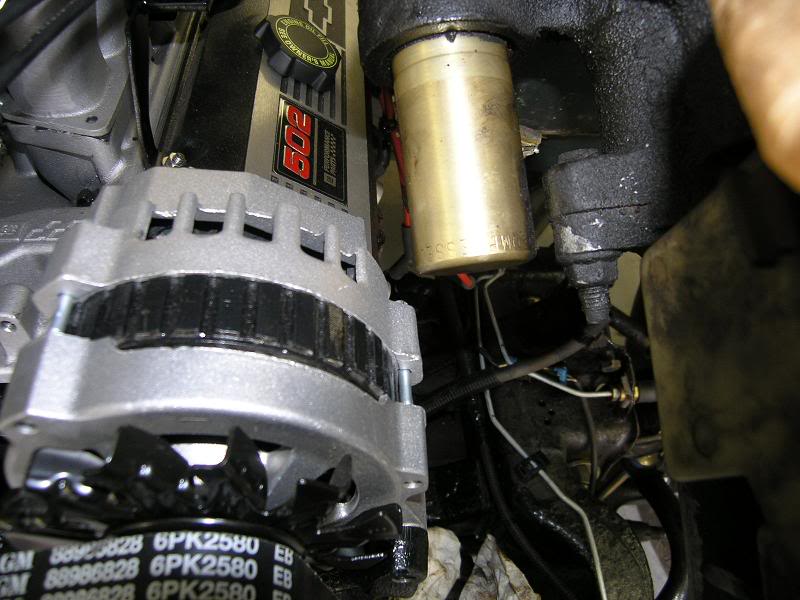
I purchased a kit from GM which included an all-new alternator, power-steering pump, water pump and bracketry. Made life so much easier than the path I'd originally chosen which was custom-made bracketry or adapting the OEM brackets off've the 4.3. The only issues with this drop-in kit was what I perceived as insufficient clearance between the power brake hydro-boost and the alternator. Back when I was a teenager, I would have simply prayed that the engine mounts would keep the engine in place and not allow it to contact the hydro-boost. But I wasn't having any of that now.
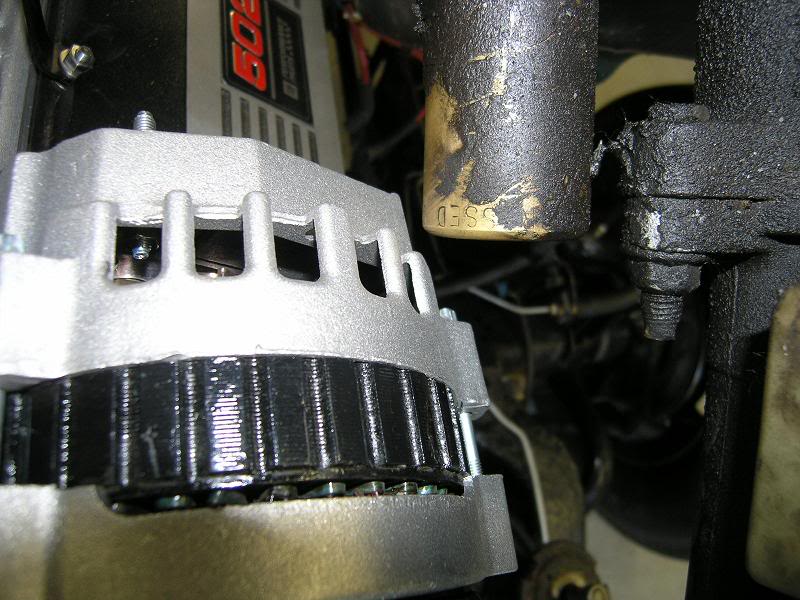
The solution was to relocate the hydro-boost slightly to the driver side.
I first removed the bracket which bolts the hydo-boost the the firewall. I removed the studs & welded up the four holes with my MIG. I then re-drilled the holes slightly offset so as to place the hydro-boost further away from the alternator. I had to mod the central hole slightly to allow for this offset, but it was no biggie.
Now the alernator had more wiggle room. It may not seem like much more clearance, but it has never ever come close to touching, even with stomping on the brake pedal while getting ready to launch at the strip.
You'll notice that sometimes the truck firewall/cab is blue, other times green. Keep in mind that I scrapped a 2nd (green) AWD Safari and cut out the cab/firewall section so as to use it as a template for fitting purposes. This allowed my girlfriend to keep using my van to get to work & back while I did alot of the preliminary fitting in the comfort of my garage without the stress of rushing to finish the swap. This decision was one of the best I'd ever made.
There were alot of details that went into building ZZ. Clearance issues with stuff you never think would be an issue. Such as....
I purchased a kit from GM which included an all-new alternator, power-steering pump, water pump and bracketry. Made life so much easier than the path I'd originally chosen which was custom-made bracketry or adapting the OEM brackets off've the 4.3. The only issues with this drop-in kit was what I perceived as insufficient clearance between the power brake hydro-boost and the alternator. Back when I was a teenager, I would have simply prayed that the engine mounts would keep the engine in place and not allow it to contact the hydro-boost. But I wasn't having any of that now.
The solution was to relocate the hydro-boost slightly to the driver side.
I first removed the bracket which bolts the hydo-boost the the firewall. I removed the studs & welded up the four holes with my MIG. I then re-drilled the holes slightly offset so as to place the hydro-boost further away from the alternator. I had to mod the central hole slightly to allow for this offset, but it was no biggie.
Now the alernator had more wiggle room. It may not seem like much more clearance, but it has never ever come close to touching, even with stomping on the brake pedal while getting ready to launch at the strip.
Last edited by peter2772000; February 14th, 2010 at 6:38 AM.