
Aux Battery or TP2 upgrade


Thread Starter
CF Junior Member
Joined: Jul 2013
Posts: 40
Likes: 1
From: Skagit Valley, WA
So I had been looking around for a guide to installing an OEM aux battery in my 2009 suburban, and I was not successful on finding an inclusive DIY.
So last summer 8/2013, I pieced one together, borrowing from a few other places online and some leg work of my own. Well the results are that I have successfully installed the TP2 so that it looks and acts OEM.
I included part numbers and where I found them, for how much... see that attached PDF...
Maybe this will inspire someone else to do it too.

Thread Starter
CF Junior Member
Joined: Jul 2013
Posts: 40
Likes: 1
From: Skagit Valley, WA
The attached pdf is a page out of the upfitters guide. it shows the underside of the Fuse block (after you lift it off the top of the electrical junction box.)
so the wires will need to be matched to the junction box (female side) so that they match up with the correct A5 and B4 connectors.
Hope this helps out...
so the wires will need to be matched to the junction box (female side) so that they match up with the correct A5 and B4 connectors.
Hope this helps out...
Thread Starter
CF Junior Member
Joined: Jul 2013
Posts: 40
Likes: 1
From: Skagit Valley, WA
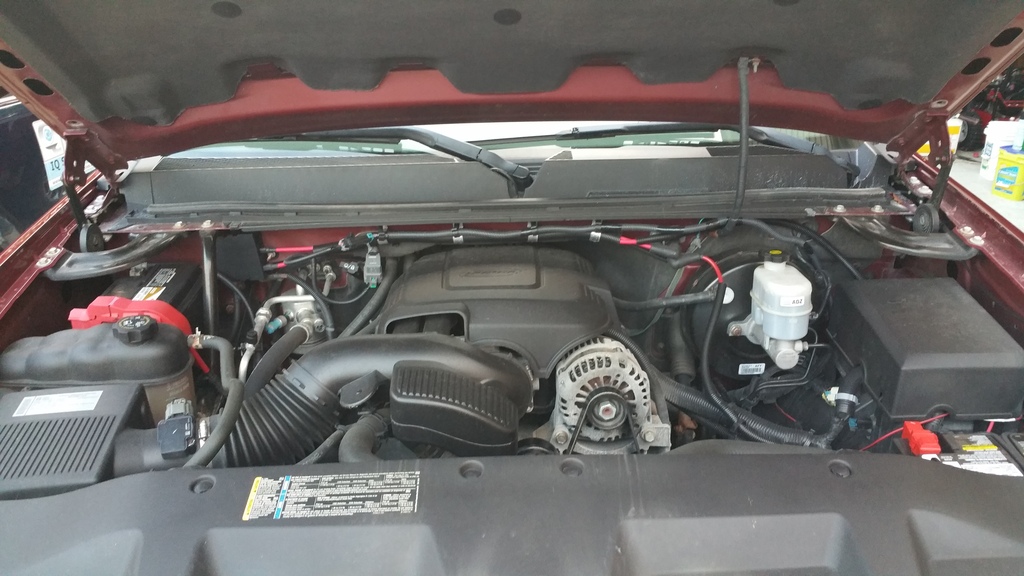
Recently asked about how/where the Main TP2 Relay got mounted, as the Suburban has a Hood Lifting Strut Bracket where a Silverado has none. The Relay mounts at the hood strut bracket location.
Picture shows where I went "non-OEM"...
Hope this helps...
Picture shows where I went "non-OEM"...
Hope this helps...
CF Pro Member

Joined: Aug 2013
Posts: 997
Likes: 21
From: SE MI
Hope it's not considered bad form, but I'd like to add a few pics for clarification of the things that, to me, weren't exactly clear.
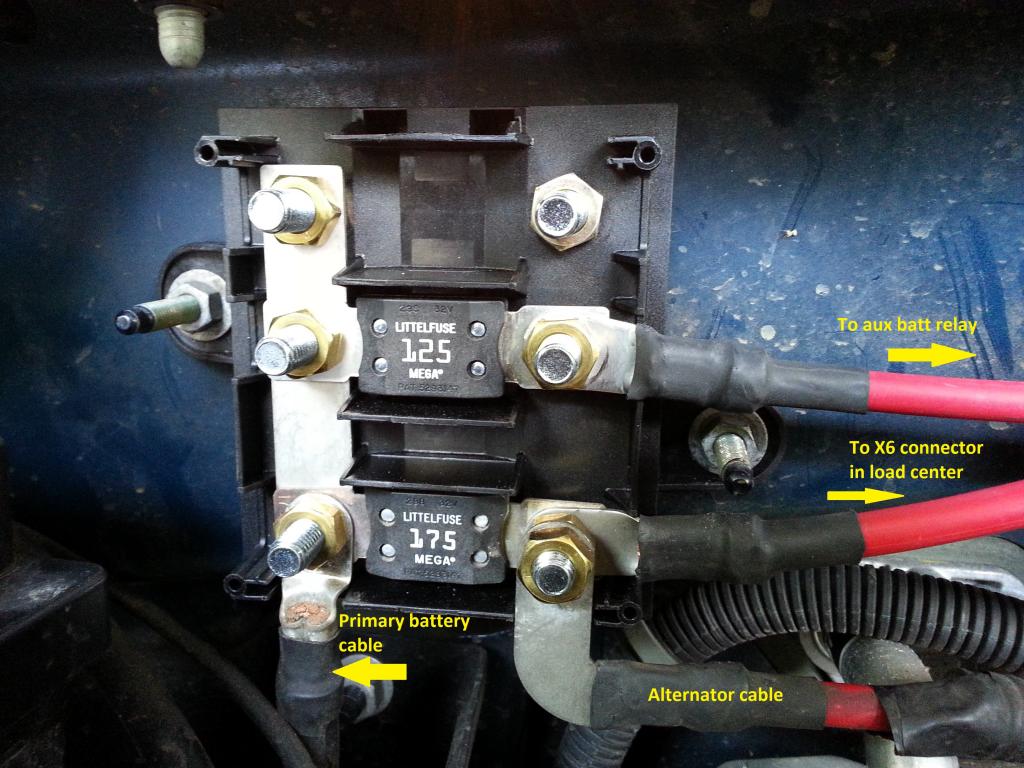
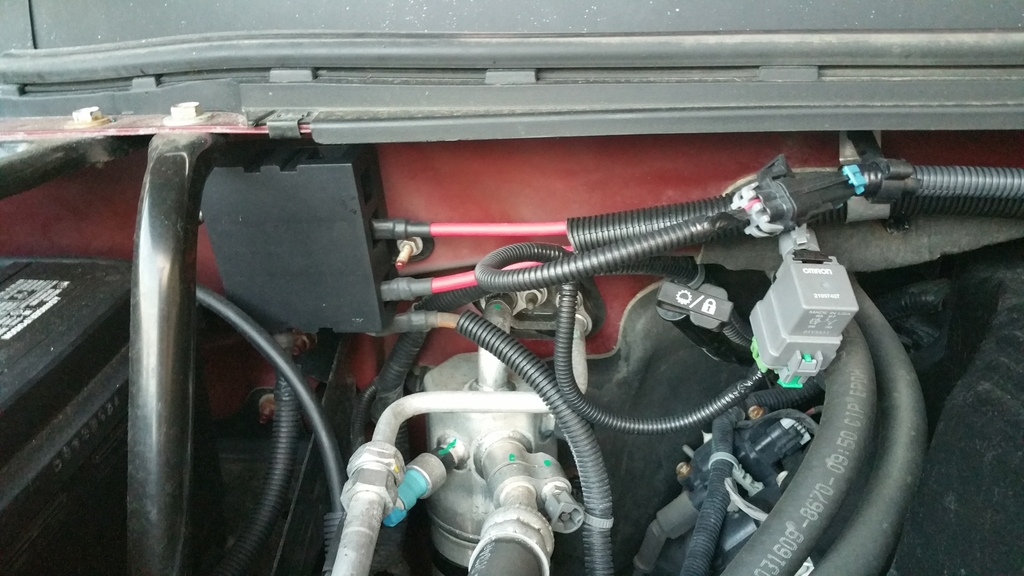
Here's the mega fuse holder wiring:
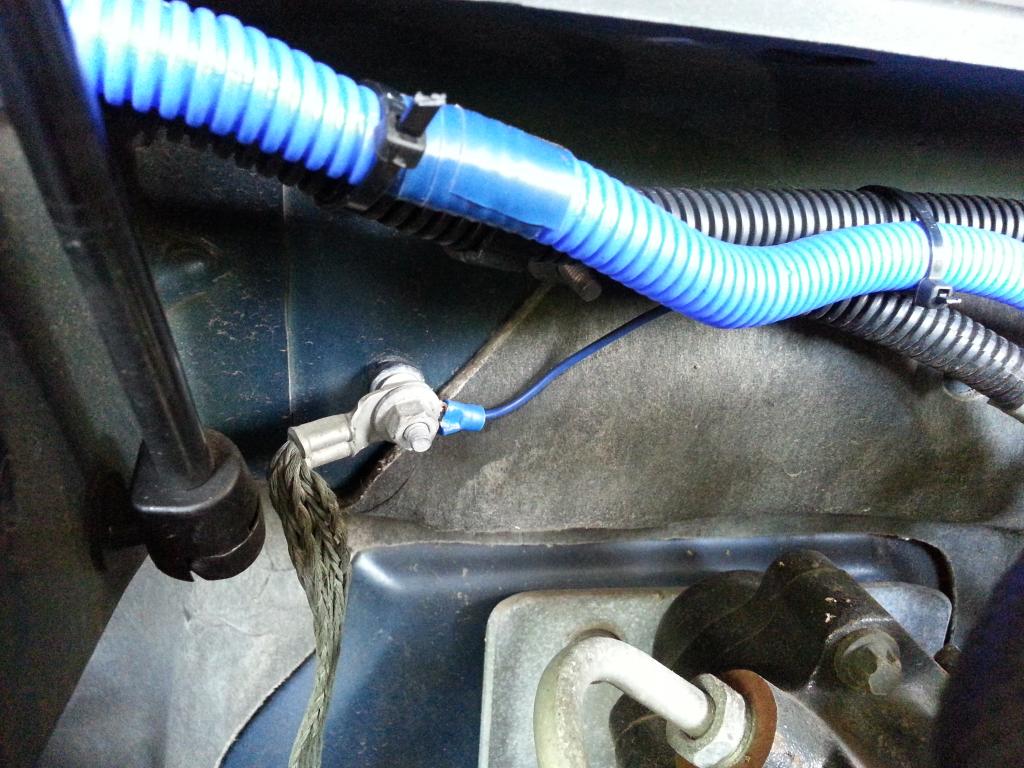
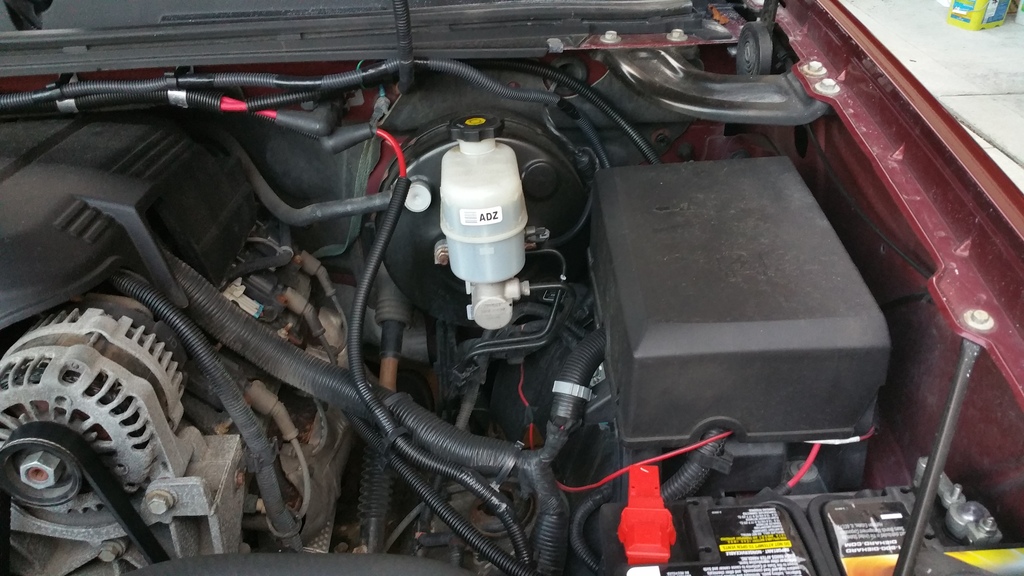
For the home-made wire loom for the aux battery relay, I terminated the ground wire early on the grounding stud on the firewall:
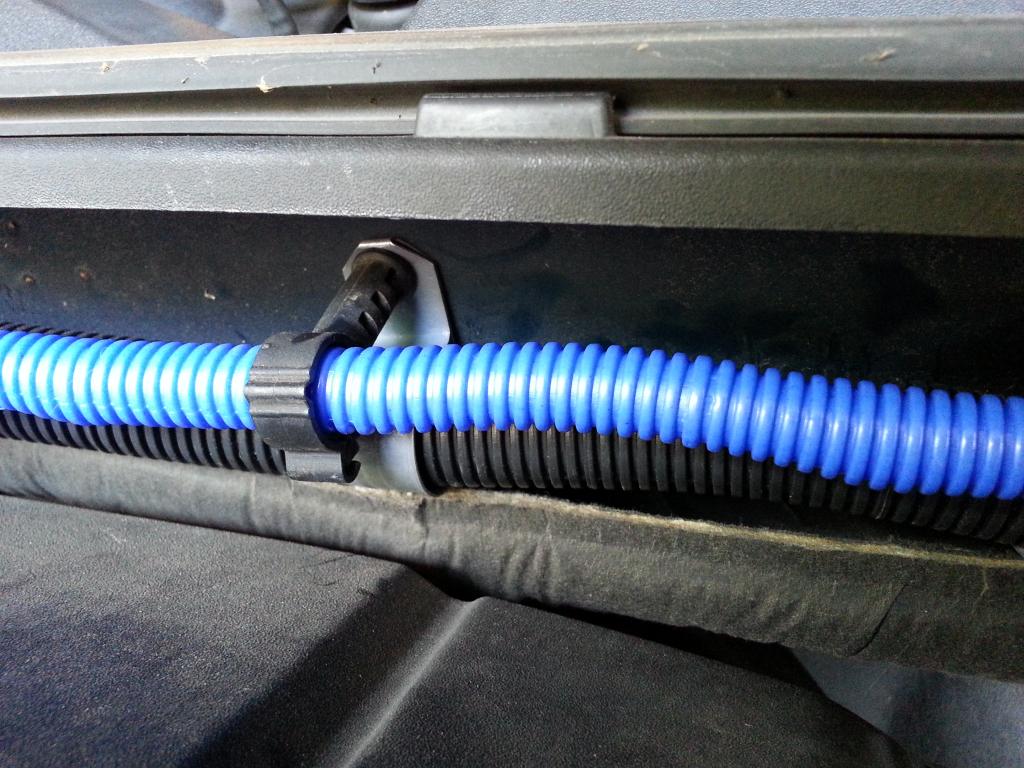
I re-used the plastic conduit clips for the home-made loom after attaching the larger, metal holders for the larger cable 25862351:
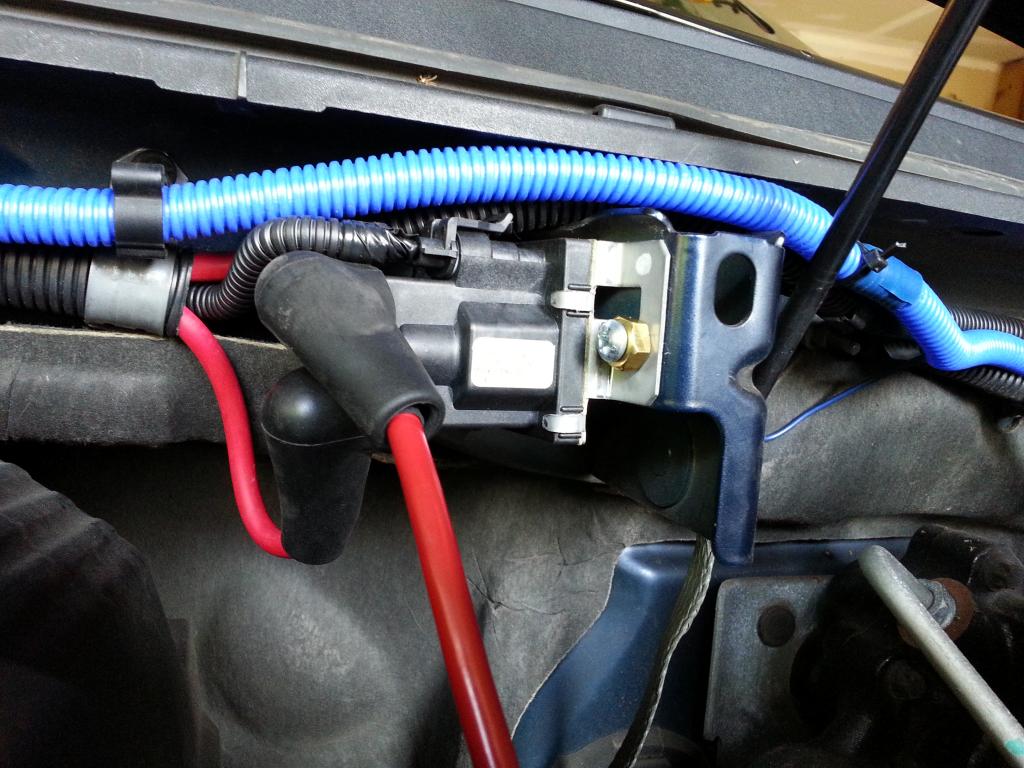
I mounted relay 19116352 on the side of the hood latch with two self-tapping #14 screws, using the brass nuts as spacers:
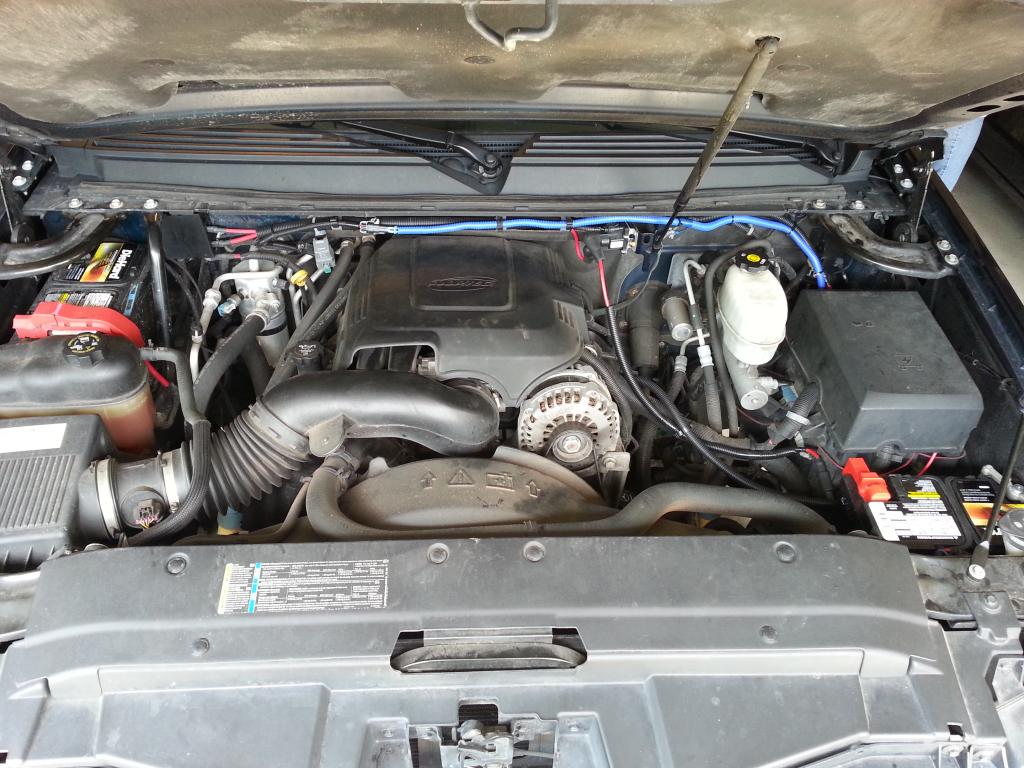
A pic of the entire engine bay:
The blue conduit seemed like a good idea at the time. Now I'm wishing I'd used black. Otherwise, I'm very happy with the results, especially knowing my recently-licensed daughter will be driving it.
Thanks again to Omandave for this thread and the help!
Here's the mega fuse holder wiring:
For the home-made wire loom for the aux battery relay, I terminated the ground wire early on the grounding stud on the firewall:
I re-used the plastic conduit clips for the home-made loom after attaching the larger, metal holders for the larger cable 25862351:
I mounted relay 19116352 on the side of the hood latch with two self-tapping #14 screws, using the brass nuts as spacers:
A pic of the entire engine bay:
The blue conduit seemed like a good idea at the time. Now I'm wishing I'd used black. Otherwise, I'm very happy with the results, especially knowing my recently-licensed daughter will be driving it.
Thanks again to Omandave for this thread and the help!
Last edited by intheburbs; Jul 31, 2014 at 2:32 AM. Reason: pics/descriptions added
Trending Topics
CF Pro Member
Joined: Aug 2013
Posts: 997
Likes: 21
From: SE MI
Just another update. I've since purchased another GMT900 truck, and I did the same thing to it as well, my '09 Sierra Denali 1500. This time, I attached the isolator relay directly to the firewall, and used the black conduit. I think it came out super clean.
As this was my second install, it went a lot quicker. Probably took me about an hour, from start to finish.
A few pics:
As this was my second install, it went a lot quicker. Probably took me about an hour, from start to finish.
A few pics:

CF Beginner
Joined: May 2016
Posts: 6
Likes: 0
From: Tijeras NM, outside Albuquerque
WOW what a great help! I'll have to wait though. The Dog Head fire outside Albuquerque NM is breathing down my neck and I have to bug out soon. Glad we got that travel trailer last year! It's been hooked up and ready to go for the last two days. Gotta pack! Wish me luck.