Chevrolet Silverado 1999-2006: How to Replace Serpentine Belt
The serpentine belt is quite critical to the proper running of the engine. Here's how to replace it.
This article applies to the Chevrolet Silverado GMT800 (1996-2006).
If you didn't already know, the serpentine belt or drivebelt on your truck's engine is very important in the proper operation of the engine. It drives critical engine components like the alternator, power steering pump, and water pump as well as accessories such as the air conditioning compressor. Without this belt, the engine cannot function correctly.
It is recommended that the belt be checked every 6,000 miles or six months, and replaced when necessary.


Materials Needed
- 3/8-inch drive tool (breaker bar, ratchet)
- Flashlight
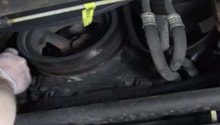
Before beginning, take a good look at the routing of the serpentine belt. Familiarize yourself with exactly how it routes over each pulley. Even though there is a diagram under the hood, it is a good idea to become familiar with it before removing it.
Step 1 – Rotate tensioner to release belt tension
The serpentine belt has tension applied to it by a spring-loaded tensioner that is attached to the engine itself. In order to remove the belt from the pulleys, you will need to release this tension, which will slacken the belt and allow you to remove it from the rest of the pulleys. There should be a 3/8-inch drive square hole in the middle of the tensioner. You can use a tool such as a ratchet or breaker bar that has a 3/8-inch drive to rotate the tensioner and release the tension. Remember to allow yourself enough room to be able to actuate the tensioner in its complete range of motion. This will be most critical when installing the new belt because it will be much tighter than the old one you are removing.

Step 2 – Remove belt from tensioner and accessory components
After releasing the belt tension, you can then remove the belt from the tensioner pulley and the other pulleys of the accessory components. Then, you can slowly release the tension that you have applied to the tensioner.
Step 3 – Route the new belt
After removing the old belt completely from all of the pulleys, you can then begin routing the new belt over all the necessary component pulleys. You will need to apply tension to the tensioner again to be able to route the new belt over the tensioner pulley, and finish the installation of the new belt.
A diagram of the proper routing of the belt is located on the radiator support. If it is no longer present, there are many resources online where you can find the proper routing.

Pro Tip
When routing the new belt onto the pulleys, take extra care to ensure that the belt sits correctly in the new pulley. Failure to do this could result in the new belt slipping off the pulleys when the engine is started.
Featured Video: How to Install/Replace Serpentine Belt
Related Discussions
- Belt Squeak - ChevroletForum.com
- Diagnosing Belt Tensioner - ChevroletForum.com
- Cracked Belts - ChevroletForum.com
- Replacing Tensioner and Idler - ChevroletForum.com
- Squealing Belt - ChevroletForum.com