Chevrolet Silverado 2014-Present: How to Replace the Starter
A key ignition system component that's prone to fail is the starter. Even with a new battery, coils, and spark plugs, a malfunctioning starter will prevent your Silverado's engine from turning over.
This article applies to the Chevrolet Silverado 1500 K2XX (2014-Present).
The starter works by using the engine's battery to turn the flywheel and kick the engine to life. Without this essential component, your Silverado will only be as useful as a very expensive paperweight. In trucks with a manual transmission, it's possible to push-start the engine, but most modern trucks with automatic transmission heavily rely on the starter (and the battery) to turn the engine over. Replace your starter when you notice symptoms of weak or delayed starting. Continue reading for the steps to complete this job yourself.

Materials Needed
- Hydraulic floor jack and jack stands
- 8mm, 3/8" sockets and ratchet
- 8 and 13mm wrenches
- Torque wrench
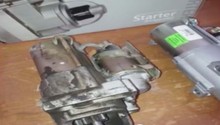
- Replacement starter
- Rubber mallet (if necessary)
- WD-40 penetrating spray (if necessary)
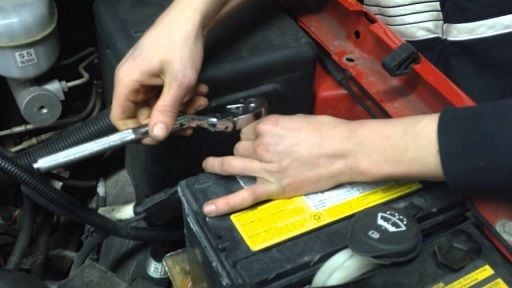
Step 1 – Disconnect the battery
- Remove the 8mm bolt from the negative battery lead (black).
- Detach and set the battery cable aside. Make sure the lead does not touch the terminal.
Step 2 – Jack up the truck
- Park your truck on level ground, and engage the emergency brake.
- Using a floor jack, raise the front end of the vehicle.
- Place jack stands under the frame rails just behind the lower control arm mounts.
- Then lower the truck onto the jack stands.

(Related Article: How to Jack Up Your Truck - ChevroletForum.com)
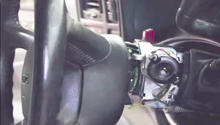
Step 3 – Remove the starter bolts
- The starter is located underneath the passenger's side of the engine.
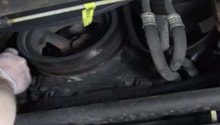
- Remove the two 3/8" mounting bolts that connect the starter to the engine block.
- If you have a V8 model engine, remove an additional 3/8" bolt near the bell housing.
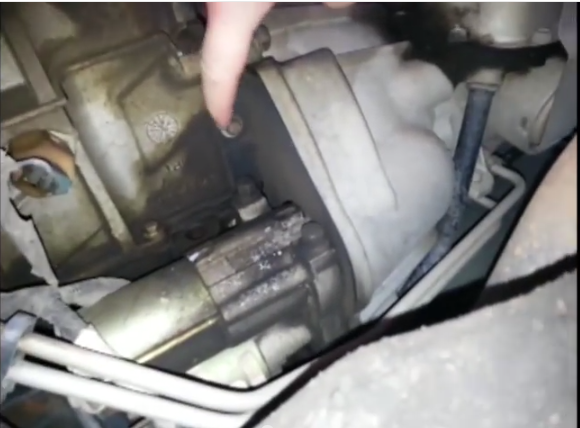
Figure 3. Remove bolt on the bell housing. 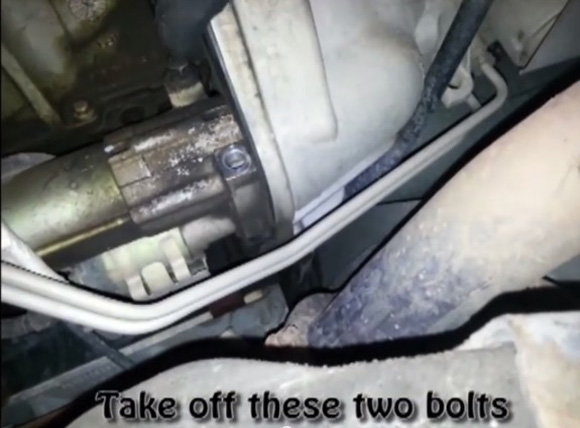
Figure 4. Remove the two starting mounting bolts.
Pro Tip
Spray the bolts with WD-40, and let the penetrating oil sit for a couple minutes before removing the bolts.
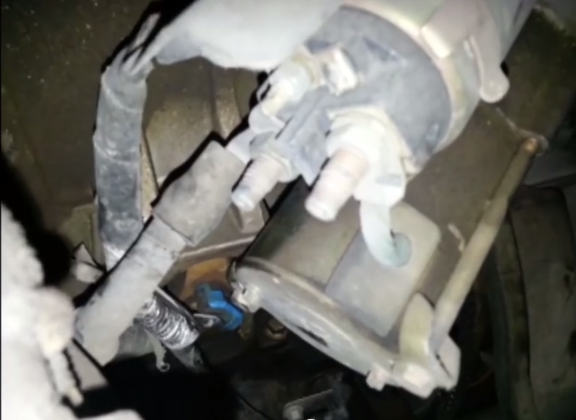
Step 4 – Remove the starter
- Pull the starter away form the engine block. You may need to use a rubber mallet if the starter is difficult to remove.
- Use an 8mm and 13mm wrench to disconnect the power wire harness and solenoid cables from the starter.
- Completely remove the old starter and set it aside. Remember the orientation of the starter, so the new one can be properly installed.
Step 5 – Install the new starter
- Transfer the heat shield from the old starter onto the new one.
- Reconnect the power and solenoid cables to the starter.
- Place the starter on the engine block and hand-tighten the mounting bolts.
- Then torque the bolts to 33 ft-lbs.
- Reconnect the negative battery terminal (black) and start the engine.
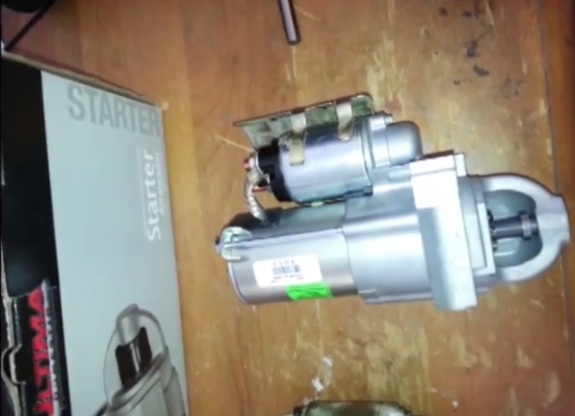
Figure 6. Transfer old heat shield to the new starter. 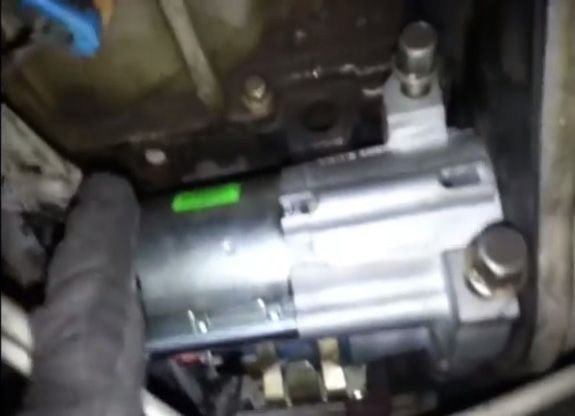
Figure 7. Thread the starter mounting bolts by hand.
Featured Video: How to Replace Starter
Related Discussion, and Sites
- Starter Sluggish When Warm - ChevroletForum.com
- How to Tell Which Starter? 5.3L V8 - PerformanceTrucks.net
- How to Change the Starter on a Chevy 1500 Truck - eHow.com