

_-_Joey Mod(Black) Or Clear your headlights_-_


Thread Starter
CF Junior Member
Joined: Feb 2007
Posts: 43
Likes: 0
From:
So, I finally decided to do my Black Denali since I've found some time over the Holidays. Here are some pics, and the write up of how to do this awesome mod.
Here are my instructions on blacking out your housings, or clearing your headlights.
1.) Remove your headlights. Use these instructions from snomon
http://www.tahoeforum.com/showthread.php?t=3257 Yukon lights come off same exact way.
2.) Take your lights inside your house.
3.) Tools Needed
- Gift card to a beauty salon for your wife to get her out of the house for a few of hours
- At least a 6 pack of your beverage of choice
- Silicone (Clear)
- Black Paint for black out or... Chrome Paint if you just want to clear
- Oven
- Flat Head Screw Driver
- t10 tork screw driver or bit,(Shaped Like 6 sided star) I believe that's the size... Mine didn't say, I just grabed the one that fit.


5.) Remove your bulbs

6.) Remove these screws

7.) Preheat Oven to 190 Deg.

8.) Place light in oven for about 2 mins. You are going to have to do this a few times, I had to do it about 4 times for each light. When you start prying on one side, it will start to cool off and the factory sealant will harden up again. Place it in the oven again to loosen and soften up the sealant again.

9.) Start working on prying carefully. The best side I found to work on first is the inside off the lights that mount up towards the grille.

10.) Viola, they are apart. Now get these next 2 screws out.


11.) Now once you take these screws out, pull the inside housing out.

12.) Take the orange side reflector out
there are 3 clips on each one. Push on them from the inside, then flip them over and take a plastic knife to pry them out.


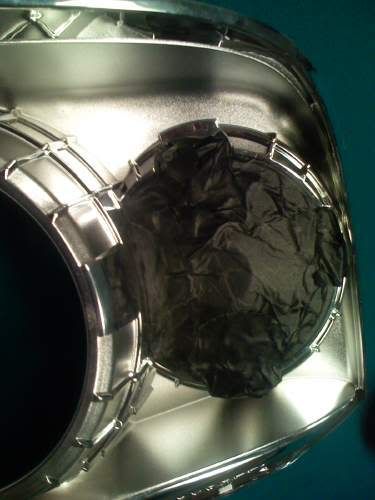
13.) Tape them ugly orange reflectors on both sides.

14.) Paint the reflectors on both sides. You chose, I went black cause I am doing my whole lights black. When I cleared my lights, I used chrome paint.
15.) If you are painting your inside lights, tape off the top clear cover. I couldn't get this darn thing out... there are 3 clips, and I could only get one out. So I just taped it off.

16.) Paint the inside of your lights. I had to use like 7 coats, cause the paint wasn't sticking to the chrome parts well. I probably should have used etching primer...

17.) Let them dry, then take the tape off

18.) Place the coners back in, the old orange reflectors that are now chrome or black.

19.) Place the painted part back in the clear plastic front.
20.) Put back those 2 screws you used when taking the inner housing out.
21.) Place only the back of the headlight back in the oven for about 4 mins to get the factory sealant soft.
22.) Use your silicone to line the groves on the back of the headlight.
23.) Place the front and backs together
24.) Apply the 2 screws on the outside
25.) Bungee Cord those bad boys tight, and leave them for a while
26.) Take the bungees off, look at your lights.

27.) Put your bulbs back in
28.) Put the lights back on your car!
I'll post pics of them on my car tomorrow morning!
Here are my instructions on blacking out your housings, or clearing your headlights.
1.) Remove your headlights. Use these instructions from snomon
http://www.tahoeforum.com/showthread.php?t=3257 Yukon lights come off same exact way.
2.) Take your lights inside your house.
3.) Tools Needed
- Gift card to a beauty salon for your wife to get her out of the house for a few of hours
- At least a 6 pack of your beverage of choice
- Silicone (Clear)
- Black Paint for black out or... Chrome Paint if you just want to clear
- Oven
- Flat Head Screw Driver
- t10 tork screw driver or bit,(Shaped Like 6 sided star) I believe that's the size... Mine didn't say, I just grabed the one that fit.
5.) Remove your bulbs
6.) Remove these screws
7.) Preheat Oven to 190 Deg.
8.) Place light in oven for about 2 mins. You are going to have to do this a few times, I had to do it about 4 times for each light. When you start prying on one side, it will start to cool off and the factory sealant will harden up again. Place it in the oven again to loosen and soften up the sealant again.
9.) Start working on prying carefully. The best side I found to work on first is the inside off the lights that mount up towards the grille.
10.) Viola, they are apart. Now get these next 2 screws out.
11.) Now once you take these screws out, pull the inside housing out.
12.) Take the orange side reflector out
there are 3 clips on each one. Push on them from the inside, then flip them over and take a plastic knife to pry them out.
13.) Tape them ugly orange reflectors on both sides.
14.) Paint the reflectors on both sides. You chose, I went black cause I am doing my whole lights black. When I cleared my lights, I used chrome paint.
15.) If you are painting your inside lights, tape off the top clear cover. I couldn't get this darn thing out... there are 3 clips, and I could only get one out. So I just taped it off.
16.) Paint the inside of your lights. I had to use like 7 coats, cause the paint wasn't sticking to the chrome parts well. I probably should have used etching primer...
17.) Let them dry, then take the tape off
18.) Place the coners back in, the old orange reflectors that are now chrome or black.
19.) Place the painted part back in the clear plastic front.
20.) Put back those 2 screws you used when taking the inner housing out.
21.) Place only the back of the headlight back in the oven for about 4 mins to get the factory sealant soft.
22.) Use your silicone to line the groves on the back of the headlight.
23.) Place the front and backs together
24.) Apply the 2 screws on the outside
25.) Bungee Cord those bad boys tight, and leave them for a while
26.) Take the bungees off, look at your lights.
27.) Put your bulbs back in
28.) Put the lights back on your car!
I'll post pics of them on my car tomorrow morning!


Thread Starter
CF Junior Member
Joined: Feb 2007
Posts: 43
Likes: 0
From:

Here's a pic from my Iphone. It was raining all day, and my car is dirty as heck. I'll clean my car up, and take some outdoor pics in the next day or so.

CF Active Member
Joined: Jul 2007
Posts: 129
Likes: 1
From:
GREAT write up! Question: In Step 8, is the initial bake time"two (2)" or "twenty (20) minutes". I've tried 20 minutes at 250 degs a few months ago and couldn't loosen my Tahoe lamps...
Thread Starter
CF Junior Member
Joined: Feb 2007
Posts: 43
Likes: 0
From:
2 minutes, then do 1 side only. You can't put in in for 2 mins, then take apart the whole light. After being out of the oven, the sealant hardens up pretty quick. Even if you left it in for 20 minutes, 1 you'd melt your lights, and it'd still cool off as fast. Put them in for 2 minutes, work on one side. Put it in as many times as you need to again and again to keep it soft as your working on that side. Once you have one side pryed open, the rest come off easy without having to re bake.
Trending Topics


Thread
Thread Starter
Forum
Replies
Last Post
biglg
Silverado, Sierra & Fullsize Pick-ups
4
May 12, 2008 9:28 AM
burnsze15
Tahoe & Suburban
1
Aug 14, 2007 6:58 PM