C4 Corvette Restoration: Starting Small
It’s often said that the journey of a thousand miles begins with a single step. Similarly, a restoration starts with a single part.
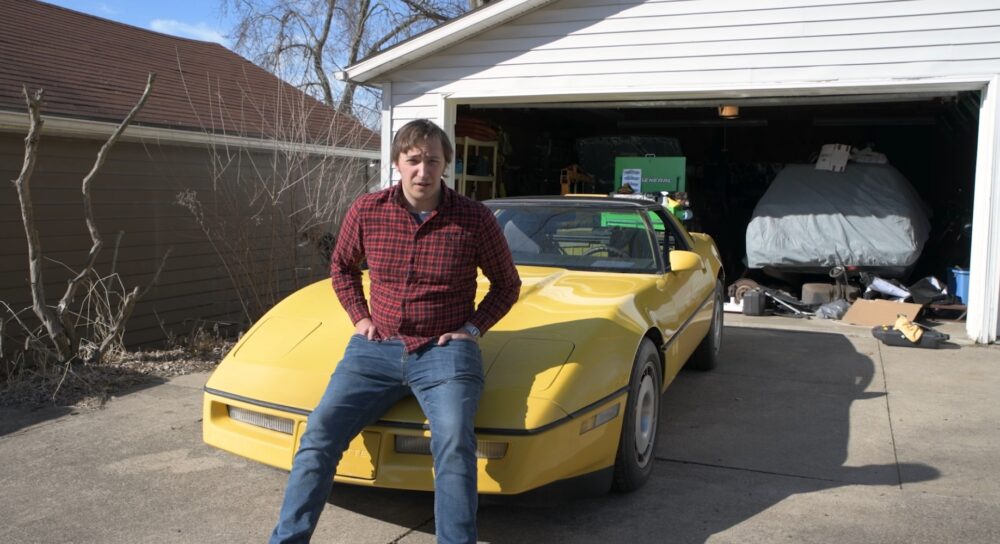
I’ve been writing about Chevrolets for you fine folks for the past three and a half years. It’s time to make a confession. Until January of this year, I’d never actually owned a Chevy of my own. However, I joined the family in a big way by realizing one of my childhood dreams. I bought a Corvette.
It’s a yellow 1986 coupe with the L98 Tuned Port Injection smallblock under the hood, backed up by a 700R4 automatic transmission. It’s pretty rough, but it’s a solid base for a great project.
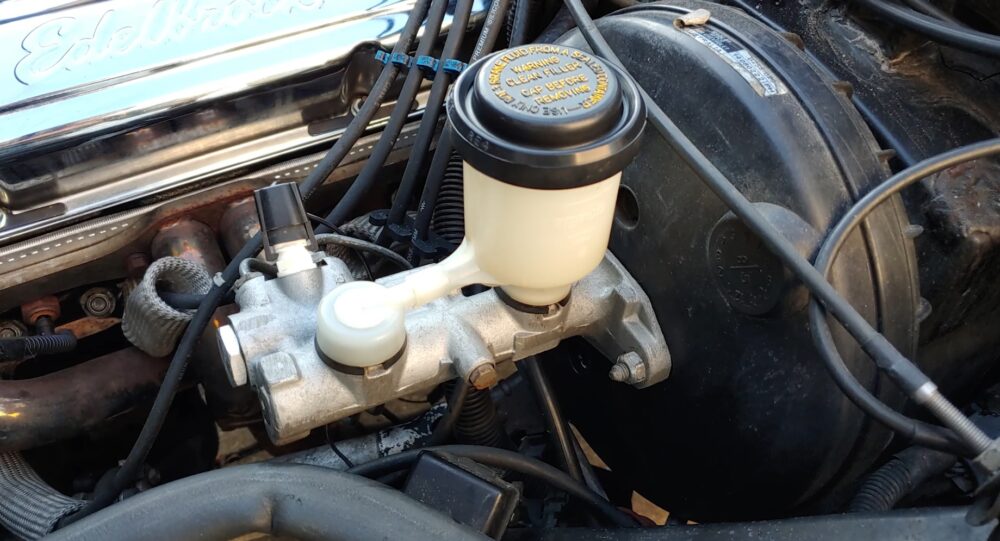
Over on our sister site, Corvette Forum, I’ve begun documenting my restoration. The first installment deals with replacing a dangerously leaky brake master cylinder. I picked up a parts car a few weeks after I brought the car home, and I raided that for the brake parts I needed. So, technically, I own two Chevrolets, now.
The Best Laid Plans…
This wasn’t my plan originally. I wanted to send this car off to the body shop for a repaint right away. However, my buddy owns the body shop, and he’s worked hard to build his business. When I saw my Corvette leaking all over my driveway, I knew I didn’t want to ruin his clean shop floor – hence the master cylinder replacement.
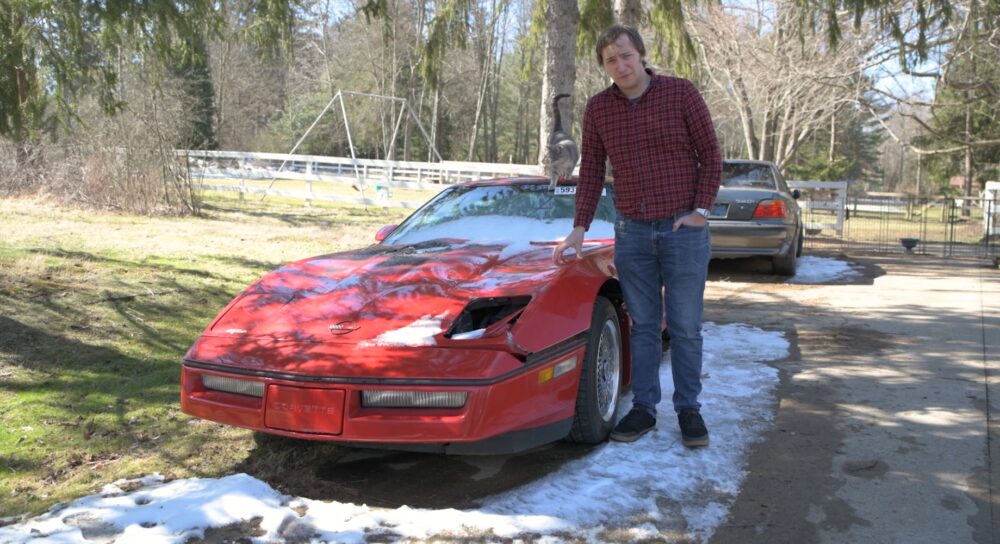
My parts car has low miles and a ton of good parts — that’s why I bought it. The reason it’s a parts car, though, is because of an engine fire, so a lot of plastic parts are melted. You guessed it — the reservoir for my master cylinder was actually so melted that it had a hole in it!
Thankfully, the reservoir of my leaky master cylinder was still good, so I removed it, cleaned it up, and re-installed it on the non-leaky one. While I was in the mood to clean, I decided to try out the old vinegar trick for cleaning light surface rust from metal.
As it turns out, the vinegar trick worked like a charm. The mounting nuts and the spring inside the sensor cleaned up like new after an hour of soaking in the vinegar. Even though I’m just getting started, I’m already learning a lot from this project.
I hope you’ll follow along with my next steps. I’m excited to turn this car from a ratty mess into a show-stopper, and I’ll share each step of the way with you guys. Thanks for reading!
Photos: Cam VanDerHorst